| | |
- "We'll rely on each other up there, like we always do. And as long as we do that, I'll go up against anything in the galaxy and like our chances."
- ―Garven Dreis, to Red Squadron prior to the Battle of Yavin
Red Squadron, also referred to as Red Group, was a starfighter squadron of X-wing starfighters that served as part of the Rebel Alliance's starfighter corps during the Galactic Civil War. The squadron participated in campaigns such as the Battle of Scarif, the Battle of Yavin, and the Battle of Endor. Following the victory of the rebellion and the reformation of the Republic, Red Squadron was assimilated into the New Republic Defense Fleet.
Description[]
Red Squadron was a starfighter squadron that served under the Massassi Group[7] and the Rebel Alliance Starfighter Corps as part of the Rebel Alliance during the Galactic Civil War,[3] and then later the New Republic.[9]
As with most Rebel starfighter squadrons, Red Squadron typically consisted of twelve ships. On occasion, however, the Squadron could be expanded to include as many as fifteen.[9] Over the years, the Squadron had various commanders, that included Commander Garven Dreis,[1] Commander Arhul Narra,[2], Commander Wedge Antilles,[3] and Commander Luke Skywalker[5]
The squadron consisted of a mix of starfighters, and occasionally airspeeders. This included the Aggressive ReConnaissance-170 starfighter, flown by Garven Dreis at least on one occasion,[10] BTL-A4 Y-wing assault starfighter/bombers,[3] RZ-1 A-wing interceptors,[3] and V-4X-D ski speeders.[12] The squadron's preferred starfighter however, was the T-65B X-wing starfighter, as it could take on TIEs and Star Destroyers and everything in between. It was also favored by one of the squadron's early commanders, Garven Dreis, who wouldn't fly anything else. Colonel Bandwin Cor speculated that the X-wing may have handled like a bush hopper, commonly used by pilots from Virujansi.[14] The Squadron's starfighters were painted with red stripes or markings.[20]
History[]
Skirmish with Darth Vader[]
- "I don't believe it. Red Four, she just…just plowed right into him."
"Red Four's name was Micha. She must have thought it was worth it. I can't argue. It was Darth Vader. What Micha did…she just saved a lot of lives." - ―Two rebels, on Micha's sacrifice

Red Four's crashed X-wing
In 1 BBY,[22] during a battle involving Darth Vader, Micha (Red Four) sacrificed herself by flying her X-wing starfighter directly into the Sith Lord. Micha's actions were heroic in the eyes of the Rebel troopers who witnessed it, and they believed it was a blow to the Empire, for eliminating Emperor Palpatine's chief enforcer. However, Vader emerged from the X-wing wreckage, igniting his lightsaber.[21]
Operation Buckler[]
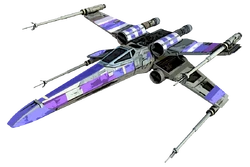
X-wing "Exterior Variant /2"
Red Squadron took part in Operation Buckler, in which their objective was to acquire decommissioned Y-wing starfighters from the orbital scrapyard at Ord Biniir. Garven Dreis' strategy involved employing subterfuge to avoid raising enemy suspicions concerning rebel mobilisation in the Void of Chopani. It wasn't uncommon to find X-wings in pirate hands in some Rim sectors. So, the aim was to pose as pirates, emulating their appearance and flight tactics. Several of the Squadron's X-wings were temporarily painted with pirate markings. Two designs were proposed, dubbed "Exterior Variant /1" and "Exterior Variant /2". The operation eventually resulted in success.[14]
Routine patrols around Yavin[]
At some point prior to the Battle of Scarif, Red Squadron carried out routine patrols while the Alliance were based at the Great Temple on Yavin. Pairs of pilots in X-wings were scheduled on shift cycles prepared by Colonel Bandwin Cor, their mission to route from Yavin to a number of Gordian Trace Relays, perform a flyby of surrounding space, then after verifying visual and sensor all clear, perform close uplink of passive relay recordings. Shift Cycle 1 consisted of Commander Garven Dreis (Red Leader) and Major Ralo Surrel (Red Eleven). Shift Cycle 2 consisted of Cadet Harb Binli (Red Seven) and Cadet Pedrin Gaul (Red Five), accompanied by Lieutenant Nozzo Naytaan (Red Nine). Shift Cycle 3 consisted of Lieutenant Attico Wred (Green Four) and Lieutenant Wion Dillems (Green Twelve).[14]
Battle of Scarif[]
- "Red and Gold Squadrons, attack formations. Defend the fleet."
- ―Admiral Raddus giving Red and Gold Squadrons their orders
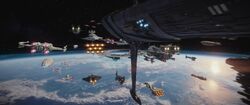
Red Squadron and the fleet at Scarif
Red Squadron, under the command of Red Leader, Commander Garven Dreis, participated in the Battle of Scarif along with Blue Squadron, Green Squadron, and Gold Squadron.[23][15] Their X-wings assisted the rest of the Alliance fleet in engaging Imperial ships above the planet, combating countless TIE fighters, attacking the Shield Gate and the two Imperial I-class Star Destroyers protecting it. During the battle, Pedrin Gaul (Red Five) was killed by TIEs when he strayed too far from the group. Later, another pilot was also killed by TIEs.[15]
Battle of Yavin[]
- "All wings report in. — Red Ten standing by. — Red Seven standing by. — Red Three standing by. — Red Six standing by. — Red Nine standing by. — Red Two standing by. — Red Eleven standing by. — Red Five standing by."
- ―Red Squadron at the Battle of Yavin
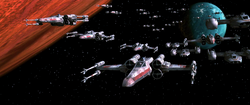
Red Squadron at the Battle of Yavin
Following the successful retrieval of the Death Star plans and heavy losses to the Rebel Alliance at Scarif, Red Squadron, along with Gold Squadron, participated in the Battle of Yavin under the command of Red Leader, Commander Garven Dreis. X-wings from Red Squadron made the second and third trench run on the Death Star's thermal exhaust port, following an unsuccessful attempt by a trio of Gold Squadron's Y-wings.[1]
Dreis, led the second trench run with wingmen Theron Nett (Red Ten) and Puck Naeco (Red Twelve), but were all destroyed by Darth Vader in his TIE Advanced x1. The third trench run was led by Luke Skywalker (Red Five) with wingmen Wedge Antilles (Red Two) and Biggs Darklighter (Red Three), but Darklighter was killed by Vader and Antilles suffered damage to his X-wing, leaving Skywalker exposed. At the last minute, the Millennium Falcon piloted by Han Solo and Chewbacca, destroyed two of the TIE fighters and damaged Vader's TIE, allowing Skywalker to score the critical hit which destroyed the Death Star and saved the Alliance forces on Yavin 4 from ultimate destruction.[1]
Chasing after a Princess[]
- "Making visual contact, Red Two. It's an alluvial damper malfunction, all right."
"Shuttle's looking wobbly, Red Five. Give her a wide berth." - ―Skywalker and Antilles, tricked by Organa and Verlaine

Leia Organa intercepted leaving Yavin 4
Following the destruction of the Death Star, the Rebel Alliance decided to evacuate their base on Yavin 4. Princess Leia Organa, along with a fellow Alderaanian rebel pilot named Evaan Verlaine and R2-D2, decided to defy the orders of General Dodonna and set out on a mission to find and protect surviving Alderaanians from the Empire. Organa sent Dodonna a message via holo, to inform him of her decision to leave on this mission, however it was too late for him to stop her, as she had already left in his personal T-1 shuttle, piloted by Verlaine.[24]
Before they could make the jump to hyperspace, Wedge Antilles (Red Two) and Luke Skywalker (Red Five), the only two members of Red Squadron to return from the battle of Yavin, intercepted the shuttle and ordered them to turn back, to which Organa refused. The two X-wings moved in front of the shuttle in a herding maneuver that Verlaine had heard Skywalker and Antilles brainstorm previously, designed to drag their heels ahead and prevent their ship from jumping to hyperspace without plowing into them.[24]
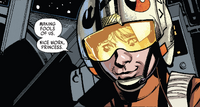
Skywalker fails to stop the Princess
Unable to evade the faster X-wings, Verlaine had an idea, she collided their shuttle with one of the X-wings, knocking a component off their ship, claiming it to be a piece of their hyperdrive over the comm. Another X-wing pilot made visual contact with the shuttle, and saw what looked like an alluvial damper malfunction, and told Red Five that the shuttle was looking wobbly and to give it a wide berth. Organa wasn't impressed with Verlaine's actions and claimed she had sabotaged the mission because she disagreed with it. As soon as the X-wings fell back, the shuttle jumped to hyperspace and slipped away. Verlaine had fooled everyone into thinking the hyperdrive had failed, when in fact the lost component was really a useless decoy that she and R2-D2 had worked on, and couldn't tell Organa while Skywalker and Antilles were listening in.[24]
Patrol sweeps around Yavin[]

Patrol X-wing
During the evacuation of Yavin, Lieutenant Wedge Antilles (Red Two) was sent on a mission in a Patrol X-wing (Snoop 2), equipped with a Fabritech high-gain recon sensor package, to scan the Yavin perimeter. After clearing orbit, Antilles made a full perimeter circuit, scanning for signs of Imperial incursion or passive observation devices. Sweep One, consisted of the far side of Yavin's sensor shadow, and received added attention in light of the previous day's unconfirmed sightings of an Imperial scout ship in the vicinity, however the sweep came up negative for foreign objects or signals. Sweep Two, concentrated on the near spinward arc, but also returned negative for foreign objects or signals. Sweep Three, concentrated on the far spinward arc, where a long-range threat popped up matching the profile of an Imperial probe droid. By the time Antilles reached the halfway point where the sensors could assemble a more accurate model, it showed a metal-rich asteroid three meters in diameter. Mirrored facets had bounced Snoop 2's own pings back, which tricked the sensors into a false alarm. Not long after, Alliance Intelligence had multiple confirmed reports of an imminent Imperial threat.[14]
Post-Battle of Yavin[]
Soon after, Luke Skywalker became an officer in the Alliance and was given the rank of Lieutenant and was regularly assigned numerous independent missions.[25]
Veteran pilot Commander Arhul Narra was tasked by Alliance High Command to lead Red Squadron. Upon his taking command, Narra asked Luke Skywalker and Wedge Antilles to continue to fly with Red Squadron. Narra made it abundantly clear that neither of them would get special treatment for surviving an encounter with the Death Star, even if they were the ones to destroy it.[2] The grizzled commander was always on Skywalker's back, demanding more of him than anyone else, including Antilles.[16]
Skirmish in the Kiax Nebula[]
- "Red Squadron–we have incoming. Multiple fighters, moving in fast."
- ―Arhul Narra
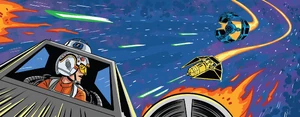
Pirates attack Red Squadron
Shortly after the Battle of Yavin, Red Squadron, led by Commander Arhul Narra (Red Leader), were tasked to accompany the Rebel Alliance transport Nema, carrying essential medical supplies. The Imperial Navy would stop at nothing to bring down such a valuable resource, so the Alliance Council had plotted a course through the Kiax Nebula, where most spacefarer's avoided, in a gamble to avoid Imperial detection. The Nebula's thick cloud consisted of swirling, space dust, which wreaked havoc on sensor readings, and Han Solo had told Mon Mothma that flying through the cloud was a bad idea.[16]
Pirates serving the Tech Masters attacked the Alliance forces using modified TIEs, which killed Duros pilot Jamman (Red Three), a newcomer to the squadron. Lieutenant Luke Skywalker (Red Five) was able to destroy three of the TIEs. The pirates used surprise hit-and-fade tactics by hitting the X-wings and then disappearing into the Nebula's thick cloud. Skywalker insisted on chasing after the pirates into the cloud, so Red Squadron followed him, leaving the Nema unprotected. While X-wings were distracted, the pirates managed to hijack the Nema and take it to Trionak. It was later found out that this was the third transport to go missing, so Skywalker and Leia Organa took the Millennium Falcon to Trionak to investigate. They were able to recover the Nema and bring it back to Home One.[16]
Mission to Giju[]
- "Nice flying. The package is clear and calculating the jump into hyperspace. Activate your scatter protocols and we'll meet at the rendezvous point at 2300 hours."
- ―Arhul Narra, at Giju
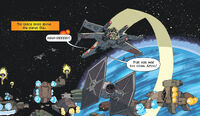
Red Squadron at Giju
A few months after the Battle of Yavin, the Alliance sent three members of Red Squadron, led by Commander Narra, on a mission to protect a transport carrying underground rebel leaders being evacuated from the planet Giju before Imperial agents arrived. Narra (Red Leader) led the transport away from the planet, while Wedge Antilles (Red Three) and Luke Skywalker (Red Five) were in the rear, keeping the TIEs busy. Initially, they encountered a patrol of TIE fighters, which they were able to eliminate, but then it seemed to them like the Empire sent every fighter it had in the system to engage the rebel raiders.[2]
While weaving through the convoy of other bulk freighters leaving the planet, the two X-wings used a "scoot and shoot" maneuver, with Skywalker in the lead, and Antilles directly behind on his tail. Inbound enemies could only target Skywalker, while Antilles scooted up and down, emerging from cover to fire at the attackers. This enabled them to destroy three TIE fighters, however, four more TIE fighters were hidden amongst the freighter convoy, waiting in ambush. Skywalker was distracted at the time, however the TIEs were eventually destroyed. Once the transport was clear, Narra ordered his pilots to activate scatter protocols, where each pilot followed a randomly chosen zigzag path through hyperspace, making several jumps to foil anyone that might track them back to the fleet above Devaron.[2]
Battle of Vrogas Vas[]
- "Vader down. I repeat. Darth Vader has been shot down on Vrogas Vas. This is Red Leader calling for assistance from all available alliance forces."
- ―Arhul Narra, at Vrogas Vas
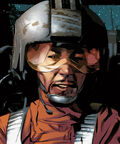
Narra at Vrogas Vas
In 0 ABY,[26] Darth Vader, while pursuing his son Luke in the aftermath of the Battle of Yavin, tracked him to the planet Vrogas Vas, where the Rebel Alliance had established a refueling base. He immediately encountered three squadrons of X-wings, including Red Squadron. Vader completely destroyed the other two squadrons before Luke Skywalker (Red Five) purposely rammed into him with his X-wing. Father and son both fell to the planet's surface, beginning the Battle of Vrogas Vas.[13]
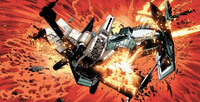
Skywalker rams into Vader
In a report to General Jan Dodonna, Commander Narra described the event as one of the worst cullings of starfighter pilots he'd ever seen, with the loss of Blue, Gray, and Yellow Squadrons, as well as abandoning their starfighter outpost following the arrival of the Imperial fleet. Darth Vader escaped capture, however all Alliance command staff members escaped and all sensitive information stored at the outpost was recovered or intentionally destroyed. The Alliance were able to capture Dr. Chelli Lona Aphra, a high-value prisoner, who was remanded to a max security penitentiary at Sunspot.[14]
Hijacking the Harbinger[]
- "Red Three to Harbinger team. We're holding it down as best we can out here. Tell me you're making progress in there."
- ―Wedge Antilles, to the Harbinger hijack team
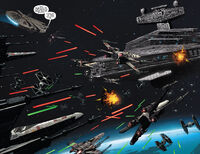
Red Squadron and the Harbinger
In 0 ABY,[22] the Empire learned that Tureen VII was sympathetic to the Rebel cause, and set up a blockade around the planet. Three previous attempts to break through the blockade had failed, as the Imperials had established bases on the planet's twin moons, and its orbit was swarming with TIE fighters. It was too risky to use the Alliance fleet, so Luke Skywalker suggested stealing an Imperial Star Destroyer instead.[27]
A hijack crew aboard the Millennium Falcon, composed of Han Solo, Leia Organa, Chewbacca, Sana Starros, and C-3PO, led the hijacking of the Imperial I-class Star Destroyer Harbinger, with support from Red Squadron's X-wings, engaging TIE fighters. The Millennium Falcon conducted bombing runs on the Harbinger, which led to a small breach in Sector 19-A. This opened up a path to the Star Destroyer's main engine reactor. Wedge Antilles (Red Three), made another bombing run with the intent of striking the reactor and overloading it, however his torpedoes missed their mark. This was followed by the deaths of Red Seven and Red Nine. Skywalker (Red Five) then flew into the breach and scored several hits with his laser cannons, putting the reactor in overload.[17]

Skywalker flies into the Harbinger
With the reactor minutes from complete overload, and not enough time for emergency engineers to shut it down, the Harbinger's admiral ordered the crew to abandon ship. Red Squadron, including Antilles (Red Three) and Red Six, intercepted shuttles leaving the Harbinger, while the Falcon and Skywalker (Red Five) landed in the hangar. The hijackers jettisoned the reactor and as it exploded, the departing shuttles reported to Imperial Command that the Harbinger had been lost. The admiral contemplated suicide when he realized that Darth Vader would hold him personally responsible.[17]
After a week of limping on the backup reactor, an Alliance admiral was supposed to rendezvous with the Harbinger, however he was killed, after being strapped to the nose of his shuttle, as a warning from Task Force 99, who were sent by Darth Vader to recapture the Star Destroyer.[27]
Breaking the blockade of Tureen VII[]
- "This is Red Leader. Those moon bases are still active. And we can't get past Vader."
- ―Red Leader, At Tureen VII
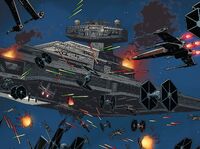
Red Squadron, Tureen VII
With the Harbinger and its skeleton crew under attack from Task Force 99, Leia Organa pushed on with her mission to Tureen VII and ordered full speed ahead. Although in bad shape, it managed to push through the Imperial blockade, initially giving the impression to the Imperial forces that Coruscant had sent reinforcements. As the Harbinger approached at high speed, it collided with two Imperial Star Destroyers in orbit, knocking out its own front shield and one of its engines. With the Harbinger's cannons offline, X-wings from Red Squadron (Red Team) and Blue Squadron (Blue Group) launched out of the hangar. While Blue Group kept the TIEs busy, the rest attacked the moon bases, which were heavily defended by TIE fighters, led by Darth Vader in his TIE Advanced x1, who inflicted heavy losses on the Alliance forces.[28]
Organa ordered Red Team to provide more room so the supplies could reach the surface but Vader wasn't making it easy. Skywalker jumped back into his X-wing to assist the squadron, and was able to eliminate the moon bases. He wanted to go after Vader, however he was urged to stay on mission as there were wounded to evacuate. The battle left the Harbinger as a burning wreck and the crew had to abandon ship.[18]
Mission to Crait[]
- "I'm from the Red Squadron, you hear me? We destroyed the Death Star!"
- ―Wedge Antilles, fighting SCAR Squadron
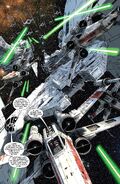
Constant Imperial attacks prompt search for new base
Sometime between 0 ABY and 1 ABY,[30] before the Rebel Alliance found their base on Hoth, Captain Luke Skywalker and Red Squadron escorted Leia Organa's survey team, which included Han Solo and Chewbacca, to the planet Crait. The mission was to survey an abandoned mining facility to determine its suitability as a new secret base for the Alliance, following their evacuation from Yavin and continued threat of Imperial attacks on the Alliance fleet.[29]
Organa had trusted Trusk Berinato, who was an old friend of her father and had previously recommended the location in the past. However, he double crossed the Rebels and they were attacked by Task Force 99. Red Squadron, including Wedge Antilles, showed up in V-4X-D ski speeders and helped Organa's team escape. The planet was ultimately unsuitable as a new base.[29]
Remembering the fallen[]
- "To Dreis, Branon, Porkins, Rue, Dinnes, Naytaan, Nett, Surrel, Naeco,…and Biggs."
- ―Skywalker, honoring Red Squadron's actions
Prior to the mutiny on Mon Cala, Luke Skywalker and fellow rebels Han Solo, Wedge Antilles, Zev Senesca, Derek Klivian, and Chewbacca raised a toast at Mess Hall IV in the Mako-Ta Space Docks to honor the deceased members of Red Squadron, including Dreis, Branon, Porkins, Rue, Dinnes, Naytaan, Nett, Surrel, Naeco, and Darklighter.[31]
Imperial ambush[]
Around 3 ABY,[32] while the Skywalker and Antilles were at Echo Base on Hoth, Narra and many other members of the squadron were killed in an Imperial ambush.[33]
Rebuilding the squadron after Hoth[]
- "Rogue Group is reborn. Or at least the name is."
"I think we should ground that name for a while. Too many losses."
"So the Empire gets to take that from us, too?"
"It's not that, it's that there are call signs I'm not sure I could say in battle right now. We'll go back to Red Squadron, maybe that name will motivate our new pilots." - ―Wes Janson and Wedge Antilles, on reforming the squadron
Following the evacuation of Hoth in 3 ABY,[19] the Rebel Alliance had scattered its forces across the galaxy, and the Seventh Division[5] had regrouped at a predetermined rendezvous point.[4] With Luke Skywalker absent, Alliance High Command had to consider the possibility that he may not return. The Contessa summoned Lieutenant Commander Wedge Antilles to discuss the situation, explaining the current lack of leadership and squadron, subsequently promoted him to commander, to replace Skywalker. She told Antilles to rebuild his squadron back to full strength. Antilles and Lieutenant Wes Janson, his newly appointed executive officer, had to recruit from the limited pool of pilots available in the Division, and given the circumstances, there weren't many top offerings, but managed to scrape together enough qualified pilots to build a full the squadron of twelve.[6]
Top on their list, was Bela Elar and Will Scotian, who they had previously flown with, and were already experienced and capable pilots. They were assigned their own flights within the squadron. Antilles told Janson it was too soon to use the Rogue Group name due to the loss of friends still fresh in their minds from Hoth, and instead resurrected the Red Squadron name. The newcomers were put through two days of intensive sim training, in which Antilles expressed his doubts to The Contessa, however she was less concerned and asked Antilles if he, Red Leader, was ready for a mission and without thinking he said yes, which to his surprise, he meant it.[6]
Attack on an asteroid mining station[]
- "The pirates have compromised our security at a time when we're still waiting for high-value Alliance personnel to arrive. That gives us two alternatives. The first is we jump to the backup muster point and hope the missing can find us. The second is we destroy the pirates. We've chosen to destroy them."
- ―Wedge Antilles, briefs the squadron
The newly rebuilt Red Squadron, led by Commander Wedge Antilles, carried out an intial scouting mission, which revealed a old asteroid mining station nearby being used as a base for bandits along with multiple ships in the area. The very presence of the pirates threatened the safety of their rendezvous point. They dropped sensor buoys to monitor comings and goings. On reviewing the intelligence with Mon Mothma, Antilles speculated that the pirates' origin was probably the Vosch Cluster, as they had blazed a hyperspace lane to the trade worlds around Caldra Prime and Caldra Tertius, with the Alliance rendezvous point right in the middle. Antilles told Mon Mothma that his squadron could destroy the pirates, however as they weren't an experienced squadron, lots could go wrong as they weren't ready. So Mon Mothma agreed to give the squadron one more day to gather sensor data and allow an attack plan to be tested in the simulator. Failing the destruction of the pirate nest, then the fleet would jump.[6]
A day later, Antilles led the squadron in an attack on the pirate base. The squadron used a pincer maneuver on the pirate base, using two flights of three X-wings that converged from opposite directions with the objective of total destruction. The squadron was split into four flights: Antilles' and Wes Janson's flights hit the targets on the landing field, while Scotian's and Elar's flights ran interference for Antilles' and Janson's flights respectively. Sila Kott and Tomer Darpen formed Antilles's wingmates, Keyser Salm and Barlon Hightower were Janson's, Ix Ixstra and Cinda Tarheel were Will Scotian's, and finally Grizz Frix and Penn Zowlie were Bela Elar's. The pirates launched Z-95 Headhunters, a Nighthawk fighter and an interceptor, resulting in a dogfight with the squadron's X-wing cover. Janson's torpedoes took out the hangar, however Elar spotted a modified freighter, the pirate mothership, that tried to escape. Antilles, however, managed to destroy it before it was able to make the jump to hyperspace. Of the twelve pilots that participated, only nine returned from the mission to Home One, after the deaths of Barlon Hightower, Ix Ixstra and Penn Zowlie.[6]
Battle at Elessia[]
- "This is Red Leader--All fighters, on me--We need to make an attack run on the Seventh Division's cruiser, push those TIEs back."
- ―Luke Skywalker

Skywalker lead fighters in defending Home One
The Empire's Commander Ellian Zahra intercepted a transmission that revealed the Alliances Fourth and Seventh Divisions were planning to rendezvous at Elessia, so Zahra initiated an attack that saw her split her forces to strike simultaneously. Zahra's primary strike force led an attack on the Alliance's Seventh Division, while her secondary strike force attempted to attack Leia Organa's Fourth Division, however the Fourth had already left their rendezvous point before the strike force arrived. The Imperial forces overwhelmed the Seventh Division's capital ships. TIE interceptors created a blockade of Home One's hangar bay, that prevented Alliance starfighters from launching, including Red Squadron.[5]
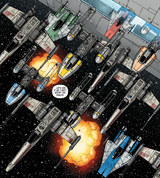
All available fighters launch from Home One
Shortly into the battle, the Fourth Division's ships emerged from hyperspace and immediately deployed their starfighters, led by Commander Luke Skywalker, who assumed the callsign Red Leader. Skywalker was accompanied by other starfighters, that included Green Squadron's Shara Bey (Green Three), along with Lando Calrissian and Chewbacca in the Millennium Falcon. Skywalker called for all Fourth Division fighters to form up on him, on an attack run on Home One's blockade, to push the TIEs back, while those starfighters who were trapped in the hangar bays prepared to launch, including Wedge Antilles (Red Two). As soon as Skywalker cleared the TIEs, all the Alliance starfighters aboard Home One launched to repay the favor. Skywalker then left the space battle to board the frigate where Leia Organa was under attack from an Imperial boarding party, led personally by Zahra.[5]
Pre-Endor[]
- "I thought you'd say you've gone back to flying with the Red Squadron."
"It's Wedge's squadron now. It wouldn't be right to swoop in and take that away from him." - ―Leia Organa and Luke Skywalker
At some point prior to the Battle of Endor, Wedge Antilles asked Luke Skywalker to rejoin Red Squadron, however he declined.[35] Skywalker even discussed not going back to flying with the squadron with Leia Organa, saying that the squadron belonged to Antilles and that it wouldn't be right to swoop in and take it away from him.[34]
Battle of Endor[]
- "Red Three, Red Two, pull in."
- ―Antilles, at Endor

Red Squadron and the fleet at Endor
In 4 ABY,[36] Red Squadron participated in the Battle of Endor led by Commander Wedge Antilles. The squadron was composed of a mix of starfighters, including A-wings, X-wings, and Y-wings. When the Alliance fleet dropped out of hyperspace and started their assault on the second Death Star, no one could get any readings on the state of the battle station's shields. General Lando Calrissian (Gold Leader), realized the shield was still up and ordered all craft to pull up, as Han Solo's strike team hadn't yet disabled the shield. As the fleet turned away from the Death Star, a huge Imperial fleet, composed of many Star Destroyers, emerged from behind the sanctuary moon of Endor, blocking their escape, Admiral Gial Ackbar realized it was trap. The Alliance ships were swarmed by Imperial TIEs, taking out many of the rebel starfighters.[3]
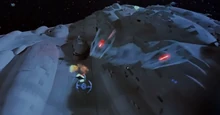
Sila Kott killed by TIE interceptors
Antilles and his fighters helped prevent TIE/IN interceptors from destroying the medical frigate Redemption, however Sila Kott (Red Three) was killed by TIEs in the process. It wasn't long before the Death Star opened fire with its superlaser on the MC80 Star Cruisers, completely destroying ships such as the Liberty. This was a surprise to the Rebels as their intelligence had suggested the superlaser wasn't supposed to be operational. Calrissian suggested the fleet move in closer to the Imperial capital ships to reduce the effectiveness of the Death Star's superlaser. Grizz Frix (Red Five) was killed when his X-wing was struck after the deflector shield generator dome from a Star Destroyer exploded.[3]
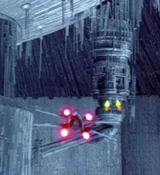
Antilles targets the main reactor power regulator
After Han Solo's strike team finally destroyed the shield generator on Endor and disabled the shield, Red and Gold Squadron commenced their attack run into the bowels of the Death Star, with Antilles at the front. They were closely pursued by TIE Interceptors and TIE fighters, who took out one of their X-wings, piloted by Keir Santage. Calrissian ordered the starfighters to split up and head back to the surface to see if any of the TIEs would follow. When Antilles and Calrissian finally reached the main reactor core, after weaving their way through the ever narrower tunnels, Antilles fired the first shot with a pair of proton torpedoes at the power regulator on the reactor's north tower. This was followed up by a shot from Gold Leader into the main reactor, leading to its destruction. Both Antilles and Calrissian raced their way to the surface, followed by an expanding fireball that consumed one of the pursuing TIE interceptors. Once clear, the Death Star exploded with a huge shockwave, forcing the retreat of Imperial forces and the end of the battle. Antilles celebrated on the forest moon below with the tribes of Ewoks and his Rebel friends.[3]
Appearances[]
Non-canon appearances[]
 LEGO Star Wars: Droid Tales — "Mission to Mos Eisley"
 LEGO Star Wars: The Freemaker Adventures — "Trouble on Tibalt"
"Vader Shows His Skills" — LEGO Star Wars 49
- LEGO Star Wars Terrifying Tales (In flashback(s))
Sources[]
Notes and references[]
- ↑ 1.00 1.01 1.02 1.03 1.04 1.05 1.06 1.07 1.08 1.09 1.10 Star Wars: Episode IV A New Hope
- ↑ 2.0 2.1 2.2 2.3 2.4 2.5 2.6 The Weapon of a Jedi: A Luke Skywalker Adventure
- ↑ 3.00 3.01 3.02 3.03 3.04 3.05 3.06 3.07 3.08 3.09 3.10 3.11 3.12 Star Wars: Episode VI Return of the Jedi
- ↑ 4.0 4.1 Star Wars: Episode V The Empire Strikes Back
- ↑ 5.0 5.1 5.2 5.3 5.4 5.5 5.6 Star Wars (2020) 8
- ↑ 6.0 6.1 6.2 6.3 6.4 6.5 6.6 6.7 6.8 6.9 "Rendezvous Point" — From a Certain Point of View: The Empire Strikes Back
- ↑ 7.0 7.1 7.2 7.3 7.4 Star Wars: Rogue One: The Ultimate Visual Guide
- ↑ 8.0 8.1 8.2 8.3 8.4 "Duty Roster" — From a Certain Point of View
- ↑ 9.0 9.1 9.2 9.3 9.4 Star Wars Battlefront
- ↑ 10.0 10.1
 Star Wars: X-Wing Second Edition — Rebel Alliance Conversion Kit (Card: Garven Dreis — ARC-170 Starfighter)
- ↑
 Rebel Pilots in the Databank (backup link)
- ↑ 12.0 12.1 12.2 Star Wars: The Last Jedi: Expanded Edition
- ↑ 13.0 13.1 13.2 13.3 Vader Down 1
- ↑ 14.0 14.1 14.2 14.3 14.4 14.5 Star Wars: The Rebel Files
- ↑ 15.0 15.1 15.2 15.3 15.4 Rogue One: A Star Wars Story
- ↑ 16.0 16.1 16.2 16.3 16.4 Choose Your Destiny: A Luke & Leia Adventure
- ↑ 17.0 17.1 17.2 17.3 Star Wars (2015) 22
- ↑ 18.0 18.1 18.2 Star Wars (2015) 25
- ↑ 19.0 19.1 "Rendezvous Point" is set in the aftermath of the Battle of Hoth, which Star Wars: Galactic Atlas dates to 3 ABY. As such, the events in "Rendezvous Point" must have taken place around that year.
- ↑ Star Wars: Squadrons
- ↑ 21.0 21.1 "Red Four" — Marvel Comics 1000
- ↑ 22.0 22.1 Star Wars: Timelines
- ↑ Star Wars: Rogue One: Rebel Dossier
- ↑ 24.0 24.1 24.2 24.3 Princess Leia 1
- ↑ Heir to the Jedi
- ↑ The Star Wars Book places the Battle of Vrogas Vas in the year immediately following the events of Star Wars: Episode IV A New Hope, which Star Wars: Galactic Atlas states concluded in 0 ABY. Therefore, the Battle of Vrogas Vas must have taken place in 0 ABY.
- ↑ 27.0 27.1 Star Wars (2015) 23
- ↑ Star Wars (2015) 24
- ↑ 29.0 29.1 29.2 The Last Jedi – The Storms of Crait 1
- ↑ The mission to Crait takes place after the Battle of Yavin, dated to 0 BBY by Star Wars: Galactic Atlas, but before the Battle of Mako-Ta which takes place a year later as stated by Ultimate Star Wars, New Edition. Therefore, the mission to Crait must take place between 0 BBY and 1 ABY.
- ↑ 31.0 31.1 Star Wars (2015) 45
- ↑
 Star Wars Helmet Collection 3 (Databank A-Z: Wedge Antilles–Azmorigan) states that this event takes place while Luke Skywalker and Wedge Antilles are at Echo Base on Hoth. The Star Wars: Galactic Atlas states that the Battle of Hoth took place in 3 ABY, and Lost Stars states that the base was inhabited for less than a month before the battle took place, therefore this event must have occurred around 3 ABY.
- ↑
 Star Wars Helmet Collection 3 (Databank A-Z: Wedge Antilles–Azmorigan)
- ↑ 34.0 34.1 Moving Target: A Princess Leia Adventure
- ↑ Return of the Jedi: Beware the Power of the Dark Side!
- ↑ Star Wars: Galactic Atlas


