Saturday, August 30, 2014

Celebrate card by Maria Potapovich (mellpellmell)

Hi, it's me Maria Potapovich (mellpellmell) for you today.
I was so impressed with the "lady stamp" that I continue to use it again and again!)))
Today I wore her the finest black stockings and sat her down on the edge of a giant bottle of milk - a wonderful way to celebrate, I think!


As you can see, all the stamp's prints are cut, painted with watercolors and raised above the background on 3D foam squares. 

Do you want to know what stamps I have used in this project?

Milk Bottle 1 1/2 x 3
Celebrate 3/4 x 3 1/4
Lady Falling 2 1/2 x 3 3/4

Thursday, August 28, 2014

StencilGirl & VLVS! Day 5

It's time for another amazing Team Up! This time we're pairing Viva Las VegaStamps! pink rubber stamps with StencilGirl stencils.


It's our last day friends, what an INSANE amount of talent we've had on this hop, eh?? We have one more rock star line up for you to visit today,

 Sneak peek of Hermine Koster's project:


Today's hop list: 


And what's a big ol' delicious hop without some PRIZES?!??!?! 2 prizes to be won TOTAL -- so join us ALL WEEK LONG and hop to see the fabulous projects. Let each designer know what you think -- then you're entered to win, every comment is another chance to win. Easy peasy right?


Both prizes consist of $25 in StencilGirl Products and $25 in VLVS! unmounted rubber stamps.

Wednesday, August 27, 2014

StencilGirl & VLVS! Day 4

It's time for another amazing Team Up! This time we're pairing Viva Las VegaStamps! pink rubber stamps with StencilGirl stencils.


We're gearing up towards the end -- have you been COMMENTING? Welcome to day 4 of our hop/swap with StencilGirl.

Sneak peek from Tera Callihan:


Sneak peek from mellpellmell:


Today's hop list:
 
And what's a big ol' delicious hop without some PRIZES?!??!?! 2 prizes to be won TOTAL -- so join us ALL WEEK LONG and hop to see the fabulous projects. Let each designer know what you think -- then you're entered to win, every comment is another chance to win. Easy peasy right? 


Both prizes consist of $25 in StencilGirl Products and $25 in VLVS! unmounted rubber stamps.

Also >> if you're interested in purchasing from www.vlvstamps.com we have free shipping through midnight tonight! 

Use coupon code "freeshipping" to receive free shipping on any order, international included! 
(Click My Cart at the top of the page, enter code in the Discount Codes section of your cart and hit apply.)

Tuesday, August 26, 2014

StencilGirl & VLVS! Day 3

It's time for another amazing Team Up! This time we're pairing Viva Las VegaStamps! pink rubber stamps with StencilGirl stencils.


 Day 3 folks! Welcome to Wednesday of our week long blog hop♥


 Sneak peek from Karen Knight:


Sneak peek from Amy Lassiter:


Today's blog hop:

  
And what's a big ol' delicious hop without some PRIZES?!??!?! 2 prizes to be won TOTAL -- so join us ALL WEEK LONG and hop to see the fabulous projects. Let each designer know what you think -- then you're entered to win, every comment is another chance to win. Easy peasy right? 


Both prizes consist of $25 in StencilGirl Products and $25 in VLVS! unmounted rubber stamps.

Monday, August 25, 2014

StencilGirl & VLVS! Day 2

It's time for another amazing Team Up! This time we're pairing Viva Las VegaStamps! pink rubber stamps with StencilGirl stencils.


It's day TWO of our swap with StencilGirl and we've got another grand slam line up of a blog hop! First.... a couple sneak peeks:


Tina Walker:


Natasha Serova:


Today's hop list:

 And what's a big ol' delicious hop without some PRIZES?!??!?! 2 prizes to be won TOTAL -- so join us ALL WEEK LONG and hop to see the fabulous projects. Let each designer know what you think -- then you're entered to win, every comment is another chance to win. Easy peasy right? 


Both prizes consist of $25 in StencilGirl Products and $25 in VLVS! unmounted rubber stamps.

Sunday, August 24, 2014

StencilGirl & VLVS! Day 1

It's time for another amazing Team Up! This time we're pairing Viva Las VegaStamps! pink rubber stamps with StencilGirl stencils.


Starting today and trucking on through Friday we'll have loads of inspiration from blogs all over the net using both products in unison. We have lots of pieces to share and can't wait to hear what you think.

Sneak peek from Glenda Tkalac:


Sneak peek from DeeDee Catron:


Today's hop list:

And what's a big ol' delicious hop without some PRIZES?!??!?! 2 prizes to be won TOTAL -- so join us ALL WEEK LONG and hop to see the fabulous projects. Let each designer know what you think -- then you're entered to win, every comment is another chance to win. Easy peasy right? 


Both prizes consist of $25 in StencilGirl Products and $25 in VLVS! unmounted rubber stamps.

Forever & ever

Hello all! Nataliya is here :)
Today I will show you another card with stamping background:


In this time I used  resist effect and sprays for create background. For stamping I took fab VLVS! Clockface 3 3/4 x 3 3/4 (and Ultra High Gloss Embossing Powder):


And I adding stamping with my fav mini stamps - Design Open Circles 1 3/4 x 1 3/4  & Undulating Lines Background 1 x 1 1/4. These seemingly simple stamps, allow you to add interesting accents in any work. I LOVE them!


And what about you? Do you like to create backgrounds using VLVS! stamps?

Have a stamping day ;)

Saturday, August 23, 2014

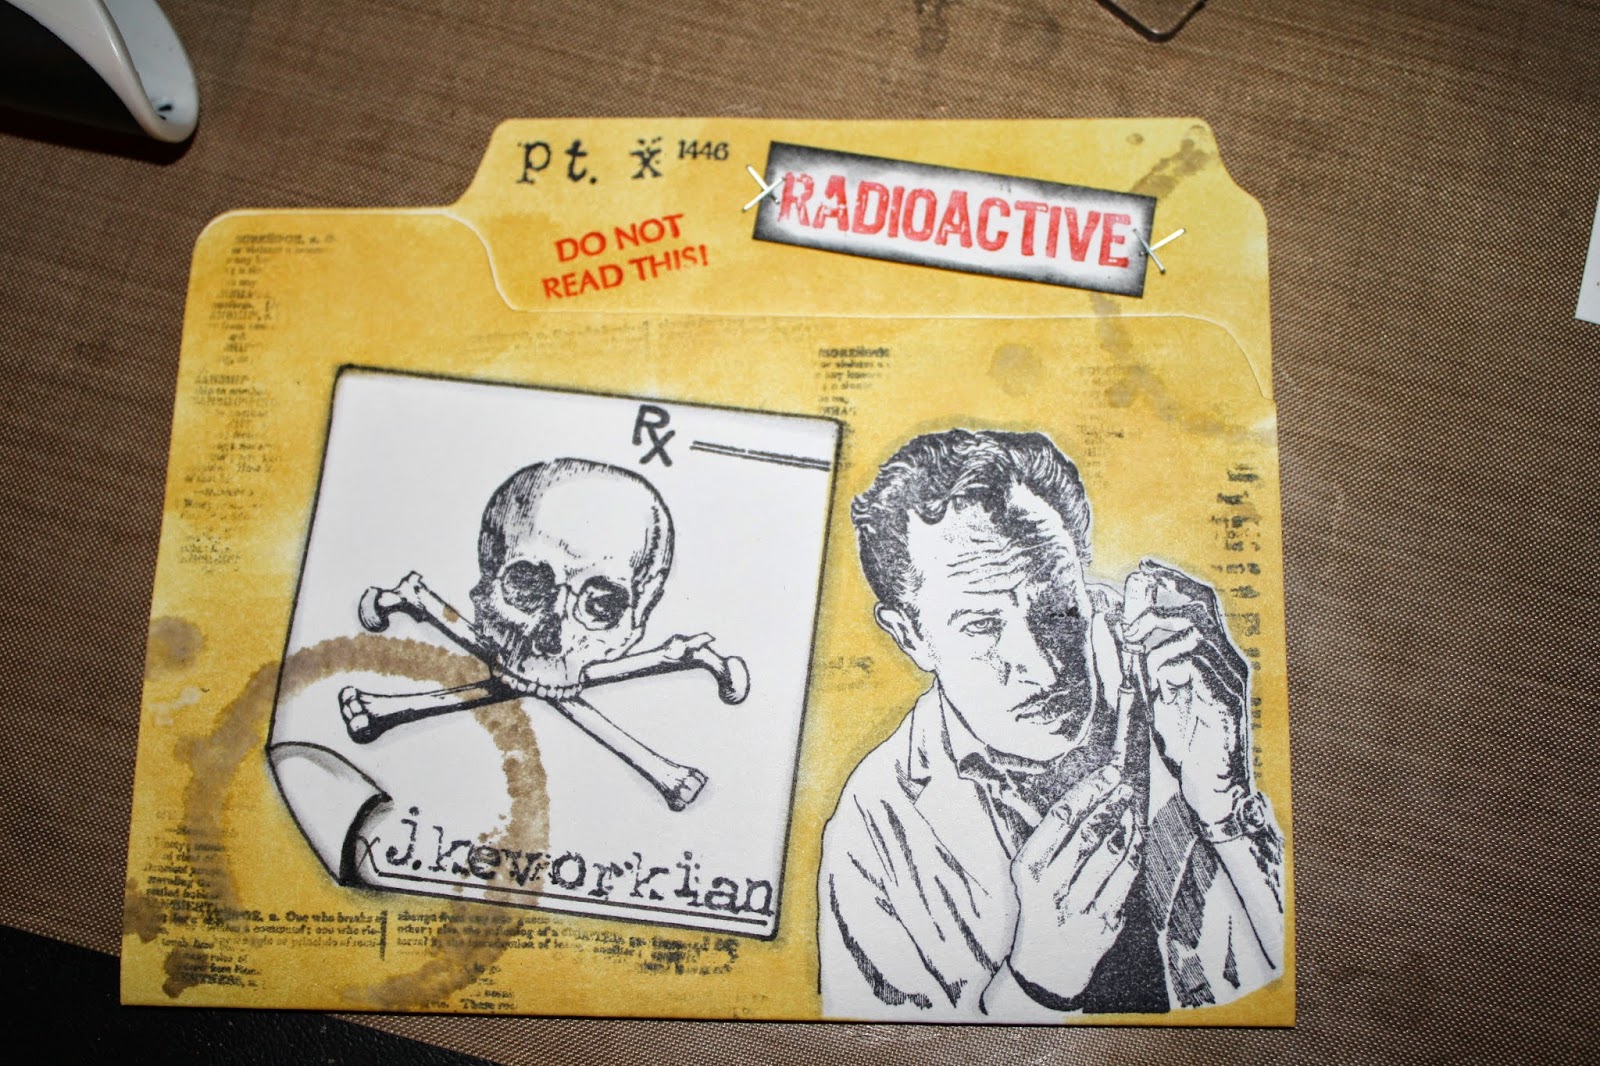
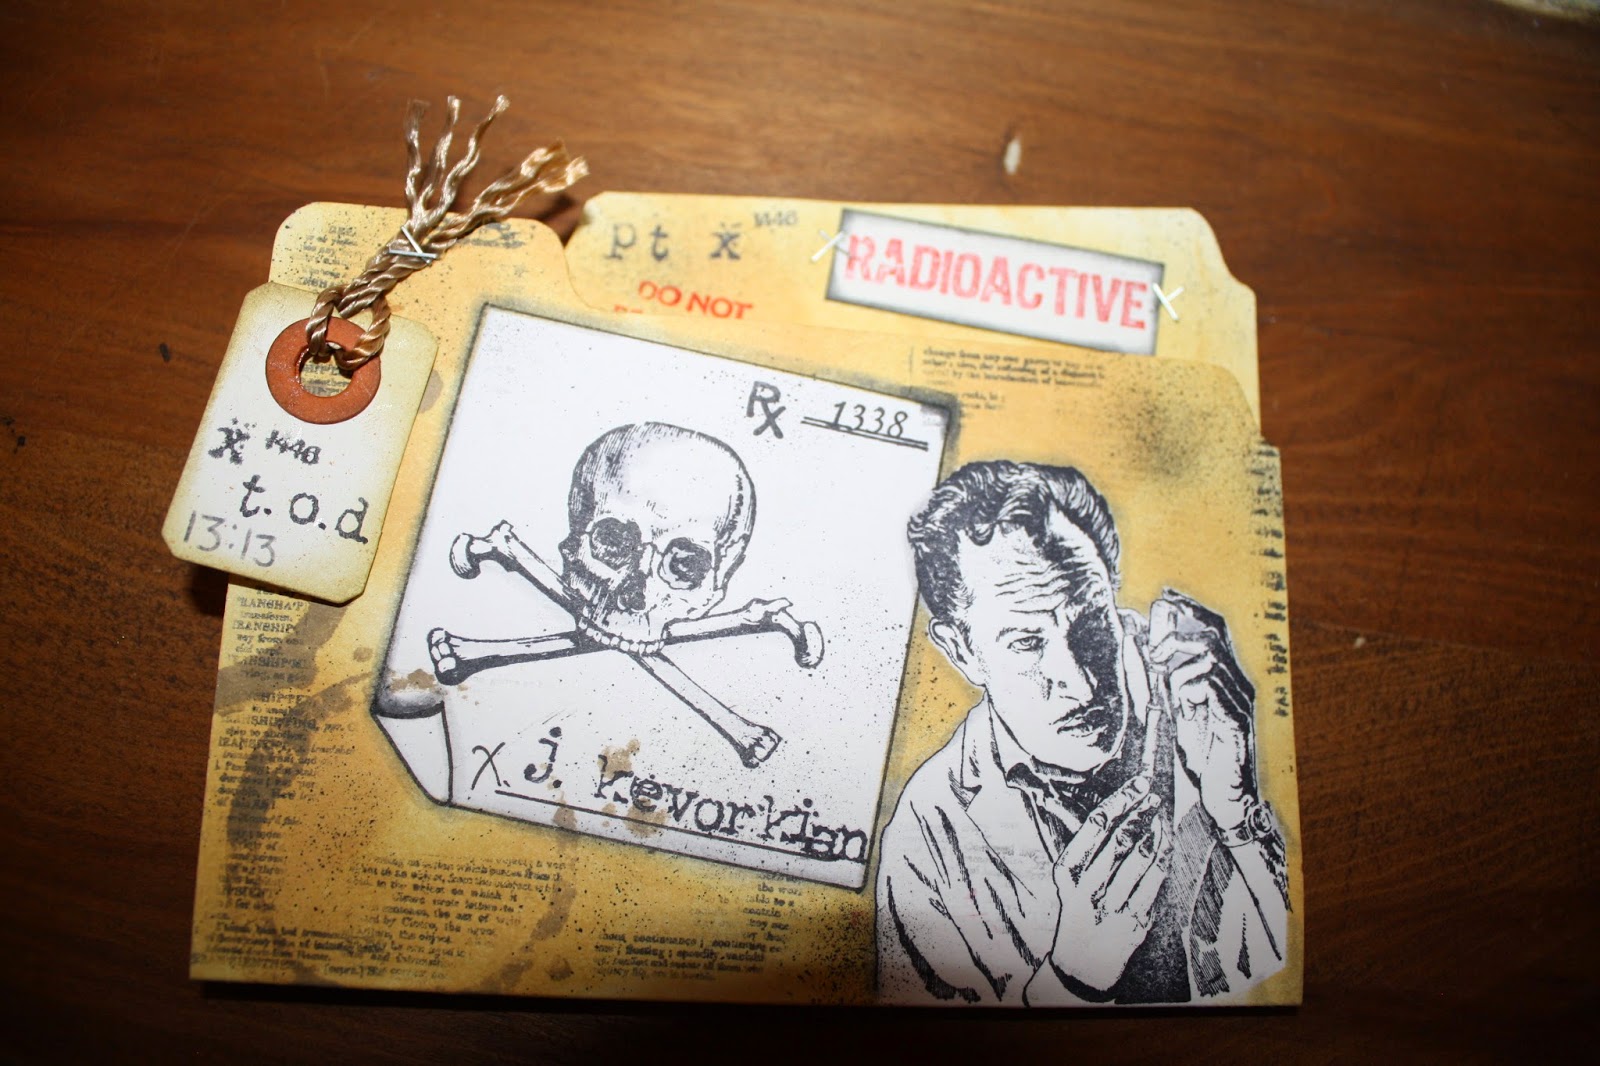
The Doctor is in....

WARNING: If you are easily offended or don't like strange or creepy themes this card may not be for you

Hello again everyone!!! It's me Tera again, today I am going to share the card I created for the VLVS Shaped Halloween Card swap on the Facebook VLVS Groupies page If you are not a member I recommend joining, So much fun and inspiration going on over there!!! 


Stamps Used: 

Coffee Ring Stain 2 3/4 x 2 1/4

Other Supplies-- 
A4 card cut into a file folder shape
Ink- Archival Black, Distress ink- Frayed Burlap, scattered straw, black soot, brick red
scrap paper (for making masks)
Marker Sprayer for distressing
make-up sponge or distress tool for additional shading
Tim Holtz Tiny Attacher/stapler 

Sizzix Movers & Shapers Die - Tag & Tie 

Scraps of orange paper (for the circles on the tag)cord/string
Black marker (fine point for writing and drawing lines) 
water spritzer optional
score tool/board optional
Scissors 
File folder to trace top of (or you can wing it! lol) 
Glossy Accents (or Glue of choice) 

To Begin cut your card Base - 8.5x 5.5 score or fold at 4.5 This gives you the long and short side of your file. On the long side trace the tab of your file , then on the short side trace the inward dip (make sure they are on the same side so it looks right). Cut out your base and admire ho cute this mini file is!

I start by stamping/drawing all of my masked off images in archival black ink: the Doctor was stamped then stamped on scrap paper to create a "mask" to protect it while i work, For the Rx pad, I traced my acrylic stamping block with a black marker leaving one corner open so i could draw it to look like folded paper. (You can also trace a post it not in your size of choice and you will save yourself from cutting out a "mask" for this.) I then traced it again on scrap paper to create a mask (and just folded the corner of the mask to match what i drew rather than guessing)


Next, stamp the skull, Rx pad with the Rx label from the Rx stamp (I cup mine out, so i can use it separate and still use the cute note box on other pieces : D ), and using the Type letters from plate 1430  I stamped out the J. Kevorkian (AKA "Dr. Death" get it a Rx for death, from Dr. Death himself... hehe) The Tiny #'s are numbers from the corners of the Plates of rubber : P Also stamp the patient (aka pt.) Name that you would like... Mine is patient X1446

Now, place both of your "mask" on to cover up your focal pieces. Get out your scattered straw ink and a makeup sponge and add color over the entire front of the card (careful not to move your masks). Set this aside to dry while you do this next step...


On a separate piece of paper stamp the "Radioactive" in red , then cut it out to look like a rectangle medical sticker "chart note"... Using the black soot distress the edge so that this will pop against the background! Also While you have the red out stamp the "Do Not Read This!" on the file tab
  (After All this is a confidential patient file!) 
Attach the radioactive "sticker" using your tiny attacher/stapler


Back  to the file, Sporadically stamp the dictionary page stamp to distress the file....Remove your masks (admire your clean work...now we are going to grunge it up more!) Using your frayed burlap distress ink, ink up the coffee ring stamp (I spritzed my stamp with water at this point to give it the wet/watery coffee look but you don't have too) then stamped as if coffee had sat on the file and Rx script

Take the marker spritzer with the black soot Distress marker and add some grunge all over where you feel it's to "clean" and bright!  


Cut out the tab in plain card stock (bread tie looking thing) then 2 of the reinforcing circles in orange .  Distress the pieces with the frayed burlap, then glue the circles on the front and back to reinforce the piece to look like the "Toe Tag". Tie yours cord around it and attach with the tiny attacher

Enjoy your spooktacular work!!!
Below I have a few more views : P


Friday, August 22, 2014

Discover Chipboard Printer's Tray {GDT : Irit Shalom}

>>> We are welcoming Irit Shalom back today with a guest spot. Please visit her first post to learn more about her.

Hello my dear crafty friends! Today I am going to show you my second project made as VLVS Guest designer and this is my tribute to Steampunk. About a year ago I hardy knew that this word exists. Now I am a proud steampunk lover and I made this chipboard tray as my 2014: Steampunk year.

I should say that the only Steampunk stamps I own are from Viva Las VegaStamps! and I bought them long before I was asked to be their guest designer. I just think that VLVS have the best assortment of steampunk stamps in the world! I believe that this is true and not just my statement. Then I have a few steampunk chipboards and some Tim Holt
metals. That is practically all. But look how much can be done just with a bunch of lovely stamps, some inks and a lot of imagination!

So here is my tray: each window is heavily stamped, heat embossed and inked over. 


Some of the windows are collaged and some were made with a single stamped image only. The grunge 2014 letters were hand cut and adhered over 3d foam glue for the dimension. I even stamped this small letter in the bottle with Dictionary stamp and rolled into the tiny bottle. As for other techniques: I used crackled paint over the frame and added a darker shade with more ink over the dry paint. I changed the color of metal plaque with alcohol ink. I heat embossed the chipboards around with a mix of 2-3 embossing powders. Not much and maybe even too much. I like the final result and I am very proud of my steampunk project.


Tando Creative, Wycinanka, Ranger, Clearsnap, Meg's Garden, Prima, Tim Holtz- Advantus, WOW! Embossing Powders, Ranger, FWAB

And finally I want to thank DeeDee and VLVS for the great chance to be their guest designer. I hope I inspired VLVS blog readers and hope to be back here some day!

>>> Irit! Thank YOU! for being here, inspiring us, and sharing your beautiful work on our blog.

Thursday, August 21, 2014

More project life my way and Viva Las VegaStamps!

I'm still loving doing project life my way and this page is a heartfelt tribute to my Sammy who we had to say goodbye to in April of this year.  I  still miss him and think of him EVERY DAY and I love how this page turned out.  He was my little Poppa. 
 I love how I as able to fit so many pictures on this page yet it's not too crowded.  Here are the stamps I used for this page
and the star pin 
here are a few close ups


  I hope you enjoyed seeing my project and thanks for stopping by!

Wednesday, August 20, 2014

The Afterthought Mini ;)

Hello and Happy Wednesday!  Tina here today with a project that I hope will make you smile and say, 'yes', I've done that too.

I am a messy crafter, at least while a project is 'in the works'.  I don't throw anything away until I am POSITIVE that I won't need even the smallest piece.  Every scrap, every extra piece, every 'trial run mistake'.

I had just finished my VLVS projects for the month, (or at least I thought I had), and I was cleaning up my crafty disaster area, when I spied one of my trial run mistakes laying on top of my ink scrap.  And I thought, 'Hey, I like how that looks'.  Well one thing led to another, and BAM!  I created a Mini Album.  From clean-up to completed project in an hour.


Using all of the left over bits & pieces on my desk, I pieced together a fun little mini that will be used to keep memories of 'everyday' life.


Nothing was 're-created' for my pages.  Every page was created using scraps, mistakes, or ink off bits.  The only added embellishment was a strip of washi tape or two.  :)

(Note:  The base of some pages were included to 'hold' a picture or embellishment)


I am SO happy I didn't throw anything away.  I love the random-ness, and eclectic feel the album has.  It is a great compliment to the 'everyday life'. 

Have you ever created a project using the scraps on your desk?  Did you like how your project turned out?  Please share your projects...I'd love to see them.

VLVS Stamps used:
Whimsical Elephant
Banksy Rain Under Umbrella Girl
Dictionary Page
Directional Circle