Battle of Pickett's Mill
33°58′30″N 84°45′32″W / 33.975°N 84.759°W
| Battle of Pickett's Mill | |||||||
|---|---|---|---|---|---|---|---|
| Part of the American Civil War | |||||||
 Remains of a trench dug during the battle | |||||||
| |||||||
| Belligerents | |||||||
|
|
| ||||||
| Commanders and leaders | |||||||
|
Joseph E. Johnston Patrick Cleburne John H. Kelly William Y. C. Humes |
William T. Sherman Oliver O. Howard Thomas J. Wood Richard W. Johnson | ||||||
| Units involved | |||||||
|
Cleburne's Division Kelly's Division Humes' Division |
3rd Division, IV Corps 1st Division, XIV Corps 3rd Brigade, 3rd Division, XXIII Corps | ||||||
| Strength | |||||||
|
Pickett's Mill: 10,000 Campaign: c. 65,000–75,000 |
Pickett's Mill: 14,000 Campaign: c. 100,000 | ||||||
| Casualties and losses | |||||||
| 500 | 1,600 | ||||||
The Battle of Pickett's Mill (May 27, 1864) was fought in Paulding County, Georgia, between Union forces under Major General William Tecumseh Sherman and Confederate forces led by General Joseph E. Johnston during the Atlanta Campaign in the American Civil War. Sherman sent Brigadier General Thomas J. Wood's division, supported by other formations, to turn Johnston's right flank, but the Federals were repulsed with heavy casualties when they ran into tenacious Confederate opposition. Author Ambrose Bierce, an eyewitness, later wrote an account of the battle titled The Crime at Pickett's Mill.
Earlier in May 1864, Sherman's army successfully compelled the Confederate Army of Tennessee to fall back to a strong defensive position at Allatoona Pass. Unwilling to attack Johnston's lines frontally, Sherman attempted a wide sweep around the Confederate western flank. Johnston quickly shifted his army southwest to block the move, and Sherman's first thrust at his opponent's defenses was defeated at New Hope Church. Both sides entrenched their positions. A day after Sherman's troops were beaten at Pickett's Mill, the Confederates launched an attack on the Union right flank which was repelled at Dallas. The two armies faced each other in the New Hope Church and Dallas lines until Sherman extended his left flank toward the railroad, compelling Johnston to retreat to a new position on June 4.
Background
[edit]Union Army
[edit]In the Atlanta campaign, William T. Sherman commanded a force made up of three armies drawn from the Military Division of the Mississippi. On April 30, 1864, the Army of the Cumberland led by Major General George H. Thomas included 73,000 troops and 130 guns, the Army of the Tennessee under Major General James B. McPherson numbered 24,500 soldiers and 96 guns, and the Army of the Ohio directed by Major General John Schofield reported 11,362 infantry, 2,197 cavalry, and 28 guns. Sherman's forces were supported by 25,000 non-combatants consisting of railroad employees and repair crews, teamsters, medical staff, and Black camp servants.[1] Thomas' army was made up of Major General Oliver Otis Howard's IV Corps, Major General John M. Palmer's XIV Corps, Major General Joseph Hooker's XX Corps, and the 1st, 2nd, and 3rd Cavalry Divisions led by Brigadier Generals Edward M. McCook, Kenner Garrard, and Hugh Judson Kilpatrick, respectively. McPherson's army consisted of Major General John A. Logan's XV Corps and Brigadier General Grenville M. Dodge's Left Wing of the XVI Corps. Major General Francis Preston Blair Jr.'s XVII Corps joined McPherson's army on June 8. Schofield's small army included his own XXIII Corps and a cavalry division led by Major General George Stoneman.[2] The IV and XX Corps each counted 20,000 soldiers, the XIV Corps had 22,000, the XV Corps numbered 11,500, and the XVI and XVII Corps each included about 10,000 men.[3]
Confederate Army
[edit]Johnston's Army of Tennessee consisted of two infantry corps led by Lieutenant Generals William J. Hardee and John Bell Hood, and a cavalry corps under Major General Joseph Wheeler. Johnston's army was soon reinforced by the corps of Lieutenant General Leonidas Polk and the cavalry division of Brigadier General William Hicks Jackson from the Army of Mississippi. Hardee's corps included the divisions of Major Generals William B. Bate, Benjamin F. Cheatham, Patrick Cleburne, and William H. T. Walker. Hood's corps was made up of the divisions of Major Generals Thomas C. Hindman, Carter L. Stevenson, and Alexander P. Stewart. Polk's corps had the divisions of Major Generals Samuel Gibbs French and William Wing Loring, and Brigadier General James Cantey.[4] On April 30, 1864, Johnston's Army of Tennessee reported 41,279 infantry, 8,436 cavalry, and 3,227 artillerymen serving 144 guns. Battles and Leaders calculated Johnston's reinforcements as follows: Brigadier General Hugh W. Mercer's brigade (2,800) on May 2, Cantey's division (5,300) on May 7, Loring's division (5,145) on May 10–12, French's detachment (550) on May 12, Jackson's cavalry (4,477) on May 17, French's division (4,174) on May 19, Brigadier General William Andrew Quarles' brigade (2,200) on May 26, and a 643-man detachment of Jackson's cavalry on June 10. Other reinforcements came from two Georgia state regiments (1,200), men returned from furlough, recruits, and returned deserters.[5] There were about 8,000 non-combatants supporting Johnston's army, mostly men unfit for combat.[6]
Operations
[edit]
The Atlanta campaign began with the Battle of Rocky Face Ridge on May 5–9, 1864, when Sherman sent McPherson's two corps to turn Johnston's defenses from the west while Thomas and Schofield demonstrated frontally. Outflanked, Johnston retreated and fought the Battle of Resaca on 13–16 May, by which time Polk's corps began arriving. With his western flank menaced, Johnston withdrew again and Union troops captured Rome. At the Battle of Cassville on May 19, Johnston planned to counterattack part of Sherman's widely-spread army, but timing was ruined when McCook's cavalry appeared in an unexpected location. Johnston then took up a defensive position south of Cassville. Hood and Polk argued that the Cassville line was vulnerable to Union artillery fire, so Johnston retreated to Allatoona Pass on the night of May 19–20. Finding Johnston's position too strong to directly attack, Sherman decided to make another maneuver around Johnston's western flank. After pausing operations for three days, Sherman sent McPherson's right wing south to Van Wert and then east toward Dallas. Thomas's army formed Sherman's center and Schofield's corps his left.[7]

At the start of the latest Union maneuver, Sherman ordered 20 days rations be carried in his wagons because they were leaving the proximity of the railroad.[8][note 1] Thomas' army crossed the Etowah River and marched through Euharlee and Stilesboro, while Brigadier General Jefferson C. Davis' 2nd Division, XIV Corps, which was detached at Rome, joined the movement of McPherson's wing. Blair's XVII Corps was approaching from the north, but had not yet joined Sherman. Garrard's cavalry preceded McPherson's columns, McCook's cavalry covered Thomas' front, Stoneman's cavalry headed Schofield's columns, and Kilpatrick's cavalry watched the railroad north of the Etowah.[9] Johnston received news of Sherman's move from Jackson's cavalry, and on the afternoon of May 23, he ordered Hardee's corps to march to Dallas and Polk's corps to follow. On May 24, Johnston ordered Hood's corps to join the others. By May 25, Johnston's army was positioned so that Hardee's corps was on the left near Dallas and Hood's corps was on the right at New Hope Church. Polk's corps was posted to the left of Hood, with a lightly defended gap between Polk and Hardee.[10]
Hooker's XX Corps led the advance of Thomas' Army of the Cumberland. When it reached Pumpkinvine Creek at Owen's Mill, the Federals drove off some Confederates who were trying to burn the bridge. Strongly resisted by three Confederate regiments, Brigadier General John W. Geary's 2nd Division pressed forward until it came into contact with Hood's corps at New Hope Church. It was 5 pm before Hooker was able to reinforce Geary with the divisions of Brigadier General Alpheus S. Williams (1st) and Major General Daniel Butterfield (3rd). Each of the three divisions were formed into brigade columns, that is, with the leading brigade deployed and the two other brigades of the division directly behind it. In the Battle of New Hope Church on May 25, Hooker's divisions repeatedly assaulted the ridge that Hood's troops defended, but without success.[11] The battle lasted three hours, and during its last hour a thunderstorm rumbled overhead. Hooker admitted sustaining losses of 1,665 killed and wounded in a place the Union troops began calling the "Hell Hole".[12] Stewart's division, which was the main defending force, reported losing 300–400 casualties.[13]
The leading unit of Howard's IV Corps, which was Brigadier General John Newton's 2nd Division, arrived in the area of New Hope Church at 6 pm and was placed in line on the left of Hooker's corps. By the morning of May 26, Howard's entire corps was fully deployed. Regarding Palmer's XIV Corps, Brigadier General Absalom Baird's 3rd Division was assigned to guard Thomas' wagon train at Burnt Hickory and Brigadier General Richard W. Johnson's 1st Division was placed in reserve behind Hooker. On the morning of May 26, McPherson's two corps occupied Dallas and confronted Hardee's corps about 2 mi (3.2 km) farther east. McPherson deployed Logan's XV Corps on the right, Dodge's XVI Corps in the center, and Davis' XIV Corps division on the left. Between Davis and Hooker, there was a lightly defended area. Schofield's XXIII Corps left Brigadier General Alvin Peterson Hovey's division to watch the wagon train and proceeded with the divisions of Brigadier Generals Jacob Dolson Cox and Milo S. Hascall. Schofield's corps reached the battlefield after an all night march in the rain. During the night, Schofield was injured when his horse fell into a ravine, so Cox temporarily assumed command of the corps. In the morning, Sherman directed the corps to the left of Howard's corps and, after marching by compass through thick woods, it came into line near Brown's saw-mill. At this point, the XXIII Corps and the left of the IV Corps made a right wheel to face toward the Confederate defensive positions. On May 26, both sides entrenched and the day was notable for the continuous skirmishing that took place between the two sides.[14]
Battle
[edit]The maneuver
[edit]
Sherman decided to turn Johnston's right flank. Aware of his numerical superiority, and with both armies entrenched, Sherman decided that he could assemble some of his troops and use them to outflank the Confederate defenses. In addition, by extending his left flank northward, Sherman was able to get closer to the railroad line. Also on May 26, McCook's cavalry bested Wheeler's horsemen in a skirmish, capturing 50 Confederates. This clash seemed to indicate that Johnston's right flank was only defended by cavalry.[15]
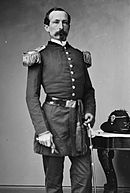
On May 27, the artillery of Schofield, Howard, and Hooker bombarded the Confederate defenses starting at dawn, and the opposing batteries replied. Sherman wanted Howard, supported by Schofield's divisions, to thrust at what he believed to be Johnston's right flank while McPherson pressed back the Confederate left flank. At dawn, Howard withdrew Thomas J. Wood's division (IV Corps) from its newly-dug trenches and replaced it with David S. Stanley's division. As Wood's division marched north, Thomas and Howard conducted a reconnaissance of the location where Sherman wanted to attack. Finding that the assault would have to cross an open field subject to Confederate cross fire, Thomas instructed Howard to shift the assault location farther north, to the left of Schofield's lines. Thomas also detached Johnson's 1st Division from XIV Corps so that it could support Wood's attack. Furious that first Davis' and now Johnson's divisions were taken away from him, Palmer threatened to resign command of XIV Corps, and Thomas had to talk him out of it.[16]
At 11 am, Wood's division was formed into a column of brigades with each brigade formed into two lines, so that the division was deployed into six lines, one behind the other. Johnson's division was formed into a similar column. The Union divisions marched through forests so dense that Wood gave the colonel of his leading regiment a compass to guide the movement. After marching 1.5 mi (2.4 km), Howard ordered Wood's and Johnson's columns to turn to the right and prepare to attack. Wood's skirmishers went forward and discovered entrenched Confederates in front, so Howard decided to attack farther north. Howard ordered Brigadier General Nathaniel McLean's brigade to support Wood's right flank;[17] McLean's command was the 3rd Brigade, 3rd Division, XXIII Corps.[18] The crucial defense of McLean's brigade at the Second Battle of Bull Run may have prevented a Union catastrophe,[19] but bad blood existed between McLean and Howard. Historian Albert Castel asserted, "Of all the brigade commanders in Sherman's army, a worse one to assist in Howard's attack could not have been found." Howard blamed McLean among others for the disaster to XI Corps at the Battle of Chancellorsville and McLean detested Howard for it.[20]
Earlier, Johnston transferred Cleburne's division from Hardee's corps to the extreme right flank. On Cleburne's left was Hindman's division of Hood's corps.[21] Cleburne's division was entrenched with the brigades of Brigadier Generals Mark Perrin Lowrey and Daniel Govan in the front line and the brigades of Brigadier Generals Lucius E. Polk and Hiram B. Granbury in reserve. Govan's scouts reported Howard's movement to Johnston, who ordered probes of the Federal lines, believing that Sherman was making a general retreat to the railroad. These probes captured some Union skirmishers but quickly discovered that Sherman's defenses were well-manned. With this information, Johnston realized that Sherman was trying to turn his right flank. He directed Hindman's troops to shift to their right and ordered Stewart's division to help Cleburne. At this time, McPherson notified Sherman that the Confederate troops in front of him were strongly entrenched. Sherman finally understood that Johnston blocked his plan to sweep around the Confederate western flank. Sherman quickly discarded his original strategy and replaced it with a plan to move northeast to the railroad.[22]
The attack
[edit]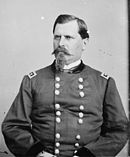
After marching an additional 1 mi (1.6 km), Wood's and Johnson's troops reached a north-flowing stream called Pickett's Mill Creek. This tributary of Pumpkinvine Creek was named after a nearby grist mill, owned by Malachi Pickett. Howard and Wood conducted another reconnaissance and discovered Confederates digging trenches, but the entrenchments did not extend to the left. Howard ordered Wood and Johnson to swing their divisions to the right, and directed McLean to make a false attack which was designed to draw fire away from Wood's real attack. Wood rapidly formed his division for assault, but both Johnson and McLean moved their commands very slowly. At 3:35 pm, Howard sent a courier notifying his superior Thomas that he was, "turning the enemy's right flank, I think". Thomas' reply arrived at 4 pm to go ahead with the attack. Even so, Howard hesitated until Wood asked, "Are the orders still to attack?" Howard gave the order to attack.[23]
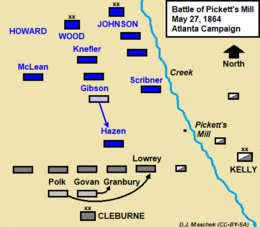
Wood's division consisted of the brigades of Colonel William Harvey Gibson (1st), Brigadier General William Babcock Hazen (2nd), and Colonel Frederick Knefler (3rd).[24] At 4:30 pm, Wood ordered Hazen's brigade, which was in front, to advance. Wood remarked to Howard, "We will put in Hazen, and see what success he has," and Howard agreed. Previously, Hazen believed that Wood's entire division would attack, but he realized that his 1,500-man brigade was going to assault unsupported. Hazen glanced at his staff officer Ambrose Bierce who instantly knew that a "criminal blunder" was about to happen. All mounted officers sent their horses to the rear and went forward on foot, with Hazen guiding his brigade with a compass because the woods and underbrush were so dense. Hazen's men soon encountered about 1,000 dismounted cavalrymen from the divisions of Brigadier Generals John H. Kelly and William Y. C. Humes.[25]
The Confederate cavalrymen gamely fought back, but they were deployed in a long skirmish line and Hazen's infantry forced them to give way. Hazen's troops reached a ravine and saw a ridgeline ahead of them about 100 yd (91 m) away. As Hazen's soldiers surged forward to seize the ridge, Granbury's Texas brigade reached the spot ahead of them. Warned that Federals were about to turn his right flank, Cleburne sent Granbury's brigade to help the outmatched cavalrymen. The Texans took cover and opened fire on the approaching Union troops, inflicting many casualties. Some of Hazen's men called out, "Ah, damn you, we have caught you without your logs", as they rushed forward. Hazen's men got within 20 to 30 yd (18 to 27 m) of Granbury's line before they were forced to take cover and return fire.[26] Blocked in front, Hazen swung his second line regiments toward a cornfield on the left.[27] Seeing the cavalrymen on his right getting overpowered, Granbury asked for help from Govan's brigade. Govan sent the consolidated 8th and 19th Arkansas Infantry Regiment, and it drove back some of the Federals who were pressing the cavalry. Next, Cleburne deployed Lowrey's brigade on Granbury's right flank where it repelled more of Hazen's troops. Unfortunately for Hazen and his men, no units from Johnson's division appeared to support his attack.[26]
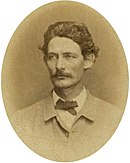
With his soldiers taking heavy losses and running low on ammunition, Hazen frantically sent messages to his superiors asking for reinforcements. No help came and neither Wood nor Howard ever explained why. After 50 minutes, the Union survivors spontaneously withdrew; Hazen made no effort to stop them. Finally, with Hazen's attack completely spent, Wood ordered Gibson's brigade forward, thinking that "a second effort might be more successful". Gibson's men were stopped by the same intense rifle and artillery fire.[28] Johnson's 1st Division, XIV Corps was made up of the brigades of William Carlin (1st), John H. King (2nd), and Benjamin F. Scribner (3rd).[29] Scribner's brigade finally showed up on Gibson's left, but was quickly pinned down by enfilade rifle fire from Kelly's dismounted cavalrymen. On Gibson's right, McLean's troops displayed no activity, so Key's Arkansas Battery and another artillery unit swung their guns to the right and blasted Gibson's hapless soldiers.[28]

Captain Cyrus Askew of the 15th Ohio Infantry Regiment went to the rear to ask for reinforcements and found Wood and Gibson. After Howard rode up and asked Askew for a report, a shell landed nearby. Howard threw up the stump of his amputated arm and shouted, "I am afraid to look down". It turned out that a shell fragment knocked off the heel of Howard's boot, but his foot was not maimed as he feared. Even so, Howard's foot was badly bruised, leaving him unable to walk or ride a horse. Meanwhile, after an hour of futile attempts to capture the ridge, Gibson's troops pulled back. They joined Hazen's men in the rear who were complaining that they had been "sold out". At 6 pm, Howard received a message from Thomas, saying that Sherman canceled the attack at 5:15 pm and ordered him to only defend. Howard ordered Wood to send Knefler's brigade forward to hold the Confederates in check until entrenchments were dug. Knefler's brigade advanced at 6:30 pm and blundered into the ravine where it was struck by intense fire. Pulling back, Knefler's men plus the 37th Indiana and 78th Pennsylvania Infantry Regiments from Scribner's brigade took a position where they exchanged fire with the Confederates until nightfall.[30]
After dark, Knefler's men went forward to retrieve as many wounded Union soldiers from the ravine as possible. Among other casualties, Johnson was grazed by a shell and handed command of his division to King. At 10 pm Knefler got the order to pull back, since the defense line was completed. At the same time, Granbury ordered his men to charge into the ravine to drive off any remaining Union soldiers. In the pitch dark, few soldiers were hit by bullets, but Granbury's Texans captured numerous Federals and chased others away. Then Granbury's troops fell back to the ridge. That night, a veteran of many battles from the Texas brigade was assigned to picket duty in the ravine. At dawn, he was so sickened by the carnage that he had to leave. He noted that many of the Federal gunshot victims were struck in the head.[31]
Aftermath
[edit]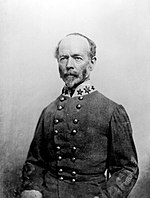
Cleburne's division reported sustaining 448 casualties, mostly in Granbury's brigade. The Union soldiers suffered a loss of 1,600 killed, wounded, and missing.[32] The American Battlefield Trust estimated losses at 500 Confederate and 1,600 Union.[33] Normally, the killed-to-wounded ratio in Civil War battles was one-to-five. In this battle, the number of killed in Wood's division was extraordinarily high, probably because many of the dead were shot repeatedly. The Confederates found one corpse with 47 bullet holes. Hazen's brigade lost 467 casualties, Gibson's brigade lost 681, and Knefler's brigade lost 250, mainly prisoners. Scribner's brigade lost 125 of which 102 were from the 37th Indiana and 78th Pennsylvania.[32] About 70 wounded and 140 unwounded Union soldiers were captured by the Confederates.[21] Georgia State Parks credited Union forces with 14,000 troops and Confederate forces with 10,000 soldiers.[34]

Cox acknowledged that Wood's troops were assailed by fire from Cleburne's division in front, Hindman's division on their right, and cavalry on their left. Even so, Cox believed that if Johnson had ordered Scribner to push straight on, while fending off the Confederate cavalry with another one of his brigades, the attack might have succeeded. Cox admitted that some "mistake" prevented McLean's brigade from having any effect.[35] Castel pointed out that a crack Confederate brigade on favorable terrain, supported by two more brigades, dismounted cavalry, and artillery, could be expected to repulse two Union brigades attacking piecemeal.[32]
Hascall's division on Schofield's left flank was initially drawn back at an angle. During Wood's attack, Hascall wheeled his division to the right and McLean's brigade was used to fill the gap between Wood's right and Hascall's left.[36] By this time, Sherman thoroughly committed himself to the strategy of moving to his left (northeast) in the direction of the railroad. An added spur to this strategy was the discovery that his soldiers were not getting enough food. Even though the wagon train carried 20 days of food, the sparse road net and the 20 mi (32 km) distance to the Union forward base at Kingston did not allow the food to be distributed to the soldiers efficiently.[37]
Hood's corps spent the night of May 27–28 marching to attack Sherman's new left flank. At 6 am on May 28, scouts from Wheeler's cavalry reported that the Federals were waiting behind breastworks, so Johnston called off the attack. That day, Johnston directed Hardee to order Bate's left flank division to probe McPherson's lines to find out if the Union troops were still present. At 3:45 pm, Bate's division and Brigadier General Frank Crawford Armstrong's dismounted cavalry brigade launched an attack on lines manned by Logan's XV Corps. Bate's botched assault in the Battle of Dallas resulted in over 1,000 Confederates getting shot, while Logan admitted only 379 casualties.[38] Ironically, Sherman had ordered McPherson to shift to the left on the night of May 28–29.[37]
After various delays, Sherman's shift to the left finally began and on June 1, Stoneman's cavalry occupied Allatoona. This allowed Sherman's railroad crews to proceed with repairing the track. On June 2, Schofield's XXIII Corps pressed forward on the extreme left flank until it encountered Confederate entrenchments near Allatoona Creek.[39] On June 3, Union cavalry under McCook and Stoneman seized Acworth on the railroad. On the same day, Hooker's XX Corps extended Sherman's left flank farther to the left of Schofield. On the night of June 4–5, Johnston abandoned his line of field fortifications based on New Hope Church and retreated to a new line running northeast from Lost Mountain to Pine Mountain to Brushy Mountain.[40] The next major clash occurred at the Battle of Gilgal Church on June 15.[41]
Between May 23 and June 6, including the fighting at New Hope Church, Pickett's Mill, and Dallas, Sherman's forces suffered 4,500 casualties while Johnston's army lost 3,000. Confederate morale, which sagged after the early May retreats, was improved by Johnston's defensive victories. Since the start of the campaign, Sherman's three armies sustained about 12,000 casualties out of a total of 100,000 men, while Johnston's army lost about 9,000 out of an estimated 65,000–75,000 men.[42]
Noted author Ambrose Bierce fought for the Union as a topographical engineer at Pickett's Mill. Bierce's short story The Crime at Pickett's Mill is an eyewitness account of this battle.[43]
Battlefield today
[edit]
Pickett's Mill Battlefield Historic Site at 4432 Mount Tabor Church Road, in Dallas, Georgia is now preserved as a Georgia state park in excellent condition.[33] The site includes a visitor center (open Fridays to Sundays), hiking trails open every day, earthworks used by Union and Confederate troops, and a restored pioneer cabin.[34]
Notes
[edit]- Footnotes
- ^ Jacob D. Cox commanded a division during the Atlanta campaign and wrote a campaign history that was published in 1882.
- Citations
- ^ Castel 1992, p. 112.
- ^ Battles & Leaders 1987, pp. 284–289.
- ^ Castel 1992, p. 113.
- ^ Battles & Leaders 1987, pp. 289–292.
- ^ Battles & Leaders 1987, p. 281.
- ^ Castel 1992, p. 106.
- ^ Boatner 1959, pp. 30–32.
- ^ Cox 1882, p. 63.
- ^ Cox 1882, pp. 65–66.
- ^ Cox 1882, p. 68.
- ^ Cox 1882, pp. 70–73.
- ^ Foote 1986, p. 348.
- ^ Castel 1992, p. 226.
- ^ Cox 1882, pp. 73–75.
- ^ Cox 1882, pp. 76–77.
- ^ Castel 1992, pp. 229–230.
- ^ Castel 1992, p. 230.
- ^ Battles & Leaders 1987, p. 289.
- ^ Hennessy 1999, p. 391.
- ^ Castel 1992, p. 233.
- ^ a b Cox 1882, p. 79.
- ^ Castel 1992, pp. 230–231.
- ^ Castel 1992, pp. 233–235.
- ^ Battles & Leaders 1987, pp. 284–285.
- ^ Castel 1992, pp. 235–237.
- ^ a b Castel 1992, p. 237.
- ^ White 2014.
- ^ a b Castel 1992, p. 238.
- ^ Battles & Leaders 1987, p. 285.
- ^ Castel 1992, pp. 238–239.
- ^ Castel 1992, pp. 239–240.
- ^ a b c Castel 1992, p. 241.
- ^ a b American Battlefield Trust 2021.
- ^ a b Georgia State Parks 2021.
- ^ Cox 1882, pp. 77–78.
- ^ Cox 1882, p. 78.
- ^ a b Castel 1992, p. 242.
- ^ Castel 1992, pp. 243–246.
- ^ Cox 1882, p. 89.
- ^ Cox 1882, pp. 92–93.
- ^ Cox 1882, p. 99.
- ^ Castel 1992, pp. 261–262.
- ^ Noe 2007.
References
[edit]- Battles and Leaders of the Civil War. Vol. 4. Secaucus, N.J.: Castle. 1987 [1883]. ISBN 0-89009-572-8.
- Boatner, Mark M. III (1959). The Civil War Dictionary. New York, N.Y.: David McKay Company Inc. ISBN 0-679-50013-8.
- Castel, Albert E. (1992). Decision in the West: The Atlanta Campaign of 1864. Lawrence, Kansas: University Press of Kansas. ISBN 0-7006-0562-2.
- Cox, Jacob D. (1882). "Atlanta". New York, N.Y.: Charles Scribner's Sons. Retrieved October 17, 2021.
- Foote, Shelby (1986). The Civil War: A Narrative. Vol. 3. New York, N.Y.: Random House. ISBN 0-394-74622-8.
- Hennessy, John J. (1999). Return to Bull Run: The Campaign and Battle of Second Manassas. Norman, Okla.: University of Oklahoma Press. ISBN 0-8061-3187-X.
- Noe, Kenneth W. (2007). "Somebody Blundered: Marcus Woodcock, Ambrose Bierce, and "The Crime at Pickett's Mill"". The Ambrose Bierce Project. Retrieved October 21, 2021.
- "Pickett's Mill Battlefield State Historic Site". American Battlefield Trust. 2021. Retrieved October 17, 2021.
- "Pickett's Mill Battlefield". Stockbridge, Ga.: Georgia State Parks. 2021. Retrieved October 26, 2021.
- White, Lee (2014-05-27). ""A Common Despair"—The Slaughter of Pickett's Mill". Emerging Civil War. Retrieved 2020-10-27.
Primary source
[edit]- Bierce, Ambrose (2021). "The Crime at Pickett's Mill". American Battlefield Trust. Retrieved 2020-10-27. This is a first-person account of the battle.
External links
[edit]- Pickett's Mill at Civil War Virtual Tours
- Battle of Pickett's Mill
- Paulding County Historical Society & Museum
- Pickett's Mill Battlefield Historic Site photos from GeorgiaInfo: an Online Georgia Almanac
- The Ambrose Bierce Project
- The Crime at Pickett's Mill by Ambrose Bierce.
