German invasion of the Netherlands
| Battle of the Netherlands | |||||||
|---|---|---|---|---|---|---|---|
| Part of the Western Front of World War II | |||||||
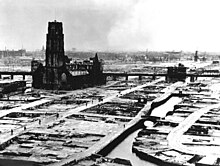 The centre of Rotterdam destroyed after bombing | |||||||
| |||||||
| Belligerents | |||||||
|
|
| ||||||
| Commanders and leaders | |||||||
|
|
| ||||||
| Strength | |||||||
|
9 divisions 700 guns[1] 1 tank 5 tankettes 32 armored cars[2] 145 aircraft[3] Total: 280,000 men |
22 divisions 1,378 guns 759 tanks 830 aircraft[4] Total: 750,000 men | ||||||
| Casualties and losses | |||||||
|
2,332 KIA (Dutch Army)[5] 8,000–9,000 wounded[5] 216 French KIA[5] 43 British KIA[5] Over 2,000 civilians killed[5] |
2,000–2,250 KIA[5] 7,000–7,500 wounded[5] 225–275 aircraft lost[5] 1,350 prisoners to England[5] | ||||||
The Battle of the Netherlands was part of the German invasion of France and the Low Countries (Belgium, Luxembourg, and the Netherlands) during World War II. The battle lasted from 10 May 1940 until the main Dutch forces surrendered on the 14th. Dutch troops in the province of Zealand continued to fight the until 17 May, when Germany occupied the whole nation.
The Battle of the Netherlands was one of the first major uses of paratroopers to land near important targets before ground troops reached the area. The German Luftwaffe used paratroopers to capture several major airfields in the Netherlands.
The battle ended soon after the terrible bombing of Rotterdam by the German Luftwaffe. The Germans threatened to bomb other large Dutch cities if Dutch forces refused to surrender. The Dutch surrendered to prevent other cities from being destroyed. The Netherlands was occupied by Germany until 1945.
Background
[change | change source]Britain and France declared war on Germany in September 1939, after Germany invaded Poland. No major land attacks happened in Western Europe during the winter of 1939–1940. During this time, the British and French built up their forces to get ready for a long war, and the Germans occupied Poland.[6] On 9 October, Adolf Hitler ordered plans for an invasion of the Low Countries. He wanted to use them as a base to attack Britain. He also wanted to prevent an attack by the Allied forces, which could threaten the Ruhr Area.[7]

The Dutch were not ready to stop an invasion. When Hitler came to power, the Dutch had begun to re-arm, but more slowly than France or Belgium. Only in 1936 did the Dutch government start to increase their defense budget.[8] Dutch governments did not see Germany as a military threat. Partly this was because they did not want to cause problems with an important trade partner.[9] The Dutch did not criticize Nazi policies.[10] The Dutch made strict budget limits in the Great Depression, which was hard on Dutch society.[11] Hendrikus Colijn, the Dutch Prime Minister between 1933 and 1939, did not think Germany would go against Dutch neutrality and invade the Netherlands.[12] Senior officers did not try to encourage improving military defence.[13]
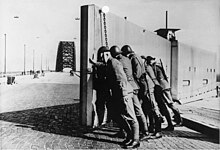
International stress grew in the late 1930s. Countries got concerned by the German occupation of the Rhineland in 1936; the Anschluss and Sudeten crisis of 1938; the German occupation of Bohemia and Moravia in 1939; and the Italian invasion of Albania in the spring of 1939.
These events made the Dutch government be more careful, but they limited their reaction as much as they could. Their most important reaction was to get 100,000 men ready to fight in April 1939.[14] After the German invasion of Poland in September 1939 and the start of the war, the Netherlands hoped to remain neutral. The Netherlands had been neutral during the First World War 25 years earlier.
The Dutch army was ready by 24 August and set up in trenches.[15] Large amounts of money (almost 900 million guilders) were spent on defence.[16] It was very difficult to obtain new weapons. The Dutch had ordered some equipment from Germany, which delayed deliveries.[17] A lot of the money was used for the Dutch East Indies (now Indonesia). A lot was spent on a plan to build three battle cruisers.[18]
The Low Countries' position between France and Germany made the area a good route for either side to attack the other. In a 20 January 1940 radio speech, Winston Churchill tried to get the Dutch to join with the British.[19] Both the Belgians and the Dutch refused, even though Belgium had learned about Germany's plans to attack.[20] The Allies planned to attack Germany in the summer of 1941. The French thought about going against the neutrality of the Low Countries and attacking them if they had not joined the Allies before then. If Germany attacked the Netherlands, the Allies would have to go through Belgium. The Allies also worried that the Netherlands might allow a German army into Belgium through the southern part of their lands.[21]
The Dutch government never decided what to do. Most of the ministers wanted to resist an attack. A minority refused to become a German ally.[22] The Dutch tried to organize a peace settlement between the Allies and Germany.[23]
After the German invasion of Norway and Denmark, followed by a warning by Japan that a German attack on the Netherlands was going to happen,[24] the Dutch military knew they would have to fight. They started to prepare for war. Dutch border troops were put on alert.[25] Reports of a Fifth Column (enemy agents acting in a country) in Scandinavia caused fears that the Netherlands also had German agents and traitors.[26] The Dutch prepared for attacks on airfields and ports.[27]
The Dutch hoped to avoid a war. On 10 April, Britain and France again asked the Dutch to enter the war on the Allies' side. Again, the Dutch refused.[28] On 19 April, the Netherlands declared a state of emergency.[29] Most civilians thought their country might not have a war.[30][31]
The Dutch forces
[change | change source]Dutch Army
[change | change source]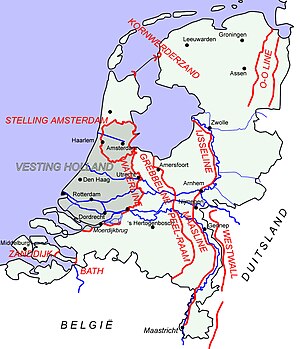
In the Netherlands, a good defence was possible. The land helped the defender, and there was a strong industrial base, including an arms industry. The Wehrmacht lacked equipment and training, but the Dutch army was very weak.[32]
The Germans had better equipment than the Netherlands. The German army had tanks and dive bombers (such as the Junkers Ju 87 Stuka). The Dutch army's armoured forces were only 39 armoured cars and five tankettes, and an air force of biplanes. The Dutch military had not got much new equipment since before the First World War.[33][34] During the 1920s, the Dutch government limited their defense budget because of an economic recession that lasted from 1920 until 1927.[11] In that decade, only 1.5 million guilders per year was spent on equipment.[35][36] Only in February 1936 was a bill passed creating a special 53.4 million guilder defence fund.[8] The lack of trained troops or good weapons made it hard to make the Dutch forces larger.[37] There was just enough artillery for the larger units. Light infantry battalions were spread all over the country to delay enemy movement.[38]
They had many pillboxes - about two thousand. [39].Modern large fortresses like the Belgian fortress of Eben Emael did not exist. The only modern fortification was the one at Kornwerderzand.
Total Dutch forces were 48 regiments of infantry and 22 infantry battalions for border defence. In comparison, Belgium had 22 full divisions and 30 divisions when smaller units were included.
After September 1939, the Dutch tried to improve the situation, but with little result. Germany delayed its deliveries of weapons. France did not want to sell weapons to an army that would not take its side. The Dutch could not get weapons from the other possible source, the Soviet Union, because the Dutch did not recognize their communist government.
Other countries had good armoured forces. The Dutch Army had two groups of armoured cars, each with a dozen vehicles;[40] A single platoon of five Carden-Loyd Mark VI tankettes was all the armour they had.
The Dutch Artillery had 676 howitzers and field guns: 310 Krupp 75 mm field guns; 52 105 mm Bofors howitzers, the only really modern pieces; 144 obsolete[41] Krupp 125 mm guns; 40 150 mm sFH13's; 72 Krupp 150 mm L/24 howitzers and 28 Vickers 152 mm L/15 howitzers. As antitank-guns 386 Böhler 47 mm L/39s were available, but there were not enough.[42] There were another three hundred old [43] 6 Veld (57 mm) and 8 Staal (84 mm) field guns. Only eight of the 120 modern 105 mm pieces ordered from Germany had been delivered at the time of the invasion. Most artillery was horse-drawn.[44]
The Dutch Infantry had about 2,200 7.92 mm Schwarzlose M.08 machine guns, and 800 Vickers machine guns. Many of these were in the pillboxes; each battalion had a heavy machine gun company of twelve. The Dutch infantry squads had a light machine gun, the M.20 Lewis machine gun of which about 8000 were available. This weapon often jammed and it was not good for attacks. Most Dutch infantry had the Dutch Mannlicher rifle. This weapon had been used for over 40 years, and it was out of date, but the Dutch military did not have the money to replace it. There were only six 80 mm mortars for each regiment. This made it hard for the Dutch infantry to fight.[45]
Despite the Netherlands having the company of Philips, one of Europe's largest producers of radio equipment, the Dutch army mostly used telephones. Only the Artillery had been given 225 radio sets.[44]
Risk of air assault
[change | change source]After the German attack on Denmark and Norway in April 1940, when the Germans used large numbers of airborne troops, the Dutch were worried about a similar attack. To stop this type of attack, five infantry battalions were put at the main ports and airbases, such as The Hague airfield of Ypenburg and the Rotterdam airfield of Waalhaven.[46] These were given AA-guns, two tankettes and twelve of the 24 operational armoured cars.[47] The Dutch put 32 hospital ships throughout the country and fifteen trains to help make troop movements easier.
Dutch Air Forces
[change | change source]The Dutch air force had 155 aircraft: 28 Fokker G.1 twin-engine destroyers; 31 Fokker D.XXI and seven Fokker D.XVII fighters; ten twin-engined Fokker T.V, fifteen Fokker C.X and 35 Fokker C.V light bombers, twelve Douglas DB-8 dive bombers (used as fighters)[48] and seventeen Koolhoven FK-51 reconnaissance aircraft. 74 of the 155 aircraft were biplanes. Of these aircraft 125 worked.[49]
The air force school used three Fokker D.XXI, six Fokker D.XVII, a single Fokker G.I, a single Fokker T-V and seven Fokker C.V, along with several training airplanes. Another forty aircraft were the marine air service along with about an equal number of reserve and training craft.[50]
There was a Dutch military aircraft industry, consisting of Fokker and Koolhoven. However, the Dutch military could not afford new planes.[51]
Training and readiness
[change | change source]The Dutch Army was poorly equipped. It was also poorly trained. There was little experience leading forces bigger than the battalion level. From 1932 until 1936, the Dutch Army did not hold summer field exercises to save money.[52] Also, soldiers lacked many skills. Until 1938, those who joined only served for 24 weeks, just enough to receive basic infantry training.[53] That same year, service time was increased to eleven months.[8] There were not many professional military staff. In 1940 there were only 1206 professional officers.[54]
Most available time was spent constructing defences.[55] During this period, munition shortages limited live fire training,[56] and units were not organized.[57] In May 1940, the Dutch Army was not ready for battle. It could not do a major attack or move around on the battlefield.[58]
German generals and Hitler thought that the Dutch military was weak. They expected that Holland could be captured in about three to five days.[47]
Dutch defensive strategy
[change | change source]Structural elements
[change | change source]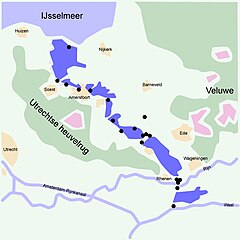
In the 17th century, the Dutch Republic had developed a defensive system called The Dutch Water Line. It could protect all major cities in the west by flooding part of the countryside. In the early 19th century this line was shifted to the east, beyond Utrecht. Later, fortresses were built. This new position was called the New Holland Water Line. The line was given new pillboxes in 1940. The line was below sea level. This allowed it to be flooded with a few feet of water. This was too shallow for boats, but deep enough to turn the soil into mud. The area west of the New Holland Water Line was called Fortress Holland. The eastern side was covered by Lake IJssel and the southern side protected by three rivers. It was expected to hold out for a long period of time.[59]
Some people thought the defences would protect the country for three months without any Allied help.[60][61] Before the war the intention was to move to this position, and hope that Germany would only travel through the southern provinces on its way to Belgium and leave Holland undamaged. In 1939, this attitude made it impossible to negotiate with the Allies about defence. Proposals by German diplomats that the Dutch government would accept a German advance into the country were rejected.[62]
From September 1939 a more easterly Main Defence Line was built. This second defensive position was dug on orders from the commander of the Field Army, Lieutenant-General Jan Joseph Godfried baron van Voorst tot Voorst.[63] This line was extended by a southern part between the river Maas and the Belgian border. In the south the goal was to delay the Germans so that the French could advance.
Fourth and Second Army Corps were put at the Grebbe Line; Third Army Corps were put at the Peel-Raam Position with the Light Division behind it to cover its southern side. Brigade A and B were positioned between the Lower Rhine and the Maas. First Army Corps was a reserve in the Fortress Holland, the southern edge of which was protected by another ten battalions and the eastern side by six battalions.[64] All these lines were protected by pillboxes.[59]
Positioning of troops
[change | change source]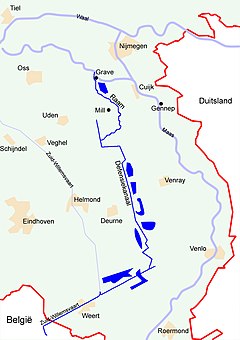
In front of this Main Defence Line was the IJssel-Maaslinie. It had pillboxes and fourteen "border battalions". Late in 1939 General Van Voorst tot Voorst wanted to use the rivers as a defence. He proposed a battle at the crossing sites near Arnhem and Gennep to force the German divisions to use a lot of their energy before they reached the Main Defence Line[63] This was deemed too risky by the Dutch government and General Reijnders. The Government wanted the army to resist at the Grebbe Line and Peel Raam Position, and then fall back to the Fortress Holland.[65] Reijnders was not given full military authority in the defence zones.[66][67] On 5 February 1940 he resigned because of these disagreements with his superiors.[68] He was replaced by General Henry G. Winkelman who decided that in the north the Grebbe Line would be where the battle was to be fought,[69] partly because it would be easier to counterattack.[70]
During the Phoney War the Dutch said they were neutral. In secret, the Dutch military[71] talked with both Belgium and France to organize a common defence to a German invasion.[72] This failed because of differences of opinion about which strategy to follow.
Coordinating with Belgium
[change | change source]Belgium, though it said it was neutral, had made arrangements for working with Allied troops. This made it more difficult for the Dutch to make arrangements with the Belgians.[73] He did not approve of a plan by Van Voorst tot Voorst to occupy the "Orange Position[74] to form a continuous line with the Belgian lines.[75]
When Winkelman took over command, he proposed on 21 February that Belgium would set up a connecting line with the Peel Raam Position along the Belgian part of the Zuid-Willemsvaart.[76] The Belgians refused to do this unless the Dutch sent in new troops to Limburg. The Dutch had no forces available. Repeated Belgian requests to defend the Orange Position were refused by Winkelman.
The Belgians decided to withdraw, in an invasion, all their troops to their main defence line, the Albert Canal. This created a gap forty kilometres wide.[77] The French were asked to fill it.[78] The French Commander in Chief General Maurice Gamelin was more than interested in including the Dutch in his continuous line. But he would not stretch his supply lines that far unless the Belgians and Dutch would take the allied side. When both nations refused, Gamelin said he would occupy a position near Breda.[21]
Winkelman decided on 30 March[79] to abandon the Peel-Raam Position after a German attack. He withdrew his Third Army Corps to the Linge.[80] This Waal-Linge Position was planned to have pillboxes; the budget for pillboxes was increased with a hundred million guilders.[81]
French strategy
[change | change source]In addition to the Dutch Army and the German 18th Army, a third force would operate on Dutch soil: the French 7th Army. Both the French and the Germans saw the possibility of a surprise attack. For the Germans this would mean bypassing the Antwerp-Namur line. Rapid forces were needed to protect important locations from the enemy. Long before the Germans did, the French had thought of using airborne troops to do speedy attacks. A naval division and an infantry division were set to go to Zealand to block the Western Scheldt against a German crossing. General Gamelin feared the Dutch would surrender or accept German protection. He reassigned the former French strategic reserve, the 7th Army, to go in front of Antwerp. Together with the two divisions in Zealand, seven French divisions were to be used.[82]
Although the French troops would have more motorised units than the Germans, they could not hope to reach their places in the battle before the enemy did. Their only prospect of beating the Germans was using rail transport. They would have to build up their forces near Breda. They needed the Dutch troops in the Peel-Raam Position to delay the Germans for a few extra days to allow French forces to move in and dig trenches. These consisted of the reconnaissance units of the armoured and motorised divisions, with armoured cars. These would be put into two task forces.
German strategy and forces
[change | change source]During the plans for Fall Gelb the idea of leaving the Fortress Holland alone was considered.[83] The first plan of 19 October 1939 suggested a full occupation.[84] In the version of 29 October it was proposed to limit the invasion to a line south of Venlo.[85] In the Holland-Weisung (Holland Directive) of 15 November it was decided to conquer the entire south, but in the north to advance no further than the Grebbe Line, and to occupy the Frisian Isles.[86] Hermann Göring wanted a full capture of Holland as he needed the Dutch airfields to use against Britain. He was afraid the Allies might reinforce Fortress Holland and use the airfields to bomb German cities and troops.[86] A swift defeat would also free troops for other sectors.[87] On 17 January 1940[88] they decided to conquer all of the Netherlands. However, few units were available for this task. The main effort of Fall Gelb would be made in the centre, between Namur and Sedan. The attacks at central Belgium and the attack at Fortress Holland were only tricks.
Although both the 6th and 18th Army were in place at the Dutch border, the first, larger force would move south of Venlo to Belgium. This would leave just the 18th Army under General Georg von Küchler to attack the Dutch main force.[89] Of all German armies in the battle, this was the weakest. It contained only four regular infantry divisions and three reserve divisions. They had few professional officers and little fighting experience. Like the Dutch Army, most soldiers (88%) lacked training. The seventh division was the 526th Infantry Division, which lacked combat training. The German divisions had 17,807 men, fifty percent larger than their Dutch counterparts. They had twice their firepower, but even so they did mot have enough men for a successful attack. To add more men, the only German cavalry division, the 1st Kavalleriedivision was told to capture the weakly defended provinces east of the river IJssel. A landing in Holland near Enkhuizen was to be attempted, using barges.[87] As both efforts were unlikely to do well, the regular divisions were reinforced by the SS-Verfügungsdivision and Leibstandarte Adolf Hitler. These would attack the Dutch fortified positions.[90] Still this added only 11⁄3 division to the equation.
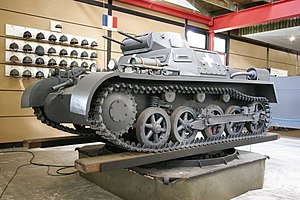
To ensure a victory the Germans used new methods. The Germans had trained two airborne divisions. The first of these, the 7. Flieger-Division, was paratroopers; the second, the 22nd Luftlande-Infanteriedivision, of airborne infantry.[91] The airborne troops would capture the airfields around The Hague, and then capture the government, together with the Dutch High Command and Queen Wilhelmina.[92]
The plan, Fall Festung, had been developed by Hitler.[93] If the first attack did not succeed, the bridges at Rotterdam, Dordrecht and Moerdijk would be captured to allow a mechanised force to move in. This force was to be the German 9th Panzer Division. They were the only German armoured division having just two tank battalions.[94] The total number of tanks in the group was 141.[95] The plan was for them to go through a gap in the Dutch lines created by the 254th and 256th Infantry Divisions. Then they would join up with them, forming the XXVI. Armeekorps.[87] At the same time, an attack would be made against the Grebbe Line in the east by the 207th and 227th Infantry Divisions, united to form X. Armeekorps,[90] to fight the Dutch Army.[96] The plan was to force the Dutch back to the east front of the Fortress Holland or beyond. If the Dutch did not surrender on the first day, the Eighteenth Army would attack Fortress Holland on the third day from the south.[91]
The Oster affair
[change | change source]The German people and troops disliked the idea of going against Dutch neutrality. The Germans said the invasion was to stop the Allies from occupying the Low Countries.[97] Some German officers did not like the Nazi government and were also unhappy with the invasion.[98]
One of them was Colonel Hans Oster, a German intelligence officer. In March 1939 he began to pass information to his friend, a Dutch military officer in Berlin Major Gijsbertus J. Sas.[99] This information included the German attack date.[100] Sas informed the Allies.[101][102] Sas knowing the date of the attack on Denmark and Norway was not noticed.[103] Though he said a German armoured division would try to attack the Netherlands and that there was a plan to capture the Queen, the Dutch defence plan was not changed.[104] On 4 May Sas warned that an attack was coming soon.[105] When in the evening of 9 May Oster phoned his friend saying the attack would be soon, the Dutch troops were put on alert.[106] Oster was a leader of the German resistance from 1938 to 1943, and was one of those hanged after the 20 July 1944 bomb plot to kill Hitler.[107]
The battle
[change | change source]10 May
[change | change source]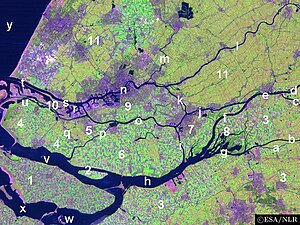
On the morning of 10 May 1940, Germany attacked the Netherlands, Belgium, France and Luxembourg.
In the night the Luftwaffe flew into Dutch lands. One group, Kampfgeschwader 4 (KG 4), attacked the Dutch airfields. Led by Oberst (Colonel) Martin Fiebig, KG 4 attacked the naval airfield at De Kooy, destroying 35 aircraft.[108] Fiebig was shot down and spent five days as a Dutch prisoner of war. KG 4 also attacked Amsterdam-Schiphol, where the Dutch lost a third of their medium bombers, and The Hague airfields where KG 4 destroyed half of the 21 defending fighters.[109] KG 4 lost 11 Heinkel He 111 bombers on 10 May and three Junkers Ju 88s; KG 30 and 54 another nine bombers.[110] Jagdgeschwader 26 (JG 26) and Zerstörergeschwader 26 (ZG 26) shot down 25 Dutch aircraft for a loss of nine fighters, with Albert Kesselring's Luftflotte 2 destroying 41. The Dutch were left with just 70 aircraft by the end of the day. They continued to fight the Luftwaffe, shooting down 13 German fighter aircraft by 14 May.[109]
Paratroopers were landed near the airfields. Dutch anti-aircraft batteries shot down numerous Ju 52 transport planes. German Ju 52 losses in the battle were about 250 planes.

The attack on The Hague was a failure. The paratroopers did not capture the main airfield at Ypenburg in time for the airborne infantry to land in their Junkers. Five Landsverks, assisted by machine guns, destroyed the eighteen Junkers, killing many troops.[111] When the airstrip was blocked by wrecks the remaining planes landed in meadows or on the beach, spreading out the troops. The small airfield of Ockenburg was captured by the Germans.
The airfield of Valkenburg was occupied. The landing strip was still being built and the water level had not yet been lowered: planes landing there sank in the soft soil.
None of the airfields could be used to land new troops. The paratroopers occupied Ypenburg but did not get into The Hague. They were blocked by Dutch troops. Early in the afternoon they were fired on by three Dutch artillery batteries.[112] Dutch artillery drove away the German troops from the other two airfields.[113]

The attack on Rotterdam was much more successful. Twelve Heinkel He 59 seaplanes landed in the city. They captured the Willemsbrug, a bridge over the Nieuwe Maas.[114] At the same time the military airfield of Waalhaven was attacked by airborne forces.[115] Here an infantry battalion was close to the airfield. The paratroopers landed near them. A fight followed. The first group of Junkers suffered no losses and the transports continued to land. In the end the Dutch defenders were defeated. The Germans occupied IJsselmonde.
The Royal Netherlands Navy's torpedo boats Z5 and TM 51 attacked the Willemsbrug. The destroyer HNLMS Van Galen sailed up the Nieuwe Waterweg to bomb the airfield, but the ship got bombed. A plan to send the gunboats HNLMS Flores and HNLMS Johan Maurits van Nassau was stopped.[116]
At the Island of Dordrecht the Dordrecht bridge was captured but the Dutch fought on.[117] The long Moerdijk bridges were captured and fortified on the southern side.[118]

The Germans, doing a plan approved by Hitler,[119][120] tried to capture the IJssel and Maas bridges. During the night of 10 May they approached the bridges. Most of these attempts failed and the bridges were blown up. The exception was the Gennep railway bridge.[121] An armoured train crossed it followed by a troop train, which unloaded an infantry battalion behind the defence line.[122]
Generally German soldiers behaved in a civilised manner towards the Dutch population, buying food at the shops.
After the failed assaults on the bridges, the German divisions began crossing over the rivers IJssel and Maas. The first attacks were destroyed by fire from the pillboxes.[123] At most places, bombing destroyed the pillboxes and the infantry divisions crossed the river by building pontoon bridges. At Arnhem, Leibstandarte Der Fuehrer led the attack and advanced to the Grebbe Line, followed by 207. Infanteriedivision.

A withdrawal was planned for the first night after the invasion, in the darkness. Due to the rapid German advance a quick retreat was ordered at 06:45.[124] The corps joined "Brigade G",[125] six battalions already occupying the Waal-Linge line.
The Light Division, based at Vught, was the only force the Dutch Army had that could move about. Its withdrawal had been done a day early. Its regiments had reached the Noord river in the evening.[126]
On the evening of the 10th, around 22:00, French troops using Panhard 178 armoured cars started to arrive at the Dutch border. After them, the French 1st Mechanised Light Division moved forward. Attempts to get the French to move forward with the Dutch troops towards Noord-Brabant did not work well. When a first attack had been stopped, an attack at the Main Defense Line was postponed because most artillery had not arrived. In the early evening, they attacked even though there was only one 105 mm battery.[127]
Colonel Schmidt at 20:30 ordered the Peel-Raam Position to be abandoned. He told his troops to go to the west at a new line at the Zuid-Willemsvaart canal.[128] In the North, by the end of the day, 1. Kavalleriedivision had reached the line Meppel–Groningen. They were delayed by Dutch teams blowing up 236 bridges. Dutch troop strength in that area was weak.[129] In the south, the six border battalions in the province of Limburg delayed the advance of the German Sixth Army. Before noon Maastricht had surrendered. The Germans did not capture the main bridge intact. This delayed the crossing by the 4th Panzer Division until the next day.
11 May
[change | change source]On 11 May the Dutch commander General Winkelman had two goals. First of all he wanted to kill the German airborne troops. He thought that the German possession of the Moerdijk bridges would stop the movement of new Allied troops.[130] The second goal was to help the French army to make a strong defensive line in North Brabant.[131] Little was achieved this day. The attack by the Light Division against the airborne troops on IJsselmonde failed. The bridge over the river Noord was defended by the German paratroopers, and it was impossible to cross it. Several attempts to cross the river by boats were not that successful.[132] At 10:15, the Light Division was told to join the Dutch troops on the Island of Dordrecht.[133] After killing German troops on the Island of Dordrecht the division was to advance into IJsselmonde over the Dordrecht bridge to reach Rotterdam.
Earlier during the day, two attempts were made by Dutch battalions to attack the western side of the German line. The First Battalion tried to attack the bridge at Barendrecht into IJsselmonde.[134] The second battalion tried to capture more land.[135] Although its crossings were successful, the first battalion was attacked by the Germans. The second battalion had many men being taken prisoner.[136]
Then a French force and another Dutch border battalion attacked the southern Moerdijk bridge, but the armoured cars were bombed by German Stukas and had to retreat.[137]

In Rotterdam, the Dutch failed to kill the German airborne troops from their bridge on the northern bank of the Maas.[116] The two remaining Dutch bombers failed to destroy the Willemsbrug. None of the attempts to kill the 1600 paratroopers and airlanded forces was successful.
In North Brabant, the situation got worse. The French commanders of the 7th Army had expected that Dutch fighting would give them four days to build up a defensive line near Breda. However, the best three divisions had been moved to the north and the remaining forces were retreating.[138]
The withdrawal of the Peel Division from the Peel-Raam Position to the Zuid-Willemsvaart, a canal to the west, meant leaving behind their trenches and artillery for a totally unprepared line. The eastern bank of the canal was higher than the western bank, providing excellent cover for the attackers. One part of the canal, near Heeswijk, was left undefended;[139] as this area contained a bridge which was not destroyed, the Germans were able to cross the canal around 13:00. A second crossing at Erp, led to a collapse of the line.[140] By the end of the 11th, the Germans had crossed the Zuid-Willemsvaart at most places and the Peel Division had fallen apart.[138] The French refused to advance further to the northeast than Tilburg, apart from some armoured cars that went as far as Berlicum.
Winkelman asked the British government to sent an Army Corps to add to allied positions in the area and bomb Waalhaven airfield.[141]
Motorised elements of SS Standarte "Der Fuehrer" had reached the southernmost part of the Grebbe Line, in front of the Grebbeberg, on the evening of the 10th.[142] This Main Defense Line sector was protected by a line of outposts and two groups of infantry.[143] At about half past three in the morning of the 11th, German artillery started bombing the outposts. At dawn, two battalions of Der Fuehrer attacked. As the German bombing had cut the telephone lines, no artillery could be requested by the Dutch defenders. The vegetation offered good cover for the attackers.[144] At noon, the Germans broke a hole at the extreme north.[145] By evening, all outposts were held by the Germans.[146]
The commander of 2nd Army Corps, Major-General Jacob Harberts, did not realise that motorised SS troops had been involved in the attack. He thought that the outposts had surrendered to a small German force.[147] He ordered a night attack by the single reserve battalion of 4th Division.[148] This attack was abandoned. However, heavy Dutch artillery fire caused the Germans to abandon their plans for a night attack.[149]
Meanwhile, in the North, 1. Kavalleriedivision advanced through the province of Friesland, reaching Sneek in the evening. Most Dutch troops had been evacuated from the north.[150]
12 May
[change | change source]On the morning of 12 May General Winkelman still had hope.[151] He thought a defence line could be set up in North Brabant with the help of the French. He also expected that the Dutch could kill the German airborne forces. He was not aware of any danger to the Grebbe Line.[152]
9. Panzerdivision crossed the Meuse in the early morning of 11 May. It could not advance quickly over roads filled with infantry. The armoured division was told to join with the airborne troops as soon as the Peel-Raam Position had been captured by the infantry forces.
Because the German 6th Army was threatening its right side and there was no time to prepare a defence line, Gamelin ordered the 7th Army to withdraw its left side. 2e Brigade Légère Mécanique retreated to the south.
The 9th Panzer Division took Colonel Schmidt prisoner. The Dutch troops in the province lost their commander.[153] Shortly after noon the German armoured cars got thirty kilometres more to the west, cutting off the Fortress Holland from the Allied main force. At 16:45 they had reached the bridges.[154]
At 13:35 Gamelin ordered a withdrawal to Antwerp of all French troops in North-Brabant.[155]
The Light Division tried to recapture the Island of Dordrecht by advancing with four battalions with little artillery support.[156] On its left side, where there was almost no enemies, the advance went well. The battalion on the right side ran into an attacking German battalion.[157] In the street fighting the German troops blocked the battalion. The other Dutch units then halted their advance around noon.[158]

In the east the Germans attacked the Dutch defenders on the Grebbeberg. After artillery bombing in the morning, at around noon a battalion of Der Fuehrer attacked the main line, occupied by a Dutch company.[159] The Germans got through the thin line.[160] A second German battalion then attacked to the north. Dutch artillery, though equal in strength to the Germans, did not fire on the enemy infantry. Due to a lack of numbers, training, and heavy weapons, the attacks failed against the well-trained SS troops. By the evening the Germans had the area under their control.[161]
The Dutch knew that the forces on the Grebbe Line would not be strong enough to stop all attacks by themselves. They were intended to delay an attack long enough for new troops to be sent. In the late evening it was decided to attack from the north the next day.[162]
In the North, the Wons position had a long perimeter of about nine kilometres, which gave space for retreating troops.[150] On 12 May units with a combined strength of only two battalions were still present, so the line was weakly held. The first German unit to arrive broke through. This forced the defenders to withdraw to the Enclosure Dike.[163]
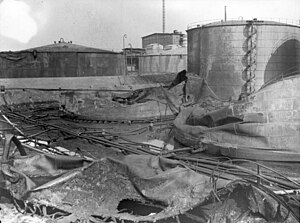
General Winkelman ordered the artillery in the Hoekse Waard to try to destroy the Moerdijk bridges and sent a team to Rotterdam to blow up the Willemsbrug. He also ordered the oil reserves of Royal Dutch Shell at Pernis to be set on fire.[164]
The Dutch government asked Winston Churchill for three British divisions to battle the Germans. The new prime minister said he did not have any reserves; however, three British torpedo boats were sent to Lake IJssel.[165] The 2nd Welsh Guard battalion was prepared to be sent, but it was too late.
The German command was very happy with the day's events. Von Bock had requested another Army Corps.[91][166] The French were retreating. von Bock decided to follow the French south towards Antwerp. Some forces would be sent to advance north with 254. Infanteriedivision, most of 9. Panzerdivision, and SS Leibstandarte Adolf Hitler.[167]
13 May
[change | change source]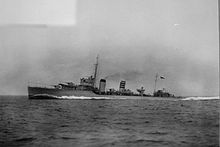
In the early morning of 13 May General Winkelman told the Dutch government that there were serious problems. On land the Dutch had been cut off from the Allied front and no major Allied landings were planned by sea. Without support, there was no hope of successful resistance.
German tanks might quickly pass through Rotterdam; Winkelman had already ordered all antitank-guns to be placed around The Hague, to protect the government. However, a collapse of the Dutch defences might still be prevented if attacks could seal off the southern front near Dordrecht and restore the eastern line at the Grebbeberg. Therefore, the cabinet decided to continue the fight,[168] giving the general the power to surrender the Army when he thought he had to.
Queen Wilhelmina was brought to safety; she left around noon from Hoek van Holland, where a British Irish Guards battalion was present,[169] on HMS Hereward, a British destroyer, and went to England.[170] The previous evening, the Queen's only child and Princess Juliana, together with her husband and their children, had departed from IJmuiden on HMS Codrington for Harwich.[171] As the Queen was part of the government, when she left, the cabinet had to whether to follow her or remain. After many discussions it was decided to leave also: the ministers sailed at 19:20 from Hoek van Holland on HMS Windsor to form a government in exile in London.[172] Three Dutch merchant ships, escorted by British warships, transferred government gold and diamonds to the United Kingdom.[173]
While two tank companies of 9. Panzerdivision remained to pursue the French, the other four began to cross the Moerdijk bridge at 05:20.[164] Two staff companies with tanks also went to the northern side. The Dutch attempted to block the German armour. At around 06:00 the last medium bomber, a Fokker T. V, dropped two bombs on the bridge. The one bomb that hit the bridge did not explode. The bomber was shot down. The Dutch tried to destroy the bridge by artillery fire, but the bridge was only slightly damaged.[174] Attempts to flood the Island of Dordrecht failed.[175] The Light Division tried to advance to the west. However, two of the four battalions could not recapture the suburbs of Dordrecht.[176] When the other two battalions approached the main road, they were met by a few dozen German tanks. The battalions were hit by a Stuka bombing and they fled to the east. 47mm and 75 mm batteries halted the attack of the German tanks. The left part of the Light Division then withdrew to the Alblasserwaard at around 13:00.[177] A tank company also tried to capture the Dordrecht, but it was ordered to retreat after heavy street fighting.[178] in At least two Panzerkampfwagen IIs were destroyed and three tanks heavily damaged. All Dutch troops were withdrawn from the island in the night.[179] German armoured forces advanced north over the Dordrecht bridge into IJsselmonde island. Three tanks, two PzKpfw. IIs and a Panzerkampfwagen III attacked the Barendrecht bridge into the Hoekse Waard. All of them were destroyed by a single 47 mm antitank-gun. Though the Germans did not make another attack, this area was abandoned by the Dutch troops.[175]

In Rotterdam a last attempt was made to blow up the Willemsbrug.[180] Two Dutch companies attacked the bridge.[181] The bridge was reached and the fifty German almost surrendered. However, the attack was stopped because of heavy fire from the other side of the river.[182]
In the North, the commander of 1. Kavalleriedivision, Major General Kurt Feldt, had to go over the Enclosure Dike because of a lack of ships.[163] The main fortifications contained 47 mm antitank-guns. There was no cover for any attacker.[183] On 13 May the position was reinforced by a 20 mm anti aircraft battery.[184] It had been Feldt's intention to destroy the position by mortars, but the train transporting it had been blocked on 10 May by a blown railway bridge at Winschoten. Several air attacks on 13 May had little effect.[184] In the late afternoon five sections tried to attack under cover of an artillery bombing, but soon fled after being fired upon.[185] In the East the Germans tried to attack the Grebbe Line by using the other division of X. AK, 227. Infanteriedivision.[186] The line was in this area defended by the Dutch 2nd Infantry Division. Two German regiments were to attack.[187] The 366. Infanterieregiment was hit by Dutch artillery fire and had to withdraw. This led to the failure of the attack by 227 Infanteriedivision.[188]
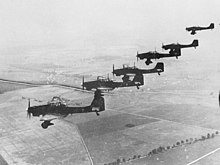
On the south of the Grebbe Line, the Grebbeberg, the Germans were now using three SS battalions. During the evening and night of 12–13 May the Dutch had a dozen[189] However, not all of these units could be put together to attack the main line.[162] This Dutch attack was delayed for several hours. When it started in the morning of 13 May, it ran into an attack by two battalions of Der Fuehrer.[190] A fight followed in which the Dutch were beaten by the SS troops. Soon this resulted in withdrawal of the brigade. The Dutch lost when the Grebbeberg area was bombed by 27 Ju 87 Stukas.[191] 207. Infanteriedivision was sent into battle at the Grebbeberg. The first German attackers were stopped with serious losses. A second attack managed to get past the trench line, which then was captured after heavy fighting.[192][193]
The Germans planned to attack and take the Rhenen line and the village of Achterberg. However, the Dutch had already disappeared. The Stuka bombing scared the reserves at Rhenen. In the morning these troops left the battlefield because of German fire.[194] In the late afternoon most of 4th Infantry Division was fleeing westwards.[195]
The German had expected that the Dutch would attempt to fill any gaps in the line.[196] The Dutch planned to send two regiments of the Dutch 3rd Army Corps north to fill any gaps.[197] Dutch command had lost control, so they could not get their defences set up again. A 8 km (5.0 mi) wide gap had appeared in the defences. At 20:30 Van Voorst tot Voorst ordered the three Army Corps to abandon the Grebbe Line and the Waal-Linge Position and to retreat.[198]
14 May
[change | change source]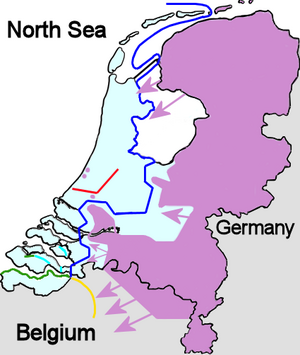
Despite his loss of hope and the power he had been given to surrender the Army, General Winkelman avoided surrendering until he had to. He wanted to battle the German troops for as long as possible, to help the Allied war effort.[199][200]
In the North, a German artillery bombardment of the Kornwerderzand Position began at 09:00. However, the German batteries were forced to move away after being fired on from the 15 cm. aft cannon of Hr. Ms. Johan Maurits van Nassau.[201] Feldt now decided to land on the coast of North-Holland.
A few barges were found; only after the surrender was the crossing done. During this operation one barge sunk and the others got lost. Winkelman on 12 May ordered the defence of an "Amsterdam Position" along the North Sea Canal, but only weak forces were available.[202] In the East, the field army withdrew from the Grebbe Line to the East Front. The new position had some problems. The flooding was mostly not yet ready and the earthworks had not yet been constructed.[203]
On IJsselmonde the German forces prepared to cross the Maas in Rotterdam, which was defended by about eight Dutch battalions. Crossings would be attempted in two sectors. The main attack would take place in the centre of the city, with the German 9th Panzer Division advancing over the Willemsbrug. Then SS Leibstandarte Adolf Hitler would cross. East of Rotterdam, a battalion of the 16th Infantry Regiment of 22. Luftlandedivision would cross on boats. The Germans decided to use air support.[204] Kampfgeschwader 54, using Heinkel He 111 bombers, was shifted from Sixth to Eighteenth Army.[205]

Generals Kurt Student and Schmidt wanted a limited air attack to temporarily stop the defences.[206] However, Luftwaffe commander Hermann Göring, worried about his surrounded airborne troops, wanted a total bombing of Rotterdam.[207]
At 09:00 a German messenger crossed the Willemsbrug to bring a message from Schmidt to Colonel Pieter Scharroo, the Dutch commander of Rotterdam, demanding a surrender of the city. If an answer had not been received within two hours, severe destruction would be done.[208] Scharroo did not receive the message until 10:30. He did not want to surrender. He got a new message signed by Schmidt and that required an answer by 16:20. At 13:20 two groups of Heinkels arrived.[209]
Schmidt ordered red flares to be fired to signal that the bombing was to be stopped, but only the squadron from the southwest stopped its attack, after their first three planes had dropped their bombs. The other 54 Heinkels dropped 1308 bombs,[210] destroying the inner city and killing 814 civilians. The fires destroyed about 24,000 houses, making almost 80,000 people homeless.[211] At 15:50 Scharroo surrendered to Schmidt in person.[212] Göring had ordered a second bombing of the city to be carried out unless the whole of Rotterdam was occupied.[213] When Schmidt heard the order, he sent a message at 17:15 claiming the city was taken, but this was not true. The bombers were called back just in time.[214]
The surrender of the Dutch Army
[change | change source]
Winkelman at first intended to continue the fight. Bombings were not seen as a reason to surrender.[215] The Hague could still fight off an armoured attack.[216] He got a message from Colonel Cuno Eduard Willem baron van Voorst tot Voorst, the commander of the city of Utrecht, that the Germans demanded its surrender. Messages were dropped by planes saying that only surrender would stop the city from being destroyed.[217] Winkelman thought the Germans would bomb any city offering any resistance, Since he was told to avoid suffering and since the Dutch military was weak, he decided to surrender.[218] All army units were informed at 16:50 by of his decision and ordered to destroy their weapons and surrender to the nearest German units. At 17:20 the German envoy in The Hague was informed.[219] At around 19:00 Winkelman gave a radio speech informing the Dutch people. This was also how the German command became aware the Dutch had surrendered.[220]

On the morning of 14 May the commander of the Royal Dutch Navy, Vice-Admiral Johannes Furstner, left the country to continue the fight.[216] Dutch naval vessels were generally not included in the surrender. Eight ships had already departed,[221] some smaller vessels were sunk, and nine others sailed for England in the evening of 14 May. The Hr. Ms. Johan Maurits van Nassau was sunk by German bombers while crossing.[222]
The commander of the main Dutch naval port of Den Helder, Rear-Admiral Hoyte Jolles, decided that his base, with 10,000 troops, its own air service, and land defences, should continue to fight. Winkelman had to convince him to obey the surrender order.[223] Large parts of the Dutch Army did not want to accept the surrender.[224]
At 05:00 on 15 May a German messenger reached The Hague, inviting Winkelman to Rijsoord for a meeting with von Küchler to make a written surrender. Winkelman surrendered the army, naval and air forces.[225] The document was signed at 10:15[226]
The fighting in Zealand
[change | change source]The province of Zealand not part of the surrender. Fighting continued alongside French troops. The Dutch forces in the province had eight full battalions of army and naval troops.[227] They were commanded by Rear-Admiral Hendrik Jan van der Stad.[154] The area was under naval command because of the naval port of Flushing on the island of Walcheren. The northern islands of the province were almost undefended apart from some platoons.
The defence of Zeeuws-Vlaanderen, the Dutch part of Flanders, was left to the Allies. The main Dutch army forces were in Zuid-Beveland east of Walcheren. They tried to block this route to Vlissingen. Zuid-Beveland was connected to the coast of North Brabant. At its eastern end, Bath Position was defended by an infantry battalion. At its western end was the Zanddijk Position, occupied by three battalions.[228]
On 10 May three French motorised units went to North Brabant. From 11 May the area was reinforced by two French infantry divisions: the 60e Division d'Infanterie,[82] a B-class division, and the newly formed naval 68e Division d'Infanterie. Part of their equipment was brought by ship. Most troops remained where two of the eight Dutch battalions and two border companies were located. Only two French regiments were sent to the northern bank. On 13 May the Dutch troops were placed under French command and 68e Division d'Infanterie was transferred to the 7th Army.[229]
There was poor communications, misunderstandings and disagreements between the Dutch and the French. The Dutch considered the Bath and Zanddijk Positions to be defendable because of the flooding. However, the French commander General Pierre-Servais Durand wanted his troops hidden behind obstacles.
On the evening of 13 May one regiment, the 271e of 68e Division d'Infanterie, occupied the canal through Zuid-Beveland. The 224e of 60 Division d'Infanterie stayed in the area separating the island of Walcheren from Zuid-Beveland. The Allied forces were not grouped together enough, which enabled the Germans to defeat them even though they had less men.[230]
On 14 May the Germans had occupied almost all of North Brabant. SS-Standarte Deutschland reached the Bath Position.[227] This cut off the retreat of 27e Groupe de Reconnaissance de Division d'Infanterie, which was destroyed defending Bergen-op-Zoom. The morale of the defenders of the Bath Position weakened by news that Winkelman had surrendered. Many decided that it was useless that Zealand kept fighting as the last remaining province. An artillery bombing on the position in the evening of 14 May caused the commanding officers to leave. Then the troops left.[231]
In the morning of 15 May SS-Standarte Deutschland approached the Zanddijk Position. A first attack around 08:00 on the northern sector was stopped, as the Germans had to advance over a narrow dike.[232] However, the bombing caused the battalions in the main positions to flee,[233] and the entire line was abandoned around 14:00.[234]
On 16 May SS-Standarte Deutschland approached the canal through Zuid-Beveland. The French 271e Régiment d’Infanterie was partly dug in and helped by three Dutch battalions. An air bombing was done that morning. The first German crossings around 11:00 led to a complete collapse of the defence.[235] On 16 May the island of Tholen was captured. On 17 May Schouwen-Duiveland was captured.[236] The commanders of the Dutch troops on South-Beveland refused commands to attack the Germans. On 17 May a night attack at 03:00 failed. The Germans now demanded the surrender of the island. When this was refused they bombed Arnemuiden and Flushing. Middelburg, the province's capital city, was shelled by artillery, its inner city partially burning down. The heavy bombing made the French defenders lose hope. The Germans managed to capture a bridge around noon.[237] The few Dutch troops on Walcheren, about three companies, stopped fighting. In the evening the Germans threatened to attack the French forces in Flushing, but most troops were evacuated over the Western Scheldt.[238]
After North-Beveland had surrendered on 18 May, Zeeuws-Vlaanderen was the last remaining unoccupied Dutch territory. On orders of the French, all Dutch troops were withdrawn on 19 May to Ostend in Belgium. On 27 May all of Zeeuws-Vlaanderen had been occupied.[239]
Aftermath
[change | change source]Following the Dutch defeat, Queen Wilhelmina established a government-in-exile in England.[240] The German occupation began on 17 May 1940. It would be five years before the entire country was liberated. Over 210,000 Dutch people became victims of war, including 104,000 Jews and other minorities, who were killed because of their race (genocide). Another 70,000 more Dutch people died from poor nutrition or limited medical services.[241]
Related pages
[change | change source]Notes
[change | change source]- ↑ Goossens, Dutch armament: Artillery, waroverholland.nl
- ↑ Goossens, Dutch armament: Miscellaneous, waroverholland.nl
- ↑ Goossens, Dutch armament: Military airplanes, waroverholland.nl
- ↑ Hooton 2007, p. 48
- ↑ 5.0 5.1 5.2 5.3 5.4 5.5 5.6 5.7 5.8 Goossens, Balance Sheet, waroverholland.nl
- ↑ Shirer (1960), p. 633
- ↑ Frieser (2005), p. 74
- ↑ 8.0 8.1 8.2 Amersfoort (2005), p. 77
- ↑ De Jong (1969), p. 438
- ↑ De Jong (1969), p. 506
- ↑ 11.0 11.1 Amersfoort (2005), p. 67
- ↑ De Jong (1969), p. 541
- ↑ De Jong (1969), p. 542
- ↑ De Jong (1969), p. 570
- ↑ De Jong (1969), p. 642
- ↑ De Jong (1969b), p. 363
- ↑ Amersfoort (2005), p. 78
- ↑ De Jong (1969), p. 548
- ↑ De Jong (1969b), p. 129
- ↑ De Jong (1969b), p. 203-208
- ↑ 21.0 21.1 Amersfoort (2005), p. 92
- ↑ De Jong (1969b), p. 143
- ↑ De Jong (1969b), p. 144
- ↑ De Jong (1969b), p. 254
- ↑ De Jong (1969b), p. 251
- ↑ De Jong (1969b), p. 254-256
- ↑ De Jong (1969b), p. 256-258
- ↑ De Jong (1969b), p. 249
- ↑ De Jong (1969b), p. 258
- ↑ De Jong (1969b), p. 392
- ↑ De Jong (1969b), p. 393
- ↑ De Jong (1969b), p. 324
- ↑ Amersfoort (2005), p. 64
- ↑ De Jong (1969b), p. 362
- ↑ Amersfoort (2005), p. 72
- ↑ Amersfoort (2005), p. 73, 76
- ↑ Amersfoort (2005), p. 79
- ↑ De Jong (1969b), p. 351
- ↑ De Jong (1969), p. 562
- ↑ Schulten (1979), p. 38-40
- ↑ De Jong (1969b), p. 331
- ↑ De Jong (1969), p. 545
- ↑ De Jong (1969b), p. 332
- ↑ 44.0 44.1 De Jong (1969b), p. 327
- ↑ De Jong (1969b), p. 330
- ↑ Amersfoort (2005), p. 101
- ↑ 47.0 47.1 Amersfoort (2005), p. 188
- ↑ De Jong (1969b), p. 337
- ↑ Niels Hillebrand (15 May 2004). "Royal Netherlands Air Force, 1939–1945 Second World War". www.milavia.net. Retrieved 25 March 2010.
- ↑ De Jong (1969b), p. 338
- ↑ De Jong (1969b), p. 340
- ↑ De Jong (1969), p. 544
- ↑ Amersfoort (2005), p. 71
- ↑ De Jong (1969b), p. 344
- ↑ De Jong (1969b), p. 349
- ↑ De Jong (1969b), p. 329
- ↑ De Jong (1969b), p. 346
- ↑ De Jong (1969), p. 577
- ↑ 59.0 59.1 Amersfoort (2005), p. 84
- ↑ De Jong (1969b), p. 366
- ↑ De Jong (1969b), p. 322
- ↑ De Jong (1969b), p. 141
- ↑ 63.0 63.1 Amersfoort (2005), p. 87
- ↑ De Jong (1969b), p. 360
- ↑ De Jong (1969b), p. 197
- ↑ De Jong (1969b), p.194
- ↑ De Jong (1969b), p. 195-196
- ↑ De Jong (1969b), p. 216
- ↑ Amersfoort (2005), p. 94
- ↑ De Jong (1969b), p. 221
- ↑ De Jong (1969b), p. 148
- ↑ Amersfoort (2005), p. 90
- ↑ Amersfoort (2005), p. 97
- ↑ De Jong (1969b), p.191
- ↑ De Jong (1969b), p.229
- ↑ De Jong (1969b), p.230
- ↑ De Jong (1969b), p.231
- ↑ Amersfoort (2005), p. 96
- ↑ De Jong (1969b), p. 224
- ↑ Amersfoort (2005), p. 100
- ↑ De Jong (1969b), p. 225
- ↑ 82.0 82.1 Amersfoort (2005), p. 240
- ↑ Amersfoort (2005), p. 128
- ↑ De Jong (1969b), p. 62-63
- ↑ De Jong (1969b), p. 65
- ↑ 86.0 86.1 Amersfoort (2005), p. 129
- ↑ 87.0 87.1 87.2 Amersfoort (2005), p. 140
- ↑ De Jong (1969b), p. 283
- ↑ Amersfoort (2005), p. 138
- ↑ 90.0 90.1 Amersfoort (2005), p. 139
- ↑ 91.0 91.1 91.2 Amersfoort (2005), p. 142
- ↑ Amersfoort (2005), p. 143
- ↑ De Jong (1969b), p. 296-297
- ↑ Jentz (1998), p. 116
- ↑ Jentz (1998), p. 121
- ↑ De Jong (1969b), p. 305
- ↑ Amersfoort (2005), p. 145
- ↑ De Jong (1969b), p. 105
- ↑ De Jong (1969b), p. 106
- ↑ De Jong (1969b), p. 107
- ↑ De Jong (1969b), p. 126
- ↑ De Jong (1969b), p. 124-126
- ↑ De Jong (1969b), p. 244-247
- ↑ De Jong (1969b), p. 323
- ↑ De Jong (1969b), p. 308
- ↑ Amersfoort (2005), p. 103
- ↑ Shirer, William L (1960). The Rise and Fall of the Third Reich. New York: Simon & Schuster. pp. 1024, 1073. ISBN 0-671-62420-2.
- ↑ Grimm, P. e.a., 2008, Verliesregister 1939–1945. Alle militaire vliegtuigverliezen in Nederland tijdens de Tweede Wereldoorlog. Verliesregister 1940, Studiegroep Luchtoorlog 1939–1945, Nederlands Instituut voor Militaire Historie p. 21–27
- ↑ 109.0 109.1 Hooton 1994, p. 241.
- ↑ Grimm, P. e.a., 2008, Verliesregister 1939-1945. Alle militaire vliegtuigverliezen in Nederland tijdens de Tweede Wereldoorlog. Verliesregister 1940, Studiegroep Luchtoorlog 1939-1945, Nederlands Instituut voor Militaire Historie p. 22–27
- ↑ Amersfoort (2005), p. 192
- ↑ Amersfoort (2005), p. 197
- ↑ Amersfoort (2005), p. 199
- ↑ Amersfoort (2005), p. 341
- ↑ Amersfoort (2005), p. 340
- ↑ 116.0 116.1 Amersfoort (2005), p. 363
- ↑ Amersfoort (2005), p. 338
- ↑ Amersfoort (2005), p. 336
- ↑ De Jong (1969b), p. 201
- ↑ Kurowski, F. (2004). Deutsche Kommandotrupps 1939–1945: 'Brandenburger' und Abwehr im weltweiten Einsatz, Motorbuch Verlag, p 51
- ↑ Amersfoort (2005), p. 215
- ↑ Amersfoort (2005), p. 220
- ↑ Amersfoort (2005), p. 218
- ↑ Amersfoort (2005), p. 153
- ↑ De Jong (1969b), p. 358
- ↑ Amersfoort (2005), p. 348
- ↑ Amersfoort (2005), p. 226
- ↑ Amersfoort (2005), p. 227
- ↑ Amersfoort (2005), p. 316–320
- ↑ Amersfoort (2005), p. 162
- ↑ Amersfoort (2005), p. 165
- ↑ Amersfoort (2005), p. 350
- ↑ Amersfoort (2005), p. 351
- ↑ Amersfoort (2005) p. 345
- ↑ Amersfoort (2005), p. 346
- ↑ Amersfoort (2005), p. 347
- ↑ Amersfoort (2005), p. 344
- ↑ 138.0 138.1 Amersfoort (2005), p. 235
- ↑ Amersfoort (2005), p. 229
- ↑ Amersfoort (2005), p. 231
- ↑ Amersfoort (2005), p. 164
- ↑ Amersfoort (2005), p. 266
- ↑ Amersfoort (2005), p. 267
- ↑ Amersfoort (2005), p. 269
- ↑ Amersfoort (2005), p. 272
- ↑ Amersfoort (2005), p. 275
- ↑ Amersfoort (2005), p. 276
- ↑ Amersfoort (2005), p. 278
- ↑ Amersfoort (2005), p. 279
- ↑ 150.0 150.1 Amersfoort (2005), p. 320
- ↑ Amersfoort (2005), p. 168
- ↑ Amersfoort (2005), p. 171-172
- ↑ Amersfoort (2005), p. 237
- ↑ 154.0 154.1 Amersfoort (2005), p. 238
- ↑ Amersfoort (2005), p. 243
- ↑ Amersfoort (2005), p. 352
- ↑ Amersfoort (2005), p. 353
- ↑ Amersfoort (2005), p. 355
- ↑ Amersfoort (2005), p. 281
- ↑ Amersfoort (2005), p. 282
- ↑ Amersfoort (2005), p. 284
- ↑ 162.0 162.1 Amersfoort (2005), p. 290
- ↑ 163.0 163.1 Amersfoort (2005), p. 324
- ↑ 164.0 164.1 Amersfoort (2005), p. 172
- ↑ De Jong (1970) p. 272
- ↑ Amersfoort (2005), p. 141
- ↑ Amersfoort (2005), p. 167
- ↑ Amersfoort (2005), p. 176
- ↑ De Jong (1970), p. 225
- ↑ Amersfoort (2005), p. 175
- ↑ De Jong (1970), p. 264
- ↑ De Jong (1970), p. 288
- ↑ "The National Archives - War Cabinet Weekly Résumé (No. 37) of the Naval, Military and Air Situation" (PDF). Archived from the original (PDF) on 2013-07-30. Retrieved 2013-12-04.
- ↑ De Jong (1970), p. 300
- ↑ 175.0 175.1 De Jong (1970), p. 301
- ↑ Amersfoort (2005), p. 358
- ↑ Amersfoort (2005), p. 359
- ↑ Amersfoort (2005), p. 360
- ↑ Amersfoort (2005), p. 361
- ↑ De Jong (1970), p. 302
- ↑ Amersfoort (2005), p. 364
- ↑ De Jong (1970), p. 303
- ↑ Amersfoort (2005), p. 324-325
- ↑ 184.0 184.1 Amersfoort (2005), p. 326
- ↑ Amersfoort (2005), p. 327
- ↑ Amersfoort (2005), p. 300
- ↑ Amersfoort (2005), p. 301
- ↑ Amersfoort (2005), p. 304
- ↑ Amersfoort (2005), p. 308
- ↑ Amersfoort (2005), p. 291
- ↑ Amersfoort (2005), p. 294
- ↑ Amersfoort (2005), p. 295
- ↑ Amersfoort (2005), p. 296
- ↑ De Jong (1970), p. 311
- ↑ Amersfoort (2005), p. 299
- ↑ Amersfoort (2005), p. 173
- ↑ De Jong (1970), p. 323
- ↑ Amersfoort (2005), p. 305
- ↑ Amersfoort (2005), p. 178
- ↑ Amersfoort (2005), p. 180
- ↑ Amersfoort (2005), p. 329
- ↑ De Jong (1970), p. 333
- ↑ Amersfoort (2005), p. 306
- ↑ Amersfoort (2005), p. 367-368
- ↑ Amersfoort (2005), p. 368
- ↑ Amersfoort (2005), p. 366-367
- ↑ Amersfoort (2005), p. 369
- ↑ De Jong (1970), p. 348
- ↑ De Jong (1970), p. 351
- ↑ Amersfoort (2005), p. 370
- ↑ De Jong (1970), p. 366
- ↑ De Jong (1970), p. 368
- ↑ De Jong (1970), p. 369
- ↑ De Jong (1970), p. 370
- ↑ De Jong (1969b), p. 366-367
- ↑ 216.0 216.1 Amersfoort (2005), p. 181
- ↑ Amersfoort (2005), p. 182
- ↑ Amersfoort (2005), p. 183
- ↑ De Jong (1970), p. 375
- ↑ Amersfoort (2005), p. 179
- ↑ De Jong (1970), p. 385-386
- ↑ De Jong (1970), p. 393-397
- ↑ De Jong (1970), p. 374
- ↑ De Jong (1970), p. 376-377
- ↑ De Jong (1970), p. 384
- ↑ Amersfoort (2005), p. 184
- ↑ 227.0 227.1 Amersfoort (2005), p. 244
- ↑ Amersfoort (2005), p. 239
- ↑ Amersfoort (2005), p. 241
- ↑ Amersfoort (2005), p. 255
- ↑ Amersfoort (2005), p. 245
- ↑ Amersfoort (2005), p. 246
- ↑ Amersfoort (2005), p. 247
- ↑ Amersfoort (2005), p. 248
- ↑ Amersfoort (2005), p. 249
- ↑ Amersfoort (2005), p. 250
- ↑ Amersfoort (2005), p. 251
- ↑ Amersfoort (2005), p. 252
- ↑ Amersfoort (2005), p. 253
- ↑ Shirer, William L (1960). The Rise and Fall of the Third Reich. New York: Simon & Schuster. p. 723. ISBN 0-671-62420-2.
- ↑ Oorlogsverliezen 1940–1945. Maandschrift van het Centraal Bureau voor de Statistiek, blz. 749. cbs.nl Archived 2011-03-02 at the Wayback Machine
References
[change | change source]- Amersfoort, Herman; Kamphuis, Piet, eds. (2005), Mei 1940 — De Strijd op Nederlands grondgebied (in Dutch), Den Haag: Sdu Uitgevers, ISBN 90-12-08959-X
- Schulten, C.M.; Theil, J. (1979), Nederlandse Pantservoertuigen (in Dutch), Bussum: Unieboek BV, ISBN 90-269-4555-8
- C.W. Star Busmann. Partworks and Encyclopedia of World War II
- De Jong, Lou (1969), Het Koninkrijk der Nederlanden in de Tweede Wereldoorlog, Deel 1: Voorpel (in Dutch), Amsterdam: Rijksinstituut voor Oorlogsdocumentatie
- De Jong, Lou (1969), Het Koninkrijk der Nederlanden in de Tweede Wereldoorlog, Deel 2: Neutraal (in Dutch), Amsterdam: Rijksinstituut voor Oorlogsdocumentatie
- De Jong, Lou (1970), Het Koninkrijk der Nederlanden in de Tweede Wereldoorlog, Deel 3: Mei '40 (in Dutch), Amsterdam: Rijksinstituut voor Oorlogsdocumentatie
- Hooton, E.R. Phoenix Triumphant: The Rise and Rise of the Luftwaffe. Brockhampton Press, 1994. ISBN 1-86019-964-X.
- Hooton, E. R. (2007), Luftwaffe at War, Volume 2; Blitzkrieg in the West 1939–1940, London: Chervron/Ian Allen, ISBN 978-1-85780-272-6
- Jentz, Thomas L. (1998), Die deutsche Panzertruppe 1933–1942 — Band 1 (in German), Wölfersheim-Berstadt: Podzun-Pallas-Verlag, ISBN 3-7909-0623-9
- Frieser, Karl-Heinz (2005), Blitzkrieg-Legende — Der Westfeldzug 1940 (in German), R. Oldenbourg Verlag München
- Shirer, William L. (1960), The Rise and Fall of the Third Reich: A History of Nazi Germany, New York: Simon & Schuster
- Powaski, Ronald E. (2003). Lightning War: Blitzkrieg in the West, 1940. John Wiley. ISBN 9780471394310.
- Powaski, Ronald E. (2008). Lightning War: Blitzkrieg in the West, 1940. Book Sales, Inc. ISBN 9780785820970.
- Goossens, Allert M.A. (2011) History Site "War Over Holland – the Dutch struggle May 1940"
