If you're lucky, you live in an area where you don't have to dig up your Dahlia tubers. For the rest of us we must dig, divide and conquer. This year I've updated a lot of the information on when to dig them up. It's breaking dahlia news.
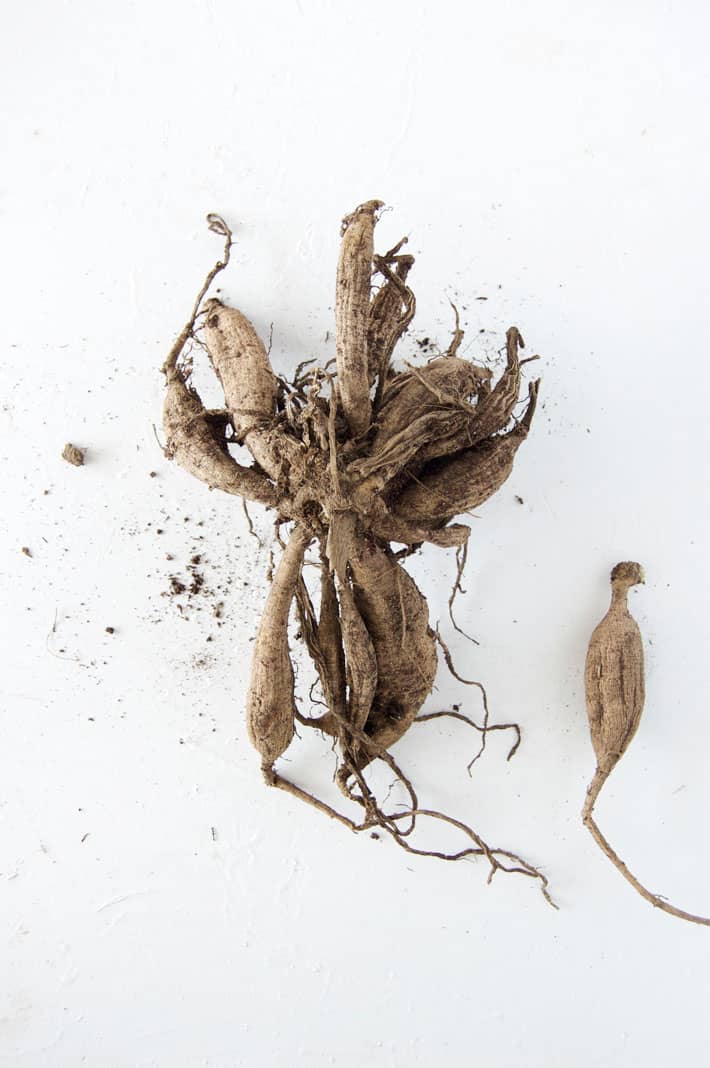
The first year I grew dahlias I left the tubers in the ground to rot; I had no idea you could save them. The next year I knew more, so in the fall I dug the tubers up.
But I didn't know THAT much more because what I saved in the fall and planted in the spring were tuber clumps the size of a clown car. I had no idea you should divide the clumps into individual tubers.
I could write another 14 pages about all of my dahlia mistakes - enough that you would need to nap and snack throughout this post. So assume you'll make mistakes, assume you'll learn from them and assume I've made infinitely more mistakes than you, so there's no need to feel discouraged.
Table of Contents
Digging
*New Information 2024*
Thanks to my local (but Internationally known) Hamilton Dahlia Society's latest meeting I learned a little trick for making your dahlia's eyes easier to spot for when you dig them up.
Cut your dahlia stems to six inches about 2 weeks before you plan to dig them up. Doing this will alert the dahlia tuber that it's about to croak. This shocks it into starting to produce eyes.
When you dig them up 2 weeks later you'll have an easier time spotting the eyes for dividing them immediately.
Zone ⅞ or higher
Zone 6 or lower
- Consider your dahlias to be tender perennials and try your luck at leaving them in the ground.
- Zone 8 dahlias can be left in the ground as a perennial.
- If you live in Zone 6 or lower you have to dig up your dahlias or they will freeze and rot.
- Dig up when they're mature in the fall. You don't have to wait for frost to dig them.
WHEN
- Tubers are mature and can be dug up for storage once they've been in the ground for 5 months.
- Tubers begin to mature on the summer equinox, (when days begin to get shorter.) 90-100 days after the equinox, the tubers will be fully mature and are ready to dig up regardless of whether there has been frost or not.

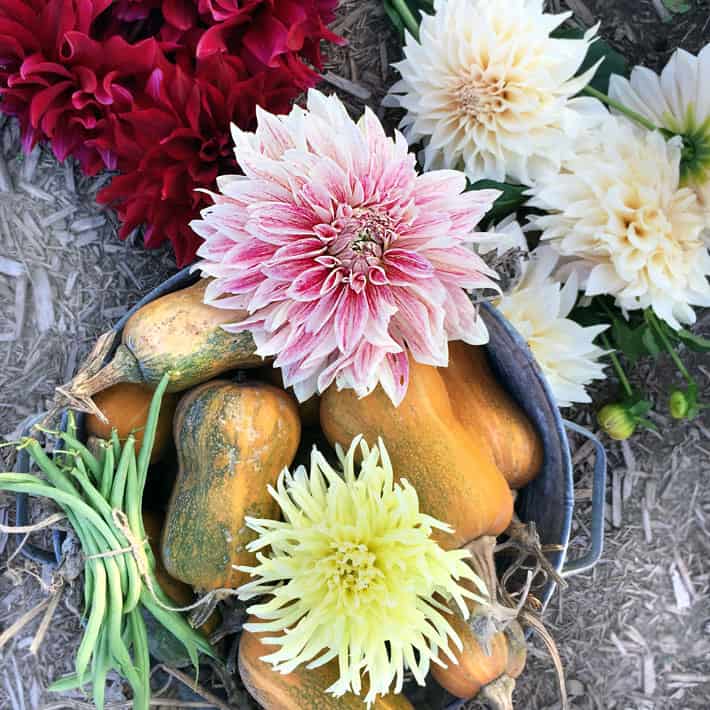
Luckily you don't need a lot of dahlia tubers to produce a lot of flowers. You can see the mountain of Dahlias 10 or so tubers produced in this post.
And dahlias multiply QUICKLY.
In one season, a baby finger sized tuber will grow to the size of something you could base an entire horror movie around.
Tubers grow like hands with multiple fingers. Each finger can get separated, cut off and planted next year.
That one tuber you bought could end up being 10 tubers after just one season. And they KEEP doing it. Every year you plant a small tuber it grows huge, you split it and you've increased your stock yet again.
(it's about this point when you start to hope your tubers will just rot straight to hell so you don't have to deal with them anymore)
Digging Dahlia Tubers
Tubers are easily broken, so be careful when you're digging them up. You don't want to injure or lose any of the fingers.
Steps
- CUT any stalks back so there's only about 6" of them showing. This way you can still see where the plant is, but the stalks won't be getting in the way. It will also give you something to hold onto when pulling up the plant.
- DIG about 1' away from the centre of the plant loosening the soil. Use a shovel or fork to dig. Pull the plant straight up once you can feel that it's released from the soil.
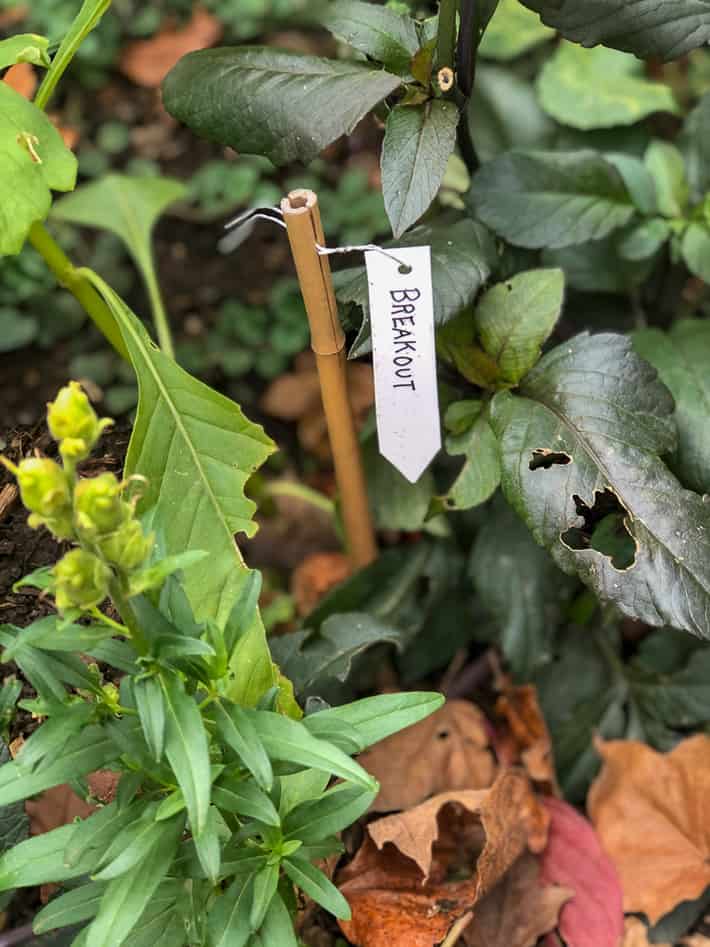
- LABEL the tuber immediately. I have a bamboo stick pushed into the ground at the base of each dahlia plant. The top of it is split which holds a plastic tag and wire tightly throughout the season. When it's time to dig the tubers up, I have the wired tag right there to grab and put on the clump so I don't lose track of what kind it is.
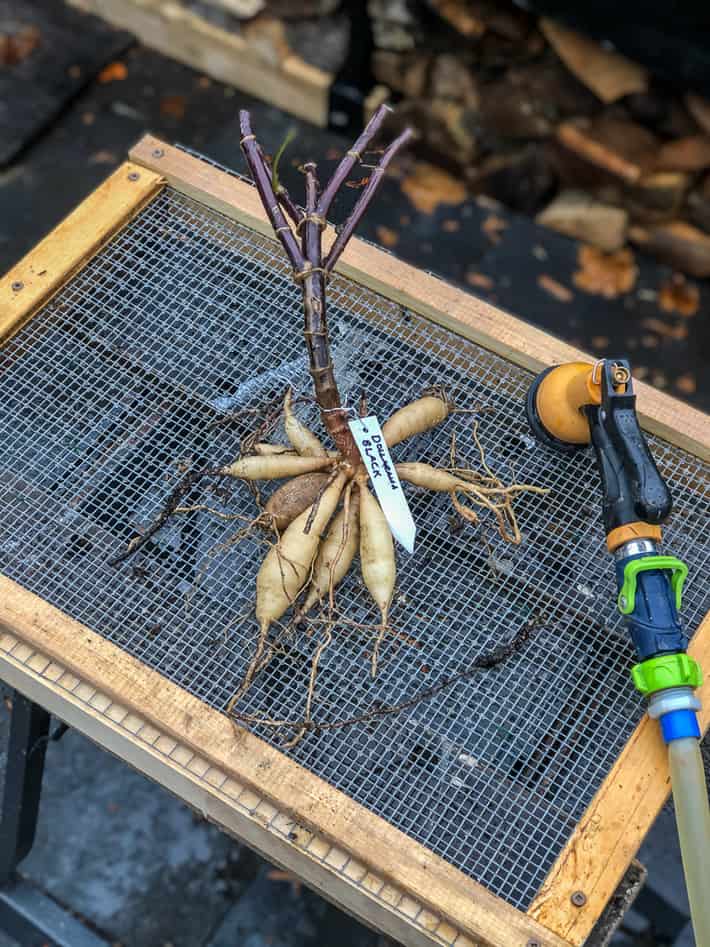
- WASH the soil off with a garden hose and set it to dry. I use a rack made out of hardware cloth set onto a small adjustable workbench. I put the tuber on top and spray with the hose so all the water just falls below.
Set the cleaned tuber aside outside to dry until the next day.
How to Split Dahlia Tubers
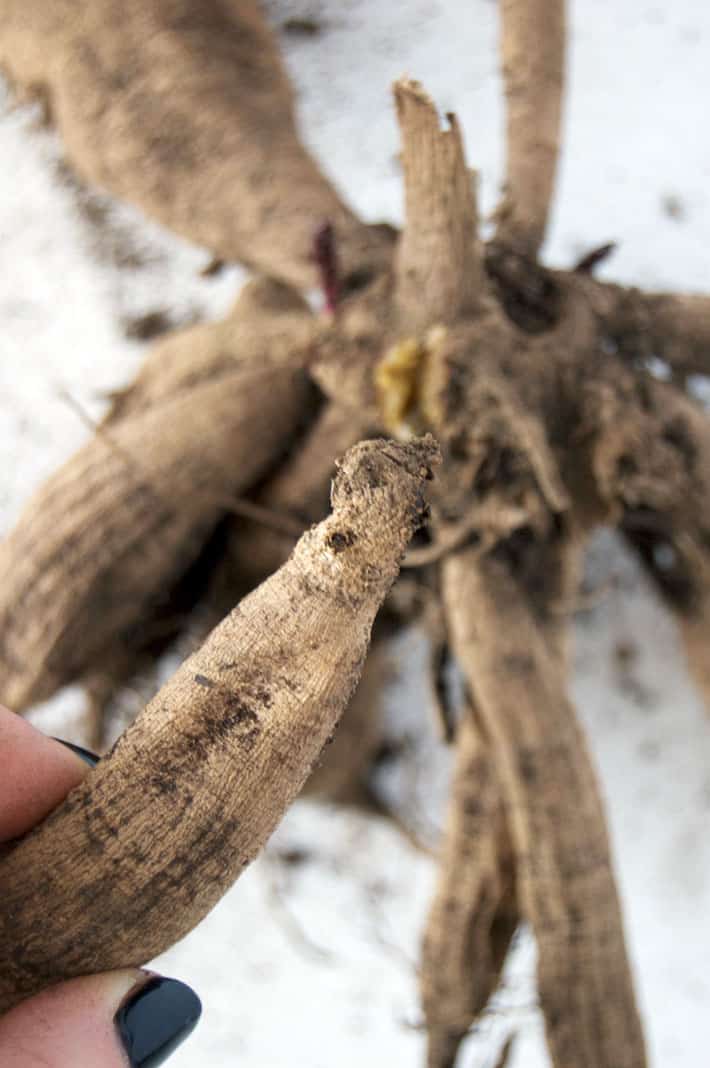
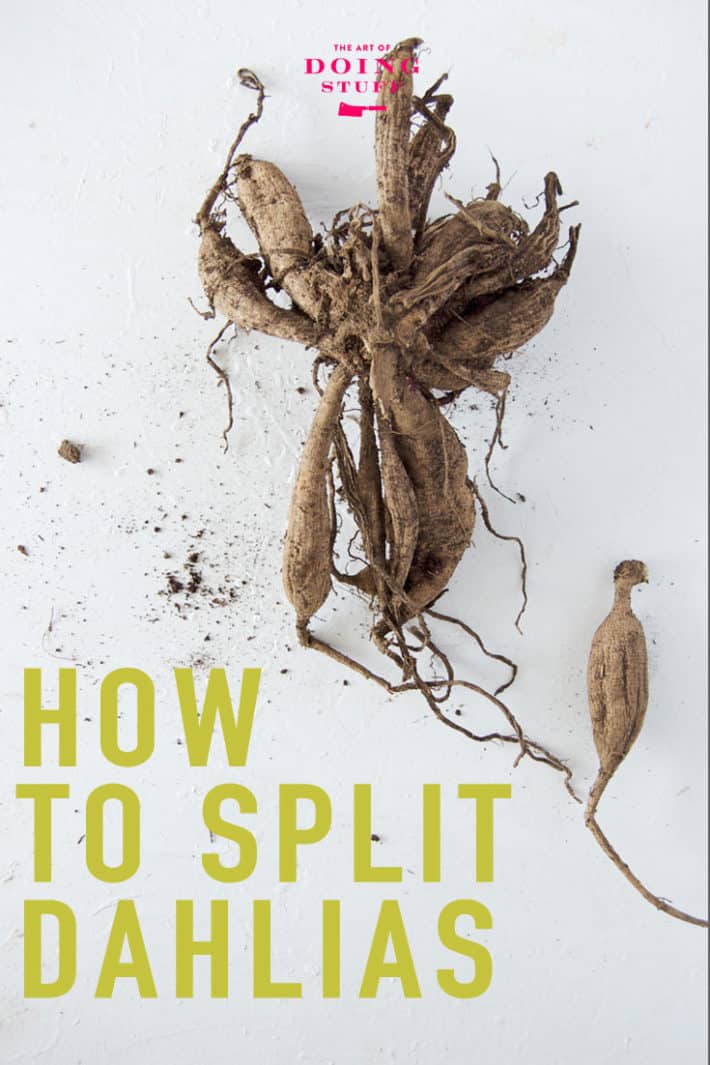
For a dahlia tuber to be viable it has to have an eye. The eye is like a potato eye only much less visible. It's what the plant grows out of. If the tuber doesn't have an eye, it will not grow.
The eyes are found on the neck of the tuber.
One clump of tubers might have 9 fingers branching off of it and 5 eyes in total. Your job when dividing dahlias is to make sure you get all the tubers with eyes and throw away the ones without.
The process of splitting aka dividing is the same no matter when you do it; fall or spring.
STEPS
Move onto dividing the tubers once they've been dug up, cleaned and allowed to dry for a day.
1. If you have a large clump take your pruners and ruthlessly cut the whole clump in half. It'll make it easier to work with.
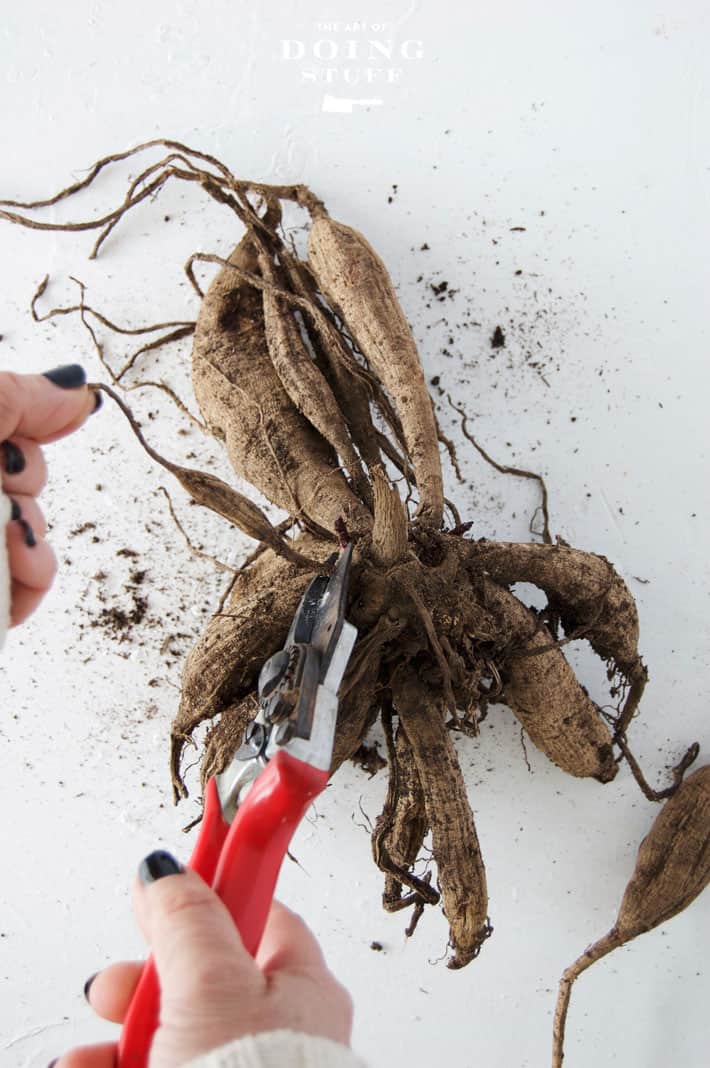
2. Remove the stringy, withered tubers that will never amount to anything.
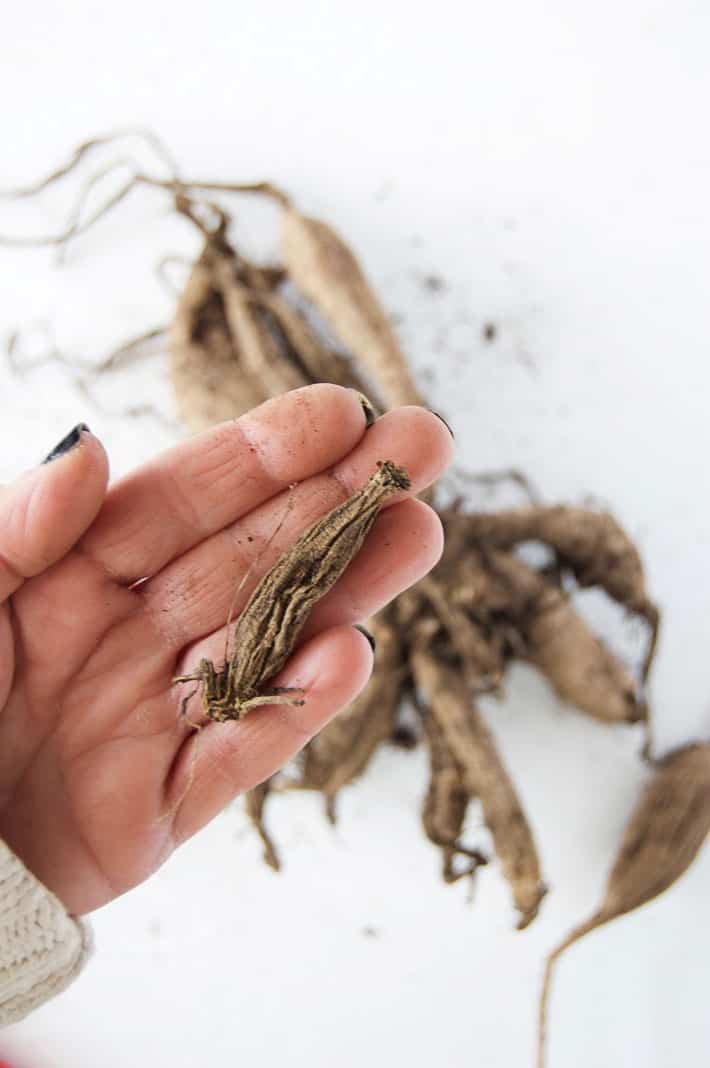
See? That's not going to do anything for you.
3. Once you get all the extraneous stuff trimmed away you can better see what you're working with.
4. If there are any tubers growing off of other tubers, cut those off and throw them away. Those piggy back tubers will never produce Dahlias. The big main one will, just not its parasitic twin.
(see below for what I mean)
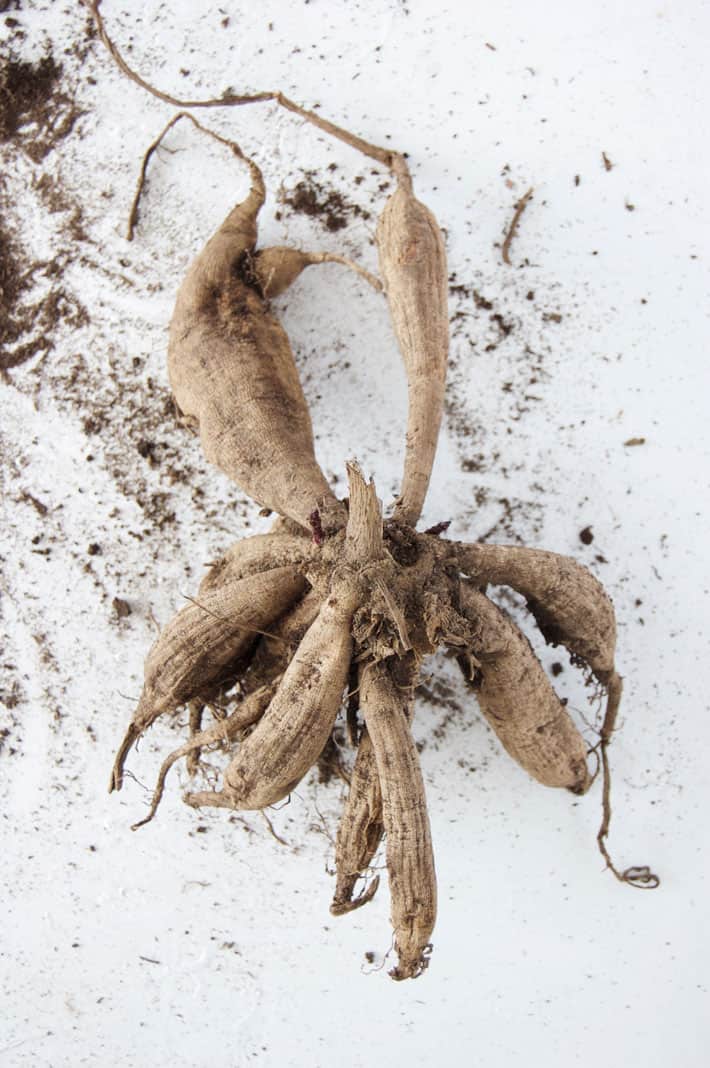
5. Dahlias sprout from eyes on the very top of the tuber necks. So start cutting off each tuber, making sure to include enough of the neck that you get some eyes.
6. If there are no eyes throw it away. If you aren't sure, keep it and see if it starts to sprout in the spring.
7. Immediately label the tuber by writing the variety on it with a Sharpie. You can also tag it by tying it with flagging tape.
8. Let the cut dahlias dry for a day before storing them.
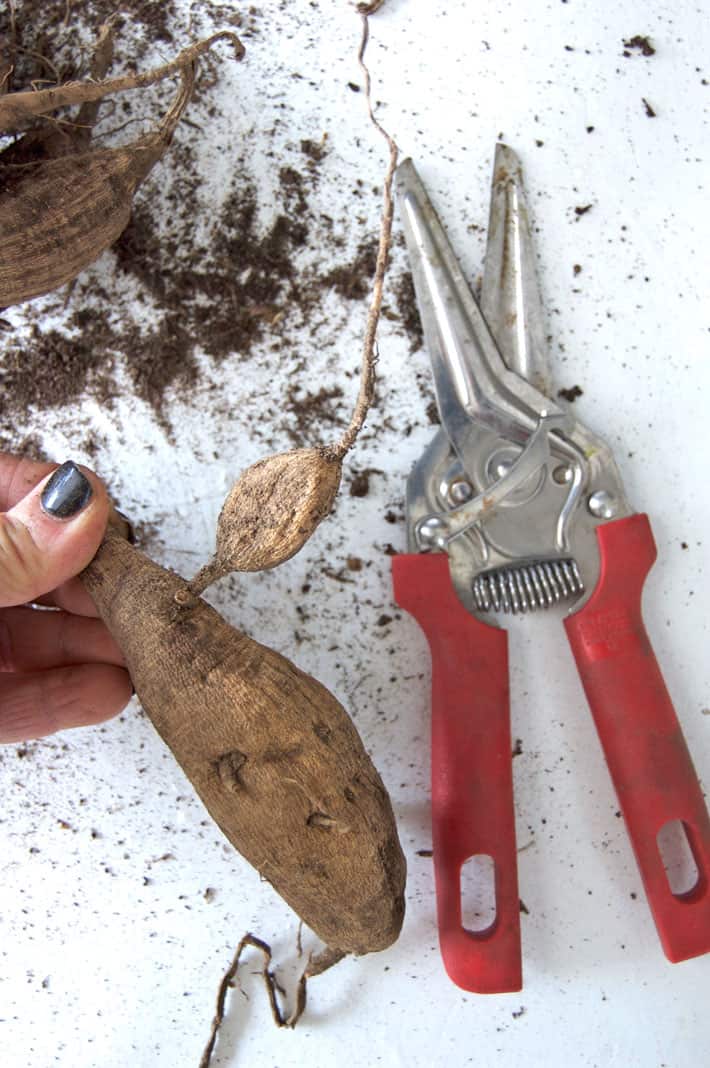
Parasitic tubers like this can be cut off.
The eyes are much easier to see for dividing in the fall when they've just been dug up.
TIP: I'm performing rudimentary dahlia surgery here, but a competitive dahlia grower will also do things like use 2 pairs of pruners, which they sterilize between cuts to ensure no crossing of disease. They'll also
If you chose to divide them in the spring, if you're lucky, your Dahlia will have already started to sprout which makes spotting the eyes easy. They'll have a stem coming out of them. Or they'll be swollen enough that you can spot them like in the photo below.
I'm not an expert - I'm just a girl with a pair of clippers whose made enough mistakes to know a few things.
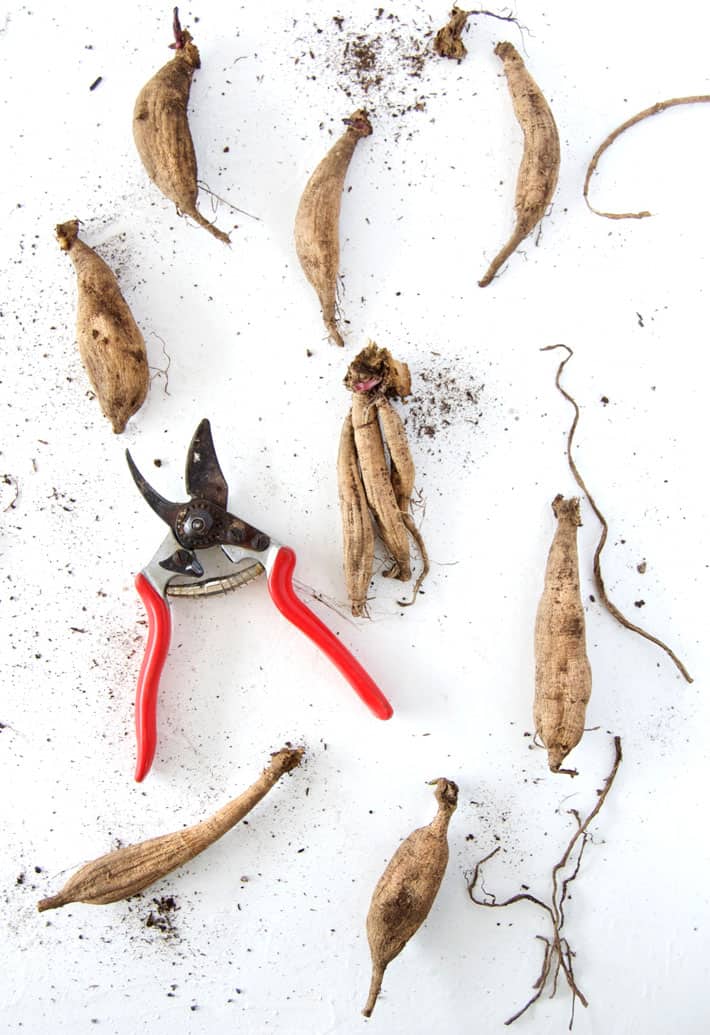
These ones above are spring divided tubers. You can tell because they have sprouts emerging from their eyes. Leaving tubers to divide in the spring means they'll be very easy to see where to split them.
Once you've decimated the horror show of tubers, you'll have several individual, viable tubers for planting or giving away the next year. This compounds year after year until eventually you have enough Dahlias to start your own free love hippie compound.
A DAHLIA TUBER'S EYES ARE VISIBLE FOR ONE HOUR AFTER FIRST DIGGING THEM UP.
The eyes on a fall tuber are almost impossible to see.
The one time this isn't true is within 1 hour of digging them up. The change in temperature and conditions from being in the ground to being out of the ground makes the eyes swell up. Once the tuber has adjusted to its new surroundings (in about an hour) the eyes disappear again.
Storing Dahlia Tubers
If you've split the tubers and let them heal and dry for a day you can go ahead and store them.
Methods
I tested a new method in the winter of 2023 for storing my tubers. Playground sand.
SAND
- Pour sand into the bottom of a plastic bin.
- Add a layer of tubers making sure they don't touch.
- Cover with sand.
- Continue for another layer.
- Put a lid on the bin, but don't close it tight.
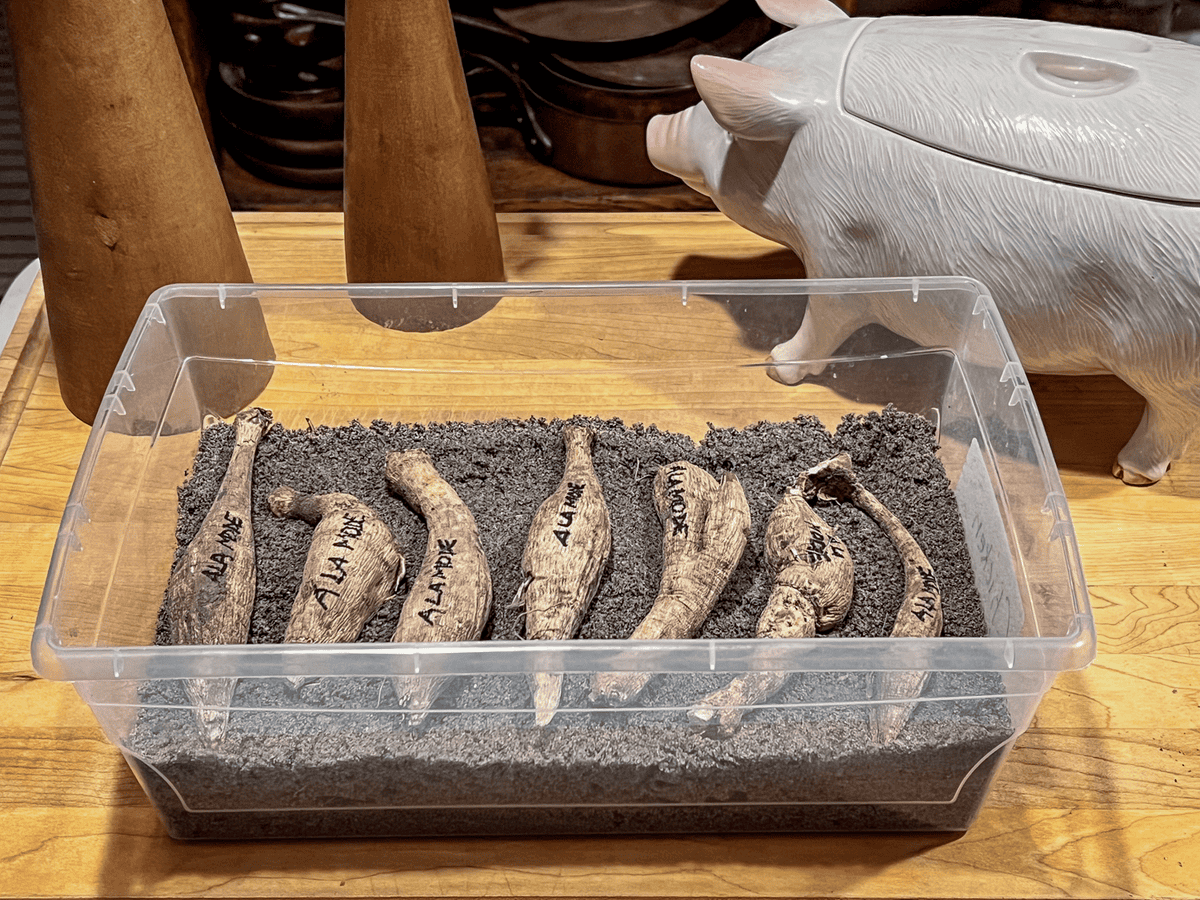
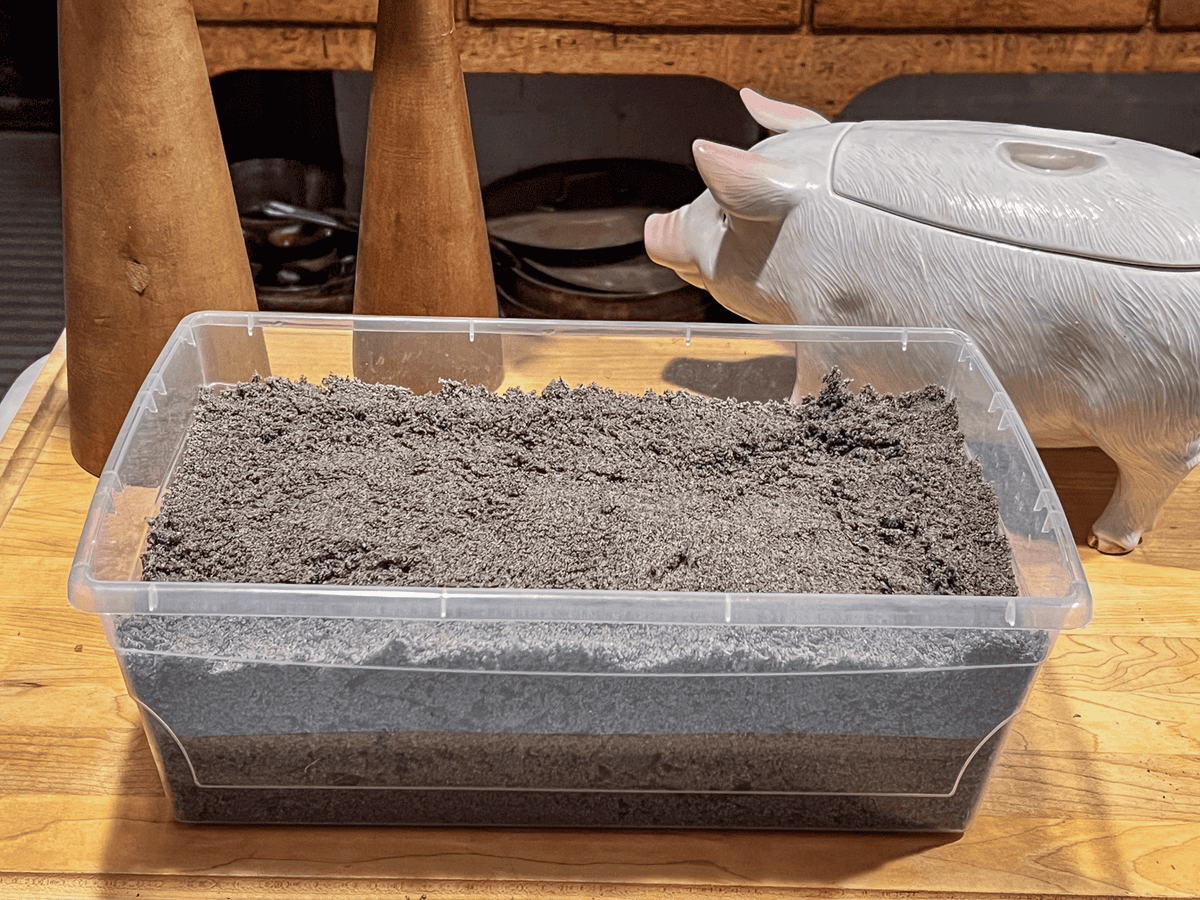
The lid helps trap the moisture in the damp sand* but not closing it tight allows excess moisture to escape.
*You don't have to wet the sand, when you open the bag of playsand it will already be damp.


The tubers stored perfectly, most of them looking even better than when they went in. By the time I decided to wake the tubers up in late winter they had already started to develop eyes and tiny roots.
BAGGING
- Put them into either plastic bags or boxes with vermiculite. You don't need to fill the bag or box. Just enough to give the tuber a good blanket of vermiculite to help keep it from drying out or rotting.
You can add more than one tuber to a bag as long as they're not touching and are separated by a layer of vermiculite. - Leave the bag slightly open so the tubers don't rot OR seal the bag closed and poke 2 holes in it for gases and moisture to escape.
- Store tubers somewhere that's 10 degrees celsius (50 degrees F) or below.
- Check on your tubers once a month or so. If they are starting to shrivel give 1 or 2 sprays of water into the bag. If they are rotting remove them and then make sure each bag or box is getting proper ventilation. You don't want the bags or boxes sealed completely.
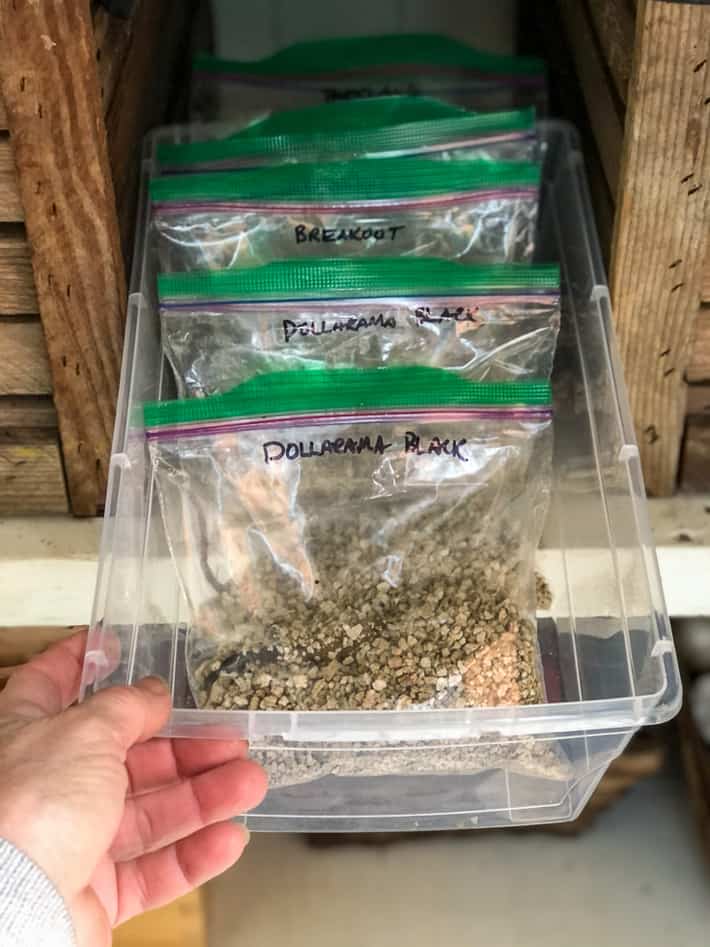
Remember : Tubers must be completely dry before storing them or they'll rot.
WRAPPING IN PLASTIC
Last year I tried storing each of my tubers by wrapping them in cling film aka plastic wrap. This method worked surprisingly well. Most of the tubers were perfect with only 2 or 3 that rotted.
- Pull out a swath of plastic wrap and lay it on the counter.
- Place one dahlia tuber on it then roll so the whole tuber is encased in plastic wrap.
- Place another tuber onto the plastic and roll again. Continue doing this until you have a group of 4 or 5 tubers wrapped in the swath of plastic. Doing it this way keeps the tubers from touching each other (they always have plastic between them) so it prevents any rot from migrating from one tuber to another.
- Don't forget to make sure each tuber is labelled with a Sharpie. I label my bundles as well.
Best Storage Temperature
Store tubers somewhere that's 10 degrees celsius (50 degrees F) or below. If you don't have those conditions, put them somewhere that's as close to that as possible. Inside a kitchen cupboard on an outside wall is a good place to try.
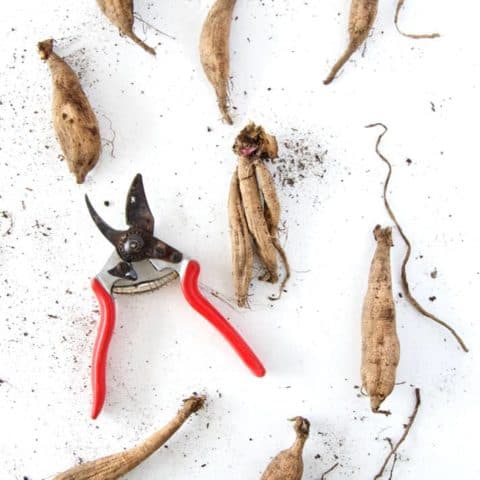
How to Divide & Store Dahlia Tubers.
How to divide and store dahlia tubers for the winter in colder climates.
Materials
- dahlia tubers
- coarse vermiculite*
- tags
- sharpie marker
- tape
- pruners
Instructions
- Dig up Dahlia tubers 1 week after they have been killed by frost. On that same day wash and label all of the tubers. LABEL AS YOU GO OR YOU'LL GET THEM MIXED UP.
- As you dig up the tubers, wash all the dirt on them away with a hose. It's a cold November job.
- Allow the clumps to dry for a day before dividing them.
- On tuber dividing day remove the stringy, withered tubers that will never amount to anything.
- If there are any tubers growing off of other tubers, cut those off and throw them away. Those piggy back tubers will never produce Dahlias. The big main one will, just not its parasitic twin.
- Once you get all the extraneous stuff trimmed away you can better see what you’re working with.
- If it's a very big tuber with lots of fingers, it's usually easiest to cut the entire huge tuber in half so you're working with a smaller bunch. It's O.K. if you have to sacrifice a few eyes to do this.
- Dahlias sprout from eyes on the very top of the tuber necks. If you split your tubers a day after digging them up the eyes will be more prominent. Waiting even a few days will result in the eyes shrinking, making them hard to see.
- Start dividing and cutting off each tuber, making sure to include enough of the neck that you get some eyes.
- Write the name of the variety on the tuber with a Sharpie as soon as you cut it off of the mother plant.
- Let the tubers dry another day to allow the cut wounds to heal and dry then store them in either an open plastic bag filled with vermiculite (label the bag as well) or in a plastic bin with vermiculite.
Notes
*coarse vermiculite is larger than regular vermiculite and helps prevent moisture build up around the tuber.
For individual tubers, sandwich bags are perfect because you can write the name of the variety on the bag and use them over and over every year
You can pot them up under grow lights a couple of months before you plan to plant them out so they get a good head start.
Some years I kind of hope the tubers will just up and die on me to relieve me of the stress of digging, dividing and storing them. And sometimes they do up and die on me.
A few years ago, despite all of my efforts, I could not kill my dahlia tubers over the winter. I stored them improperly, ignored them and silently cursed them.
I'd have given them the evil eye if I believed in that sort of thing but I don't, so I stuck with a garden variety exorcism.
No luck.
At the beginning of April I excitedly opened up my plastic bags of Dahlia tubers expecting to find a wrinkled or rotted mass of nothing and found perfectly fine tubers.
This goes to show you that dahlias have a mind of their own. You can store them improperly and have them either rot into a putrid mess or shrivel up into a fossilized version of a tuber. Or. They'll turn out just fine.
Dahlias can seem overwhelming because they do need a bit of work - what with having to dig them up, curse them, and replant them every season. They demand attention, you can't just plant them and forget them. Don't let their bossiness stop you from growing them though. Divide ... and conquer your Dahlias.



Dahlia storage in sand
I am trying your dahlia sand storage method and crossing my fingers. I got a big crop of Totally Tangerine dahlias this year. What a lovely dahlia and hope with this sand method I will have lots of viable tubers next year. I will let you know.
Thx you are the BEST
Great article! I love dahlias!
Would the same method work for Cannas? Other than the tubers are different looking? I have had only about 50% successful storage of them. But I didn’t wash them, nor use vermiculite. I used peat moss.
I found many were completely dried out/desiccated husks.
Thanks 😊
Happy Thanksgiving
Excellent overview of dahlia tuber digging, splitting, and storage! As president of the local Hamilton Dahlia Society, I'm usually the one putting this info together for our members. This was a great read with lots of awesome tips for success! I also learned a few things along the way!
Thanks Mike. This post has changed a lot over the past several years thanks to the world class knowledge-base of the Hamilton Dahlia Society. :) ~ karen!
Hi Karen. Any tips on dahlia diseases? I'm subscribed to a dahlia blog where all people seem to be concerned with is whether their tubers have leafy gall or crown gall. Why are these diseases talked about so often? Is the easy way out just to toss tubers that have the symptoms? I only have 3 varieties, all from the Dollarstore,so I am no expert. Just wondered what all the fuss is about.
I'm exhausted!
This is my first year growing Dahlias Zone 7a, coastal CT.
If I leave them in in the ground for the winter, how do I know when to divide in the spring? Do they need to be divided every year? Thanks Karen!
Hi Heidi. Even if you want to divide the tubers in the spring, if you're in zone 7 you have to dig your tubers up this fall. You can't leave them in the ground. They'll freeze and rot. If you want to try, you could leave some in the ground to see what happens. But in general below zone 8 you have to dig them up in the fall and then either divide them immediately or in the spring. ~ karen!
Great article! I’m in NW Georgia USA zone 8a so I have successfully left dahlias in the ground to overwinter, and we have had a couple of quite severe (for us) winters over the past several years. Year before last, I had some lovely dahlias that were gifted me by a sweet lady in Washington State who was actually giving them away to anyone who requested. I think she just asked for postage. Anyhoo, they were lovely but after I had enjoyed them for a couple of years, I decided that I wanted to relocate them. So when they were spent that year, I cut them back and dug them up. Then I stored them in a plastic container filled with pine shavings. To my dismay, they all rotted over the winter. I now know (from your article) what my mistakes were - not letting them dry fully before storing, and storing them in a sealed plastic container. The pine shavings were probably also a mistake (?). And there were probably more mistakes but there you have it. Thanks for the great information.
Sorry about your tuber. It's happened to all of us. :/ ~ karen!
Thanks for the tutorial, Karen. I was wondering what to do about my dahlia tubers this year. I usually let them rot in the ground because I once dug them up and stored them improperly. A mess! This year, I'm going to follow your directions for sand storage. I will also copy your labeling method; it's so simple and attractive. I recently began experimenting with drying my flowers using silica gel. A satisfying experiment! Since my dahlias are still producing lovely blooms I'm going to try drying a few before digging up the tubers. Can't wait to make a wreath from all my lovely flowers. Have you used silica gel to dry flowers? If so, any tips? Perhaps I've missed a whole tutorial on that subject. Have a happy day, my internet pal.
Hi Hettie. Vermiculite works very well for storage as well - it's what most of my dahlia society members use - and it isn't as dirty or heavy as sand. I haven't tried to dry flowers in silica gel since high school so I'm afraid I won't be able to help you with that but now I want to try it again myself! ~ karen!
I'll get some vermiculite. Can't wait to see your dried flowers! :)
"Dahlia eyes are visible when first digging them up". This could be the opening line of a horror novel.