This project shows the code, images and results of an operationalizing project using Azure ML Studio, Azure SDK and Swagger.
This project first begins with uploading the dataset and using the AutoML function on Azure to generate the best model using a metric and ending criteria. The model is then deployed using Azure ACI to generate a swagger URI and REST API endpoint. The dataset used for this project is obtained from the direct marketing campaigns of a company which intends to predict whether a client will accept a term deposit or not. Using Azure and its workspace, this project looks at creating a cloud based machine learning model, from deployment to consumption and finally publication. Commands for the deployment, processing and endpoint results are executed using Git Bash. The image in the next section shows the steps and is followed by a description of the steps accompanied by useful figures.
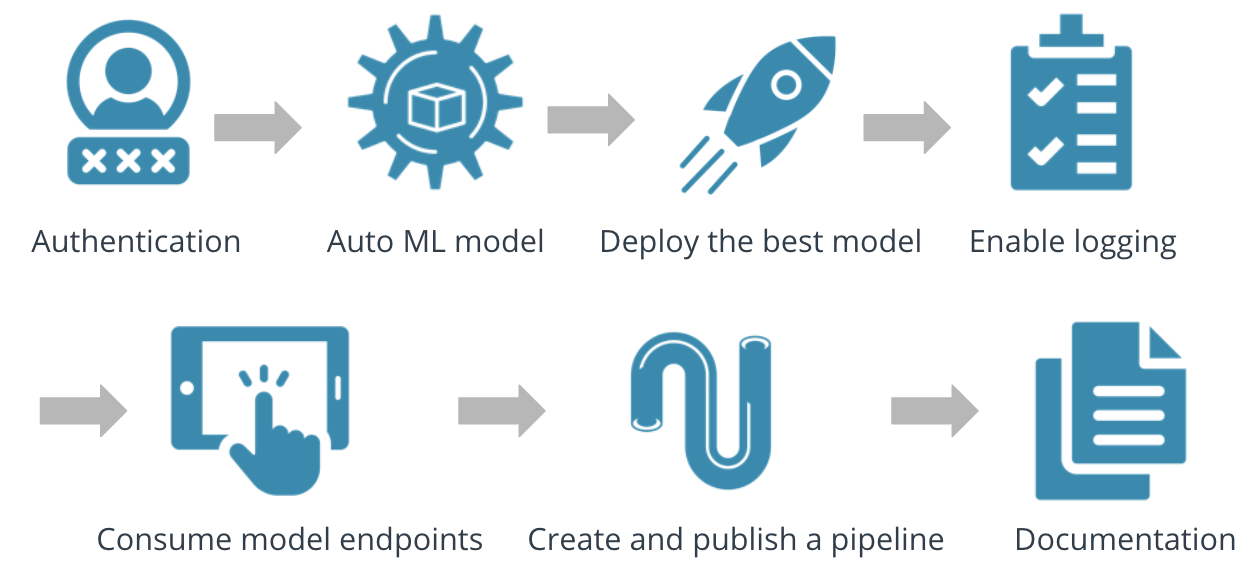
We can see the main steps that go into creating a cloud platform system for machine learning from the figure below:-
The project begins by launching the main studio and uploading the dataset from the link(https://automlsamplenotebookdata.blob.core.windows.net/automl-sample-notebook-data/bankmarketing_train.csv). After specifying a computer cluster with a minimum number of nodes and the target column to be predicted, the dataset and its run is setup in the workspace. These can be seen from the figures below

After creating a compute cluster, we run an experiment using the cluster and use that cluster to run the experiment. From the figures below we can see that VotingEnsemble produces the best accuracy after repeated runs. This step is crucial to choose and determine the best model through the AutoML function, before shipping the model into production. After the run is completed we can see the details of the model.

Additionally, we can click on the models tab of the UI to see the details of all the models run and how they have performed. We can see the Voting Ensemble performed the best as Accuracy was the prime metric of the models run.


In order to create an undisturbed cloud platform that can communicate seamlessly with the backend, authentication is improtant. Continuous Integration and Delivery systems (CI/CD) require a well authenticated system that can automate the logging in proecss, either through passwords or tokens. The AZ toolkit and CLI is used for authenticating Azure cloud services with the local machine. First we type az login and authenticate it from our local machine via a DeviceCode. Then we run ServicePrincipalName to access the automated Azure tools from our local machine via powershell.
 With the appID of the created Service Principal we select the role of Contributor and share our workspace config. And install the AzureCLI ML. AzureCLI allows to automate our machine learning activities.

On deploying the model and enabling the application insights, we can now use Swagger to consume the endpoint. Azure provides a Swagger JSON file for deployed models. We first access the deployed model through the Endpoints section and save it in the Exercise folder. In the same folder, the swagger.sh will download the latest Swagger container, and it will run it on port 80. Due to connection issues, this was changed to 9000. The serve.py will start a Python server on port 8000. All files are placed in the same folder to prevent sourcing issues.
 The serve.py is serving locally on port 8000. Similarly, the swagger.sh is running on port 9000:8080 as other ports were already allocated.

The deployment process involves delivering a trained model into production and then consuming it by clicking on the options in the endpoints section. For the purpose of this project, the deployment is done through the Azure ML Workspace, but it can also be done through the Python SDK. Model metrics with explanations can be seen in the figures and the screencast. The Best Model will be displayed in the Details tab. On deploying the Best Model, we can interact with the HTTP API service and interact by sending data over POST requests.

 Applications Insights enabled is true.

 Logs.py is running


The logging process is used to help in the identification of issues and to visualize the performance of the model deployed. We can better interpret the access and use of the endpoint by looking at the Application Insights tab which can be modified through the Azure SDK. In this step, we execute the endpoint.py script to interact with the trained model. We then run the shell script, modifying both the scoring_uri and the key to match the key for the service and the URI. Information for the URI can be obtained through the Details tab, above the Swagger URI.
 The deployed service is then consumed using an HTTP API, which generates a URL. The HTTP POST method used in this step is a way of submitting data. On consuming the endpoints by using the swagger commands and running the bash file, we get the results show in the following figures which match with the project requirements.

The figure below shows the result of a completed endpoint from the Jupyter files. More information can be seen through the screencast.

For this part of the project, we use the notebook in the Exercise files to perform the same operations in the above steps to upload data, generate an AutoML model, deploy and create an endpoint using a URI, cluster and REST API point.


The pipeline is used as a stepping stone to automate model building and make the model publicly available for others to view and implement. For this project, the pipeline publishing process being by creating a computing instance with a specific number of nodes and endpoints. Once the endpoint is deployed and running, we can open Jupyter Notebooks and execute the cells to publish the model. The end result of this step is the creation of a public HTTP endpoint that can be accessed publicly once executed to success completely.

 Published pipeline status shows Active.

1.The swagger json file can be modified to include additional information about the model in real time for datasets that are updated constantly and not uploaded. 2.Comparing the model results with a hyperdrive configuration model to see what parameters are better at predicting the output column values. 3.With AZureCLI we can manage many ml-models deployment issues from our pwershell for time saving. Additionally, with CLI we can integrate our azure cloud ml workspace and other configs directly from our powershell and use them in our own machine locally which is also very
Link to screen cast https://youtu.be/2IYrqRVzSKg