Getting started with Catalyst
Learn how to create your Catalyst storefront using One-Click Catalyst. Alternatively, you can follow our Manual installation guide.
To get started, there are a few steps you must go through first.
Requirements
First, you must have an existing BigCommerce store or sandbox. If you don’t have one already, you can create a free trial store or spin up a developer sandbox.
Additionally, you must have the following permissions in the BigCommerce store control panel:
- Manage Channels
- Create Channels
- Edit Channels
- Install Applications
Lastly, in order to allow Catalyst to authenticate with your BigCommerce store, you’ll need to make sure that your user account on the subject store has been granted the Create store-level API Accounts permission detailed in our documentation on High-Risk Permissions . If you are the assigned store owner of the store, you have these permissions implicitly.
Redirected Checkout
Catalyst uses Redirected Checkout out of the box, which means customers are redirected to BigCommerce’s hosted checkout experience when they’re ready to complete their purchase.
Redirected Checkout does NOT require a separate Stencil channel. You can use a single Catalyst storefront channel for both your storefront and checkout experience.
Here’s how it works:
- A Channel Site’s checkout URL determines what URL is loaded when users are redirected to checkout
- DNS for the checkout URL domain can be pointed at the Catalyst channel (e.g., a CNAME record pointed to
https://store-{{store_hash}}-{{channel_id}}.mybigcommerce.com) - When the checkout domain is pointed at the Catalyst channel in this way, Stencil serves the checkout, but it is still in the context of THAT channel (not channel 1)
Example URL setup:
mystore.com→ Pointed at hosted Catalyst storefrontcheckout.mystore.com→ CNAME pointed at BigCommerce on the Catalyst channel
The free preview Catalyst deployment that is created when One-Click Catalyst is used to set up a Catalyst storefront is set up in exactly this way. The checkout URL loads checkout on the Catalyst channel.
When a single Catalyst storefront is needed, Multi-Storefront (MSF) does NOT need to be enabled.
The process for setting up a single Catalyst storefront without enabling MSF would be:
- Leave the default channel 1 in Prelaunch status
- Create the Catalyst storefront channel using the steps outlined in this getting started guide
- Move channel 1 to INACTIVE status
- Once hosting Catalyst on your own hosting, set the Channel Site main and checkout URLs as described above, then set the Catalyst channel to ACTIVE
This will only consume a single storefront seat in terms of licensing/pricing.
Create a Catalyst Storefront
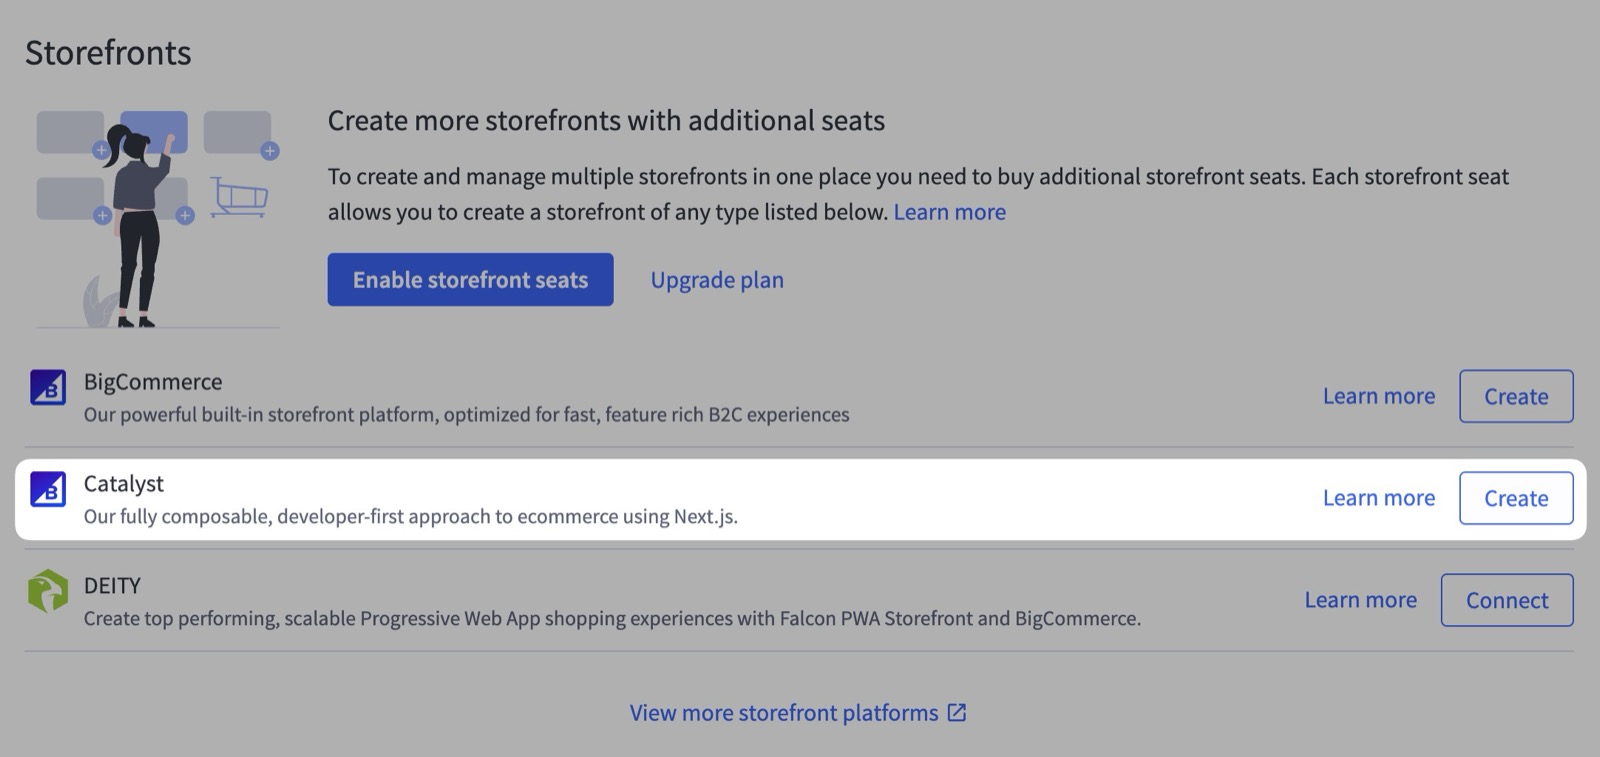
Start by logging into the BigCommerce control panel. Then, navigate to the Channels section, click Create Channel, and select Catalyst as the channel type.
Here you’ll need to fill in some information about your storefront. First, give it a name. Then choose whether or not to use sample data. We recommend using the sample data to start. Lastly, choose your primary language along with any additional languages you plan on supporting.
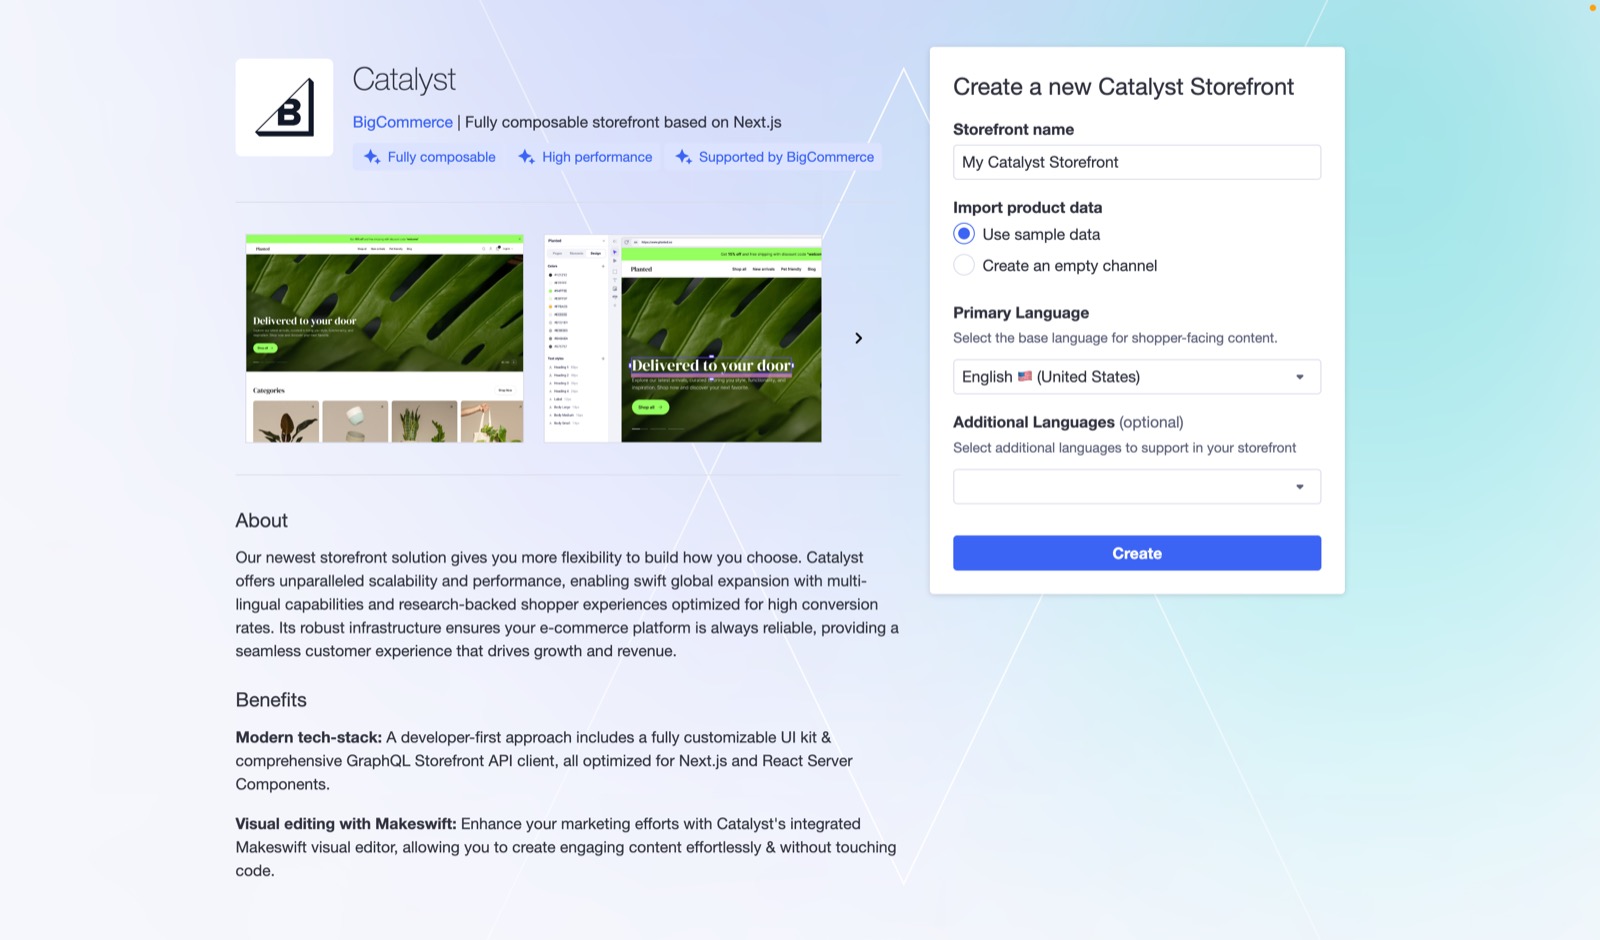
After you’ve filled in the necessary information, click Create to deploy the storefront. This process takes a few minutes.
The version of Catalyst deployed in the preview environment is determined by Git tags. See our how we use tags documentation for more details.
Viewing Your Deployed Storefront
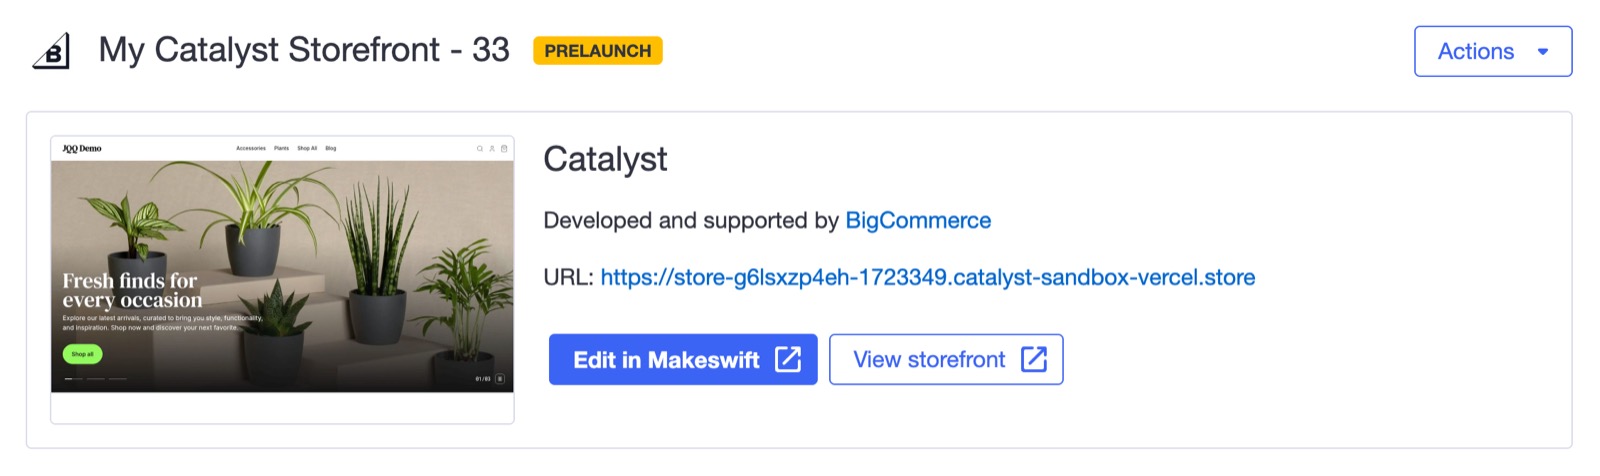
Now that your storefront has been fully deployed, you’re able to visit your live store. You can do this by clicking the View storefront button.
Keep in mind, this deployed storefront is not meant to be used in production.
Makeswift Integration
Makeswift is a composable visual page builder designed to unlock speed and creativity for marketing teams.
Editing Your Deployed Storefront in Makeswift
You can edit your storefront in Makeswift to customize the design and layout of your site. The corresponding Makeswift site comes with pre-built content including pages, custom components, theming options, and more.
To explore and start editing your site, click Edit in Makeswift.
Syncing your products to Makeswift
Syncing products to Makeswift is currently in Beta.
By default, your Makeswift site will not have any products synced from your BigCommerce store. If you’d like to be able to view your products in Makeswift, you need to ensure the following:
- Product Syncing is enabled in the BigCommerce control panel for your Catalyst channel
- Routes are enabled in your Makeswift site
Once both requirements are met, any time you add, remove, or update products in BigCommerce, they will automatically sync to your Makeswift site via webhooks.
Next Steps
After exploring your site in Makeswift, there are two primary next steps:
- Run locally to do custom development
- Deploy your site to your own hosting provider
Running locally to do custom development is not required but it does enable full customization and control over your storefront. If you’re interested in this, you can follow our Local development documentation to get started.
If you’re not interested in doing any custom development and are happy with what’s provided out of the box, you can go directly to our Deploying guide for next steps.